Switchback experiments
Switchback experiments are currently in closed Beta
Marketplaces present unique challenges when it comes to experimentation, particularly because they depend on complex interactions between multiple groups. Switchback tests solve this problem by randomizing entire environments (e.g., regions and time periods) instead of focusing on groups of users. For example, in a ride-sharing app, you might alternate between pricing algorithms (new algorithm as treatment, old algorithm as control) during a specific time of day across different cities. This way, all drivers and riders experience the same conditions for each phase, minimizing interference and isolating the effects of price changes cleanly. Switchback tests can simulate real-world conditions without fracturing the ecosystem or leaving groups with noticeably worse experiences.
Configure Switchback assignments
Before creating any experiments, the data for which environment (i.e. market or region) is being randomized and when each variation is exposed to these environments needs to be configured. This is in addition to user assignments, which tell Eppo when individual users were exposed to a variation. See here for more information on setting up AssignmentSQL.
Create the environment entity
First we need the environment entity defined. This is the environment that is being randomized over the course of the experiment, such as market or region.
Navigate to Definitions, click on "Manage Entities" and "Create Entities" to add the new entity you'll use.
Switchback data model
| Description | Examples | |
|---|---|---|
| Randomization unit | A unique identifier for the environment of an experiment. | market_id, region_id, city |
| Timestamp start | The time at which a given variant was enabled for the environment. | time_start |
| Timestamp end | The time at which a given variant was disabled for the environment. | time_end |
| Experiment key | A unique identifier for the experiment that this assignment corresponds to. | experiment_id, flag_name, campaign_group |
| Variant | A unique identifier for the experience served. | variant_name, flag_value, campaign_subgroup |
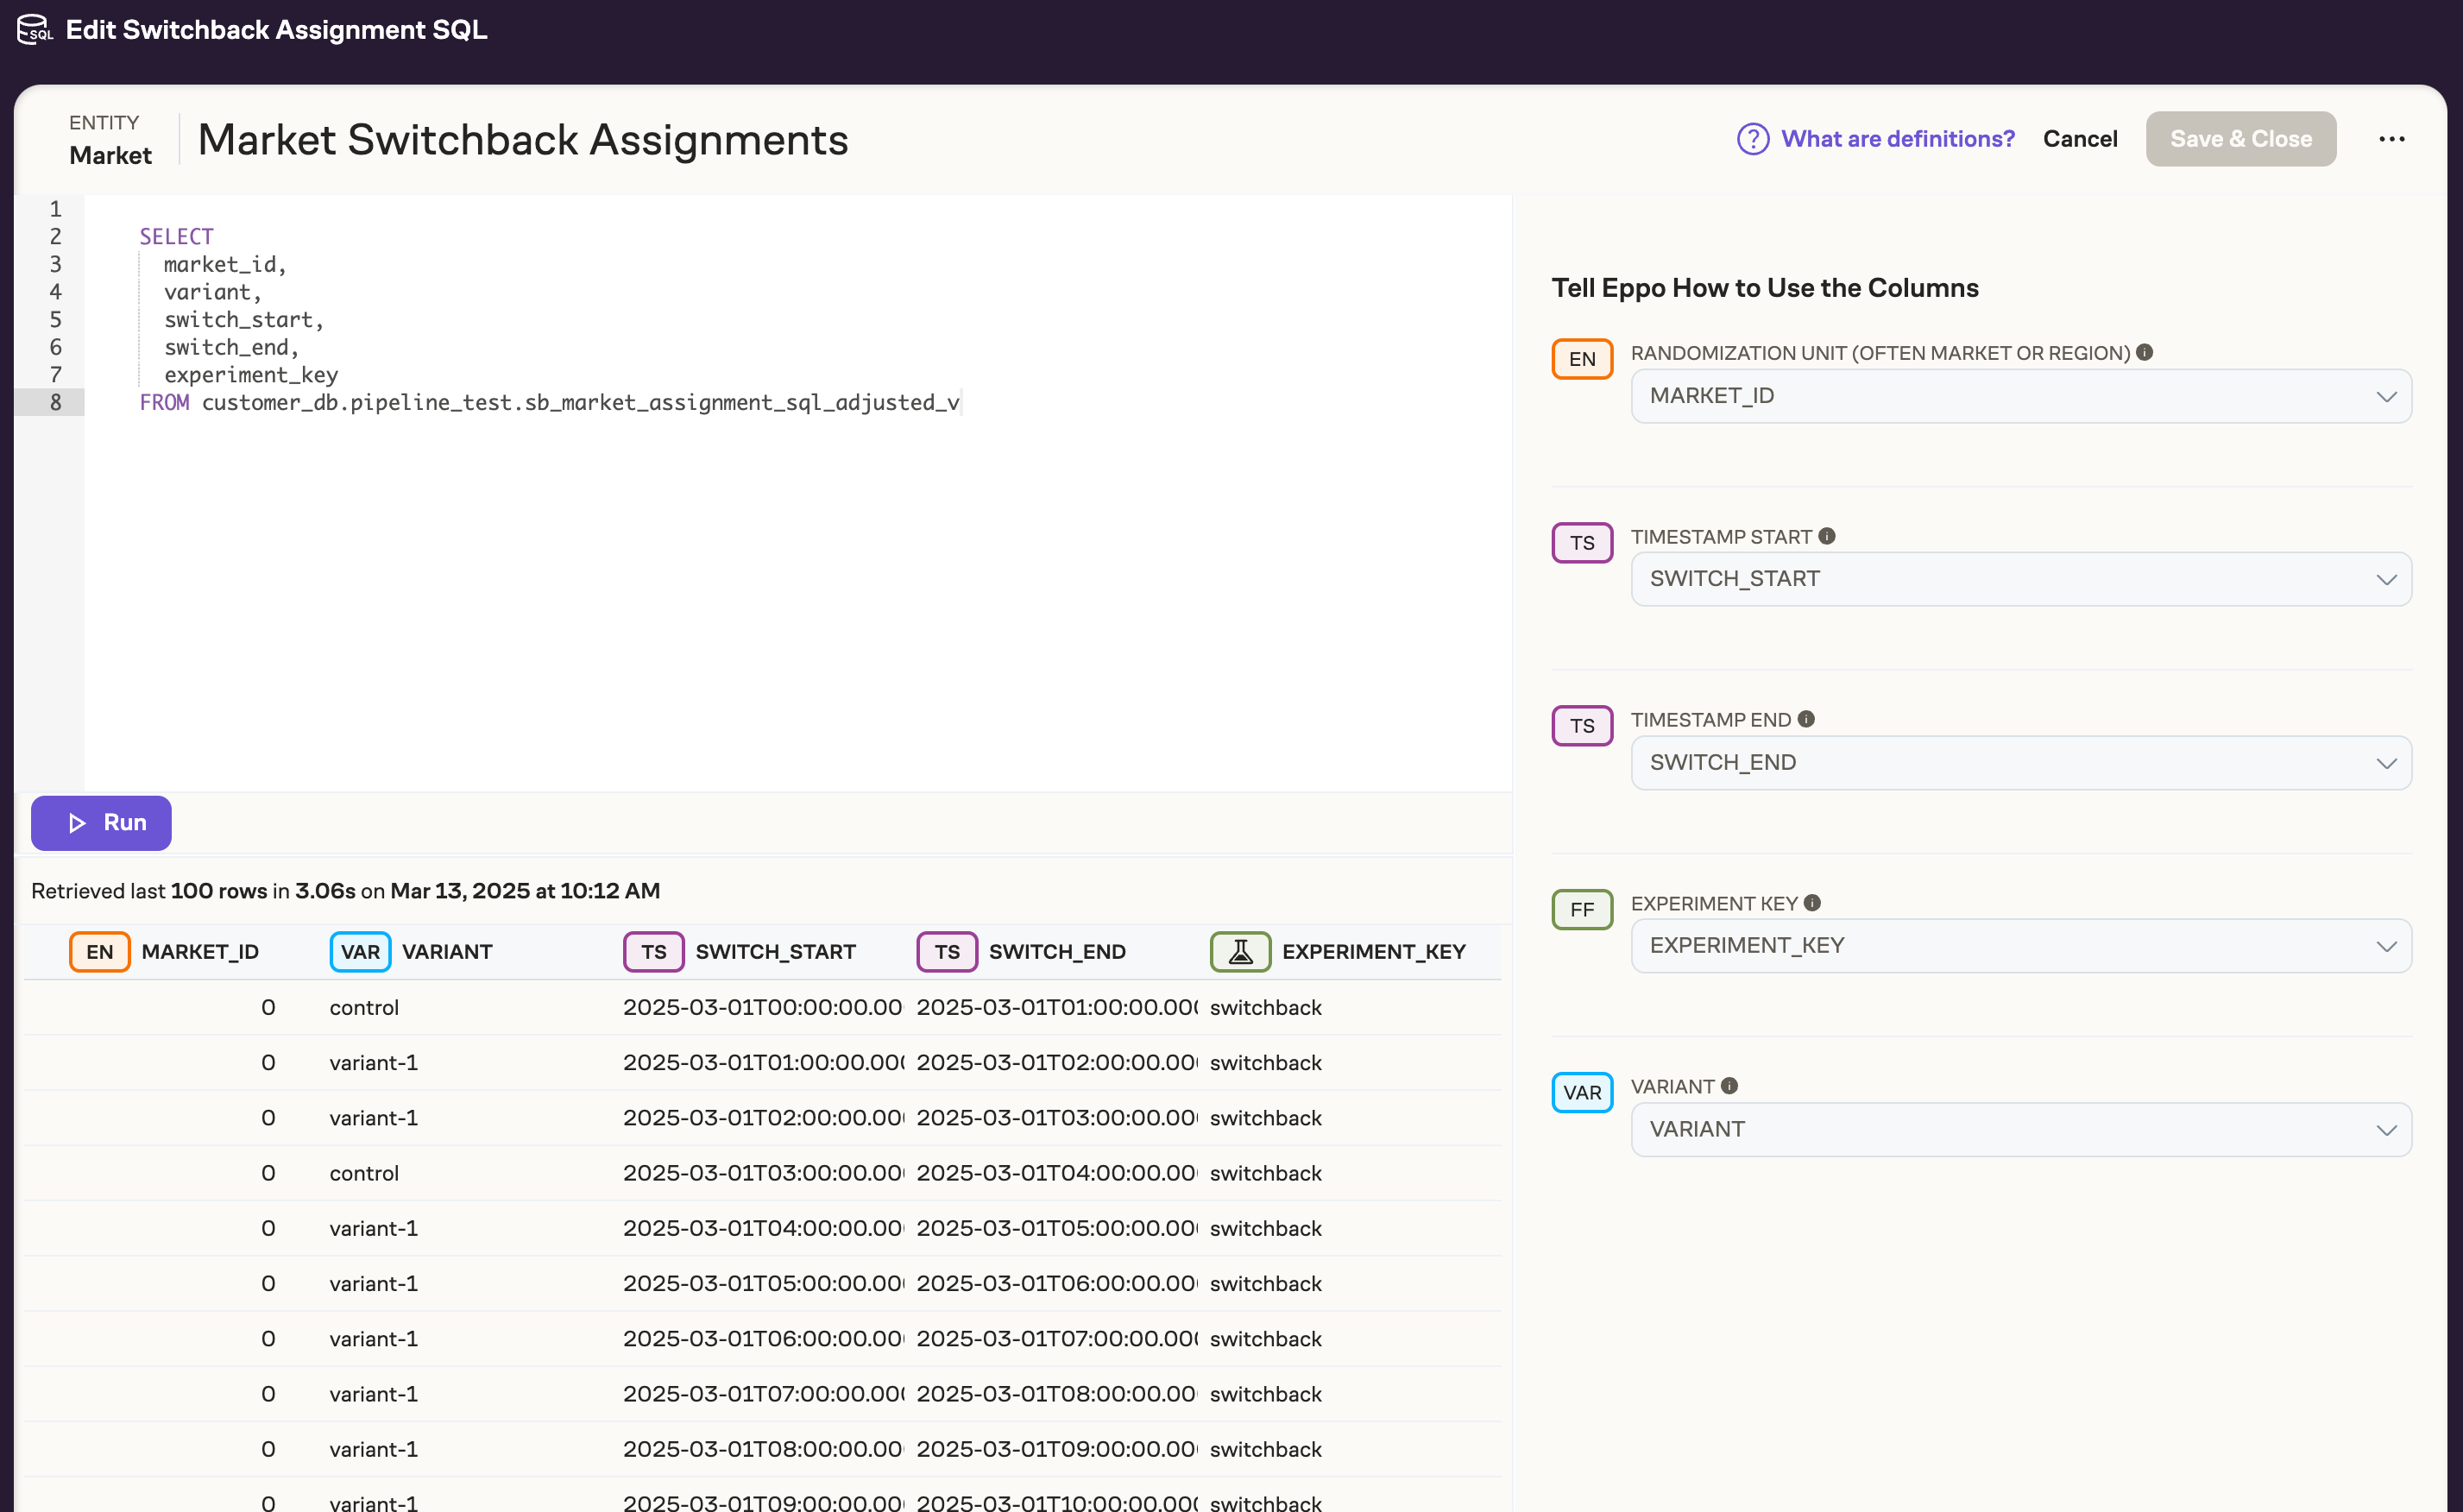
Creating a Switchback Assignment SQL
We'll now provide a step-by-step walkthrough for creating Switchback Assignment SQL Definitions in Eppo's UI.
- Navigate to Definitions, click the "Create definition SQL" button, and select Switchback Assignment SQL.
- Select the subject of the Switchback Assignment. This is the unit the Switchback is randomizing over, such as market or region.
- Write SQL in the SQL editor that returns assignment data from your data warehouse and click Run.
- After clicking Run, you'll see some sample data. Annotate these columns into Eppo's data model using the right panel:
- Once you've finished annotating columns, click Save & Close
Updates to FactSQL
FactSQL that corresponds to metrics you want to monitor also need to be updated with the Switchback entity. On the FactSQL page, click edit and add a new subentity that corresponds to the Switchback entity.
You do not need to make any changes to metrics.
Create switchback analysis
Switchback analysis shows you the impact of your test on key metrics while giving you confidence that your test is healthy.
To create a Switchback analysis, navigate to Analysis, click on the "Create Analysis" menu and select "Switchback analysis". Give your test a name and assign a team to get started.
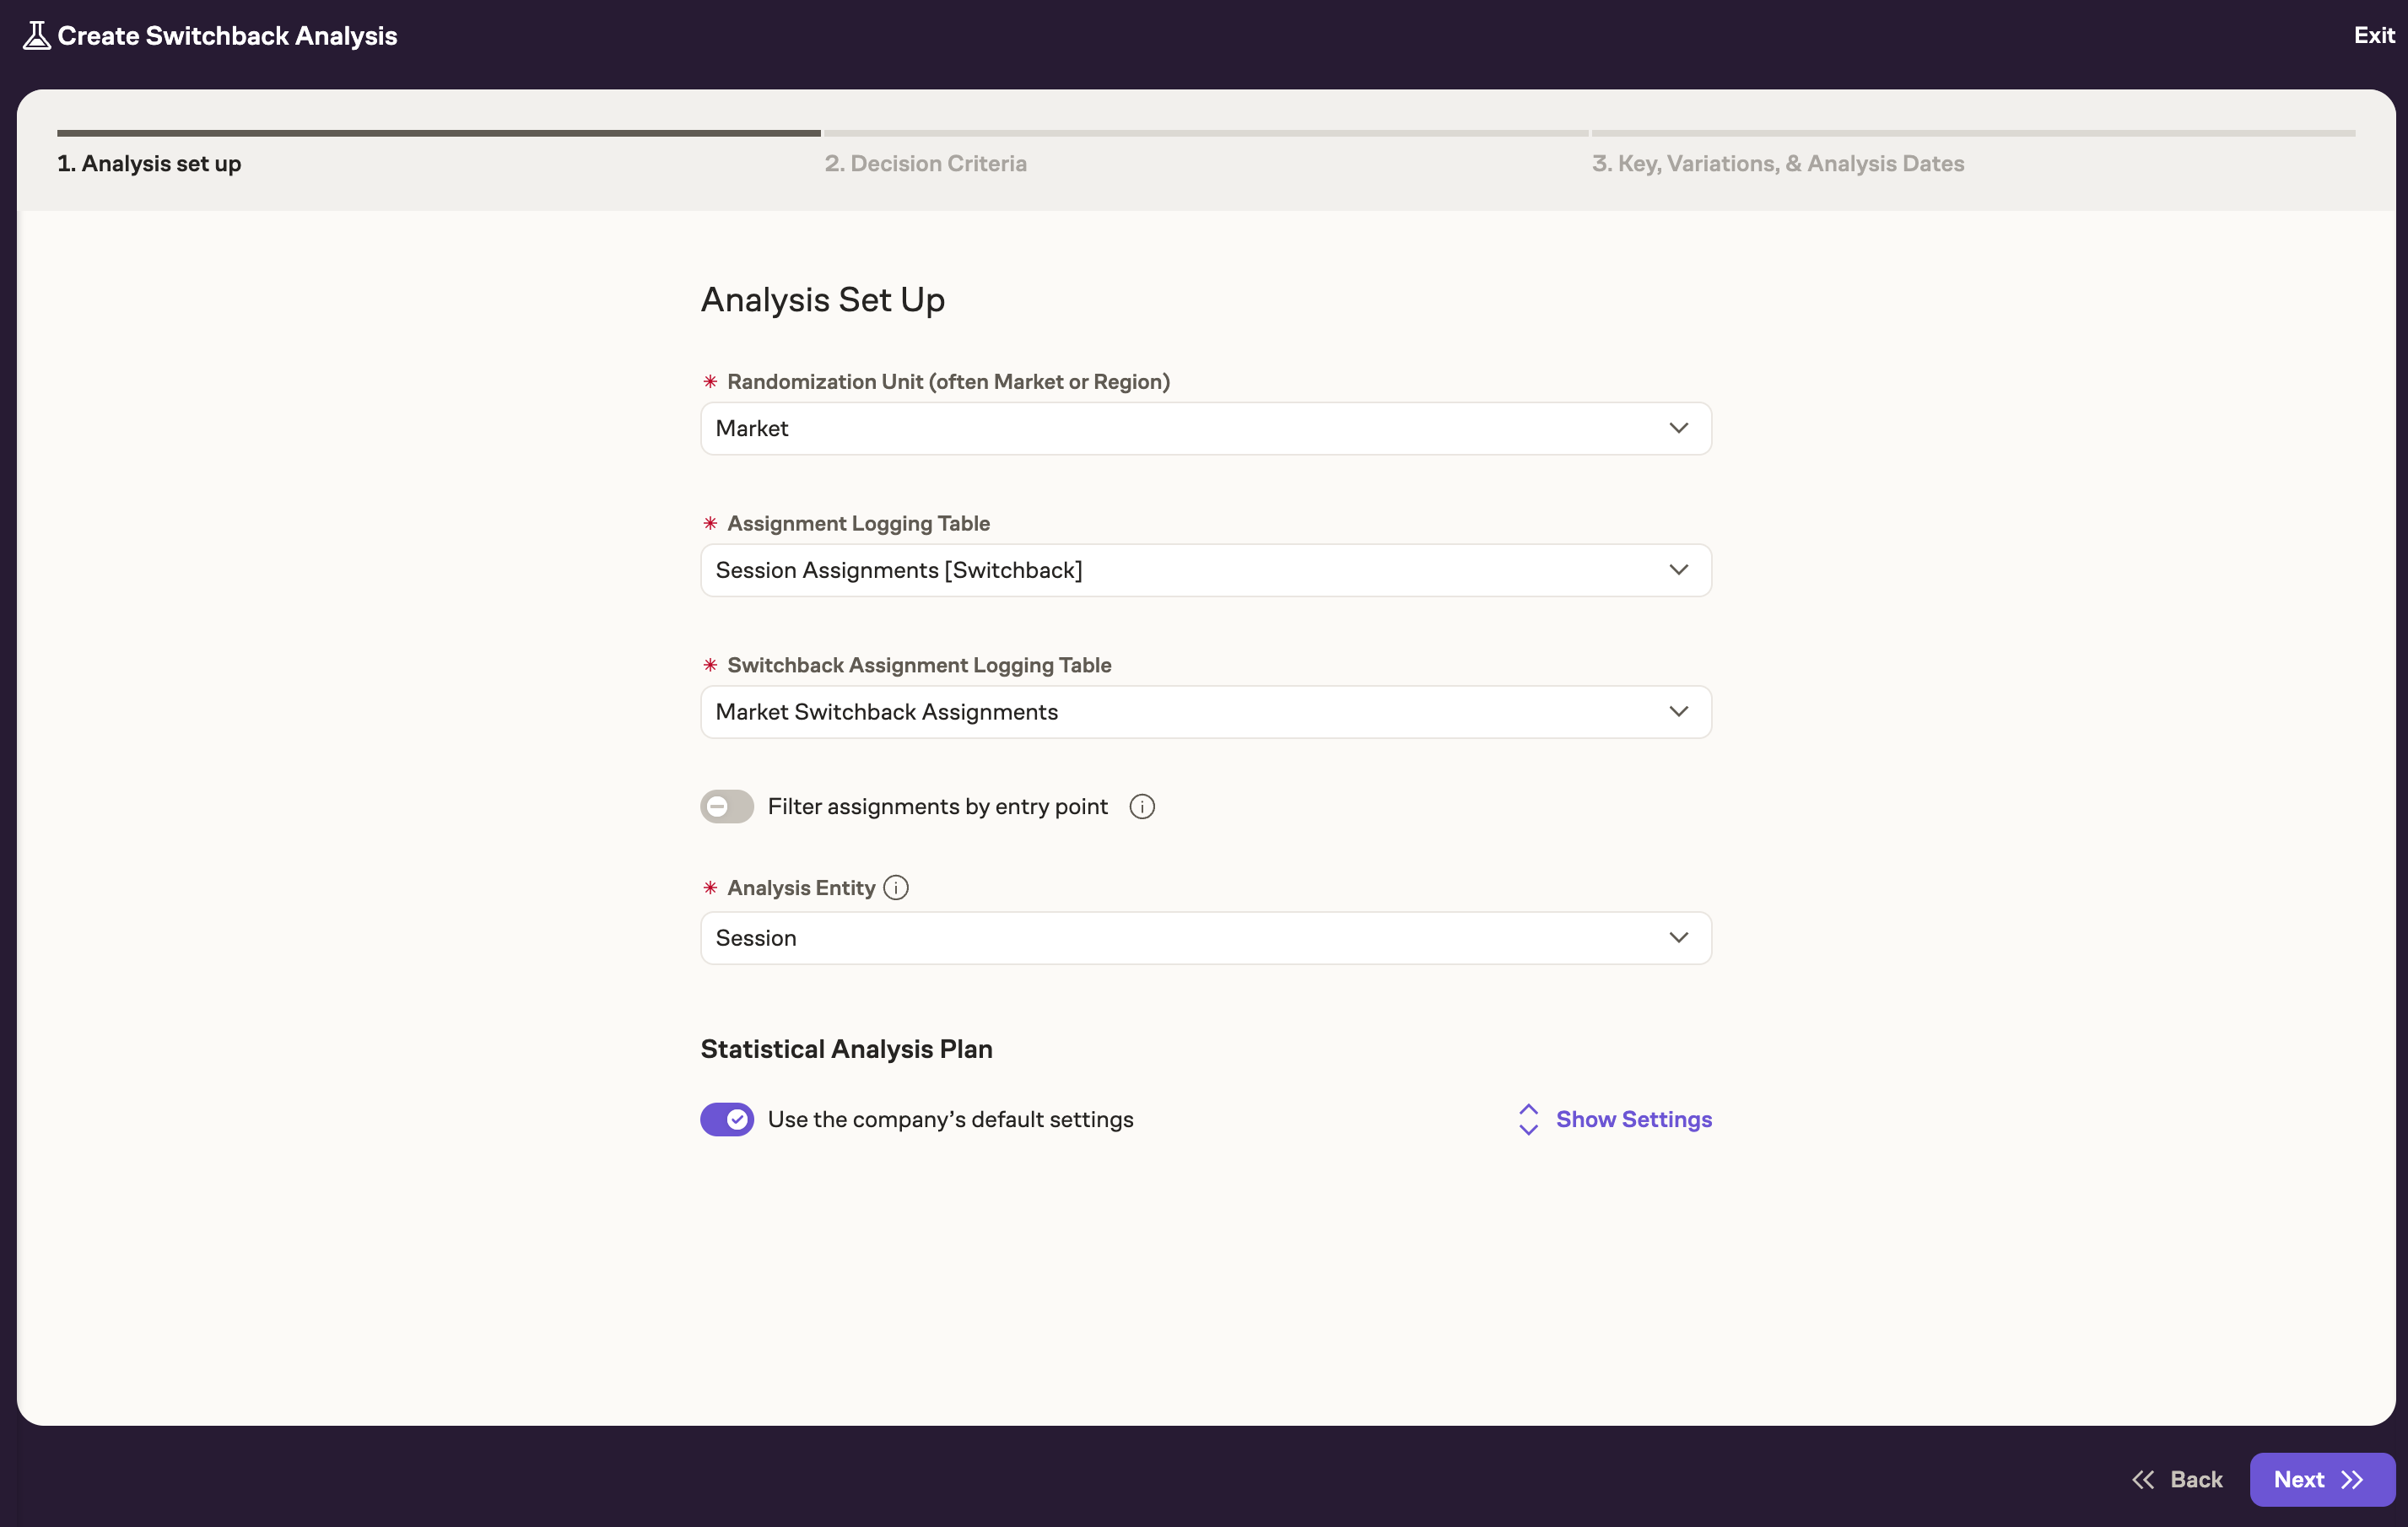
Analysis set up
Switchback have some key differences from setting up an A/B analysis. To configure the analysis set up:
- Environment setup
- Choose a Randomization Unit. This is the environment that was randomized in the experiment, such as market or region.
- Choose an Switchback Logging Table. This is the Switchbacks Assignment Table that was described above.
- Subject setup
- Choose an Analysis Entity. This is the subject that you want to analyze the experiment on, such as users.
- Choose an Assignment Logging Table. This is the table that has information on when subjects were exposed to each variant over the course of the test.
- (Optional) Filter assignment by entry point - enable this is subject are exposed to the experiment at a different point from when they are randomized.
- Statistical Analysis Plan
- Choose to use the default analysis plan or not. See here for more information on the Statistical Analysis Plan.
Decision criteria
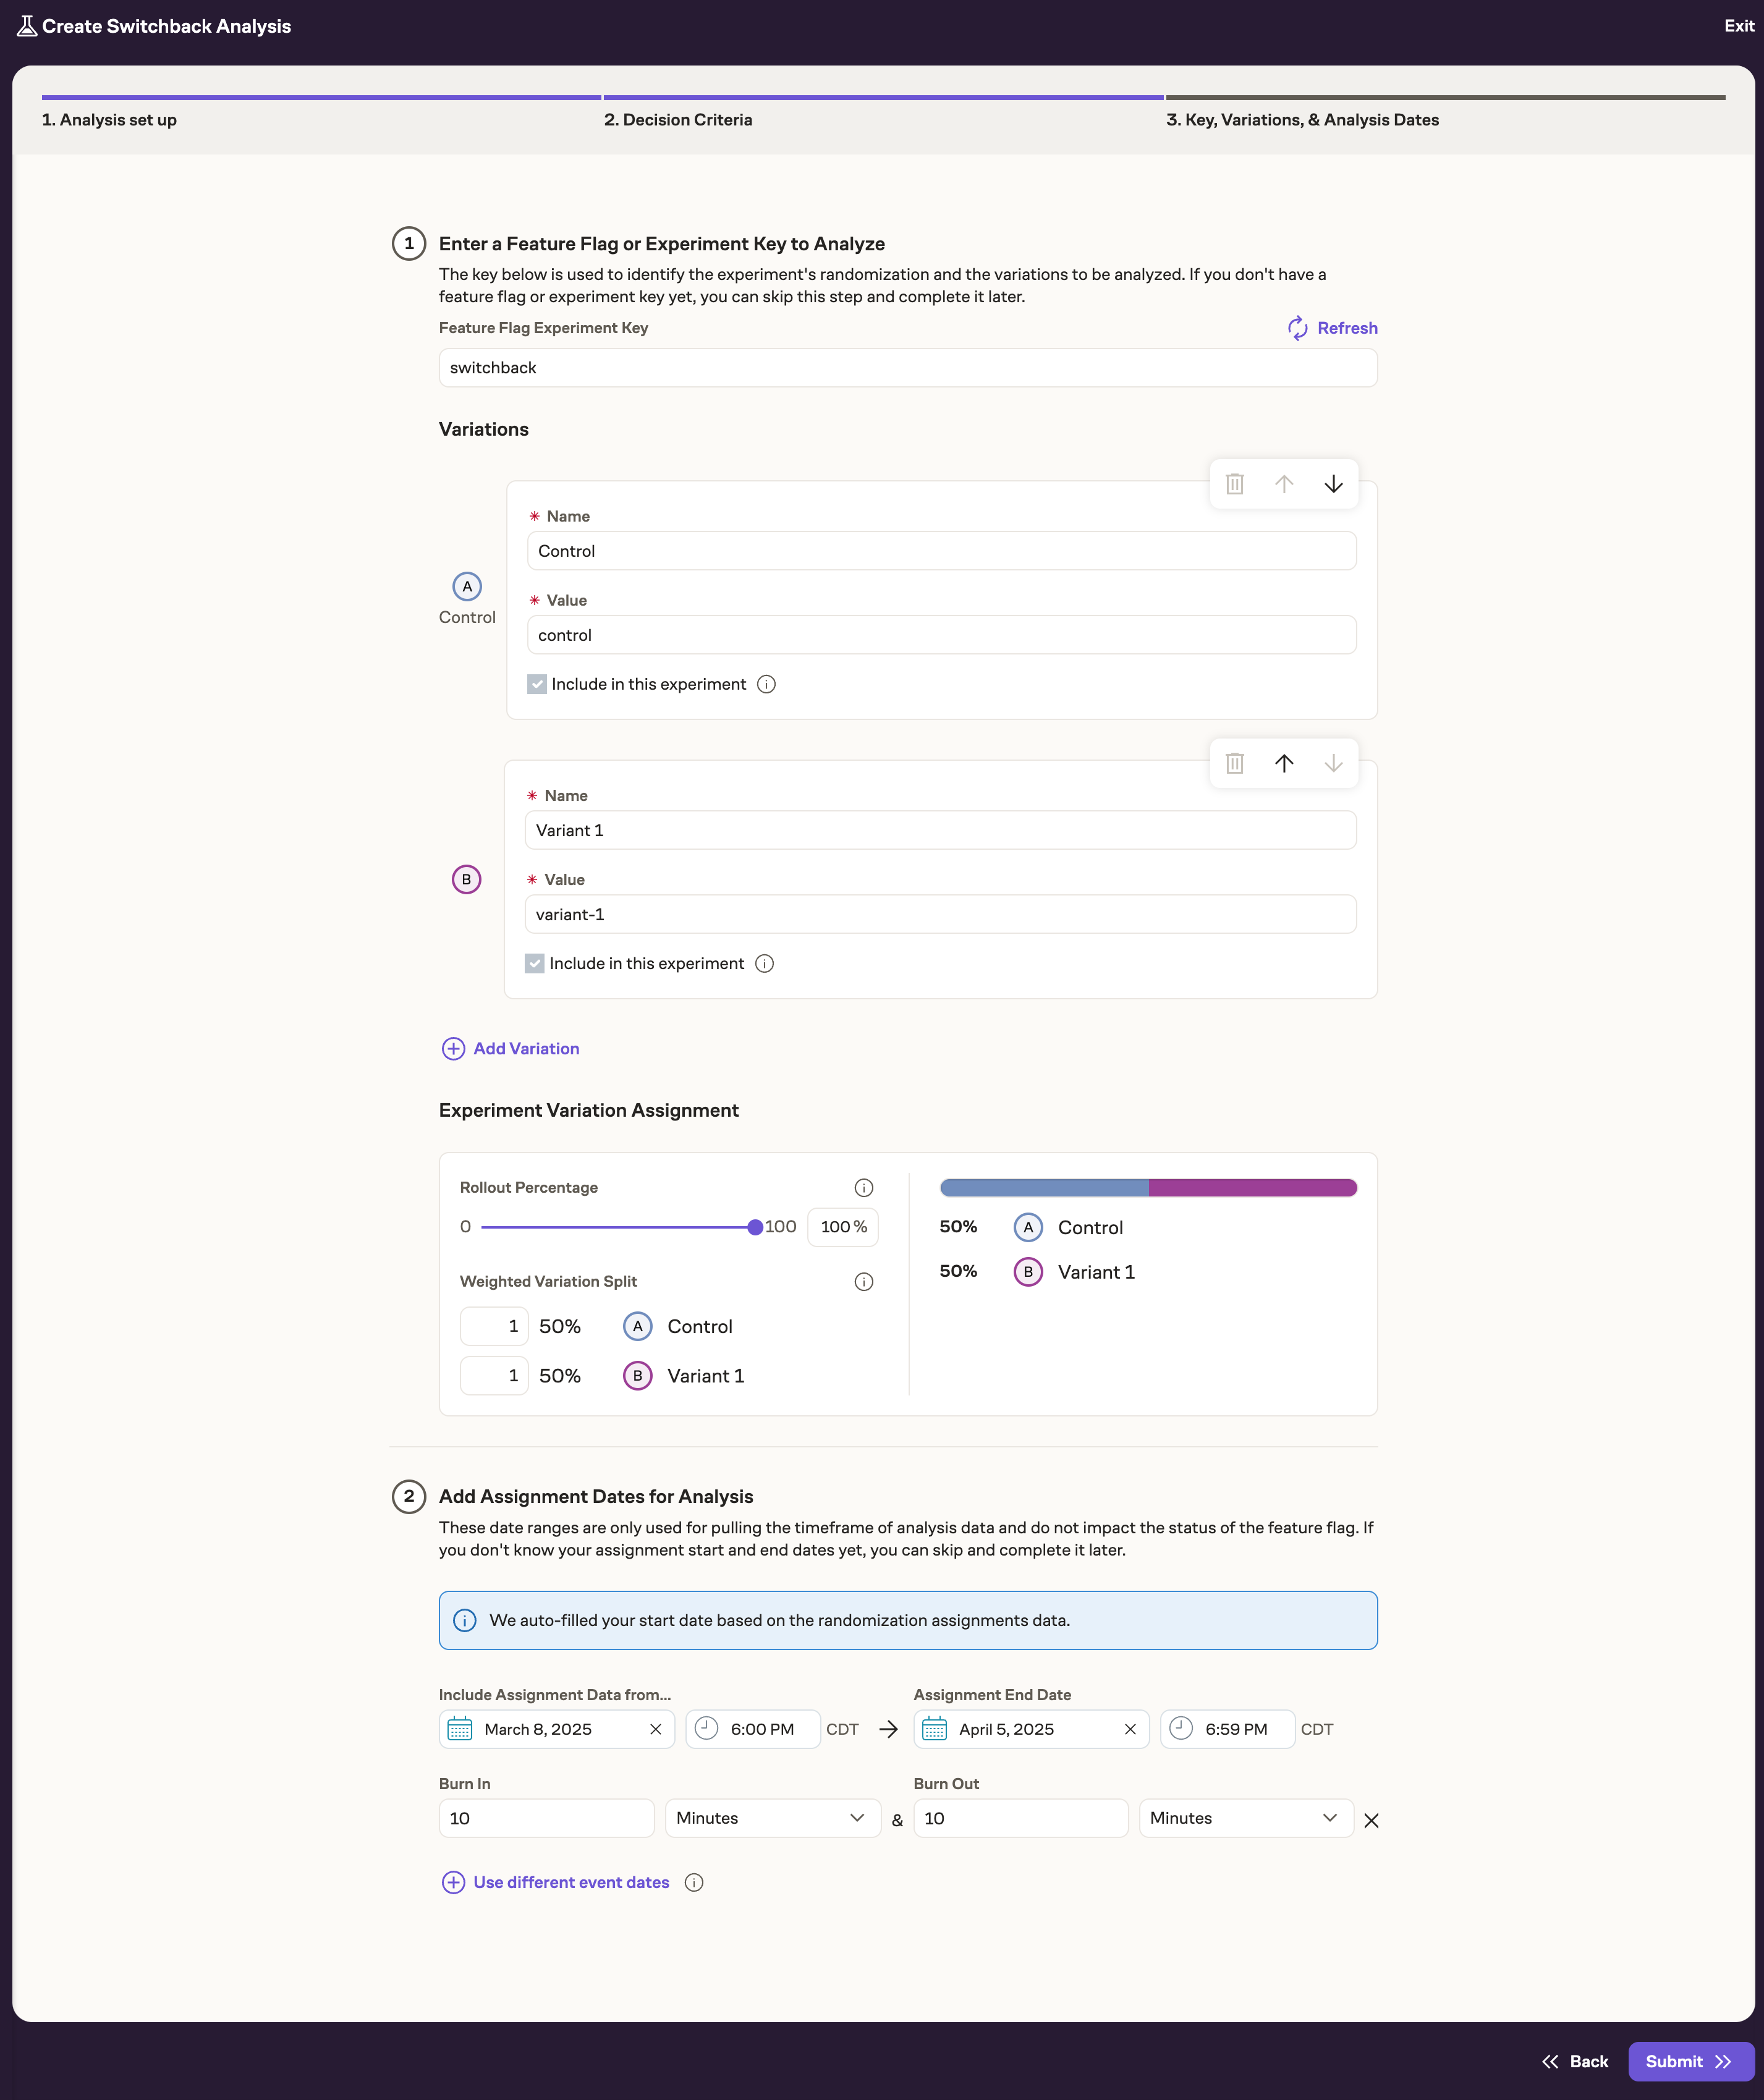
The decision criteria sets the key metrics to be measured in the experiment and aligns the team around a ship decision based on the measurement of those metrics. See Decision Criteria for more information on configuring this part of the analysis. Of note for Switchbacks only, you can optionally add burn in and burn out periods. A burn period refers to a designated time interval at the start of a testing cycle where assignment data is intentionally disregarded. This period allows the system to stabilize after switching between test conditions, such as transitioning from control to treatment in a switchback test. For example, when alternating pricing algorithms in a ride-sharing app, a burn period gives the marketplace time to adjust rider demand and driver availability before meaningful data is collected.
Key, Variations, & Analysis dates
This is where the experiment key is chosen, the variations are defined, and the dates for the experiment are configured.
Of note for Switchbacks only, you can optionally add burn in and burn out periods. A burn period refers to a designated time interval at the start of a testing cycle where data is intentionally disregarded. This period allows the system to stabilize after switching between test conditions, such as transitioning from control to treatment in a switchback test. For example, when alternating pricing structures in a ride-sharing app, a burn period gives the marketplace time to adjust rider demand and driver availability before meaningful data is collected.
You can choose any amount of time for the burn in and burn out periods. You can also choose to just have a burn in and no burn out, or vice versa.
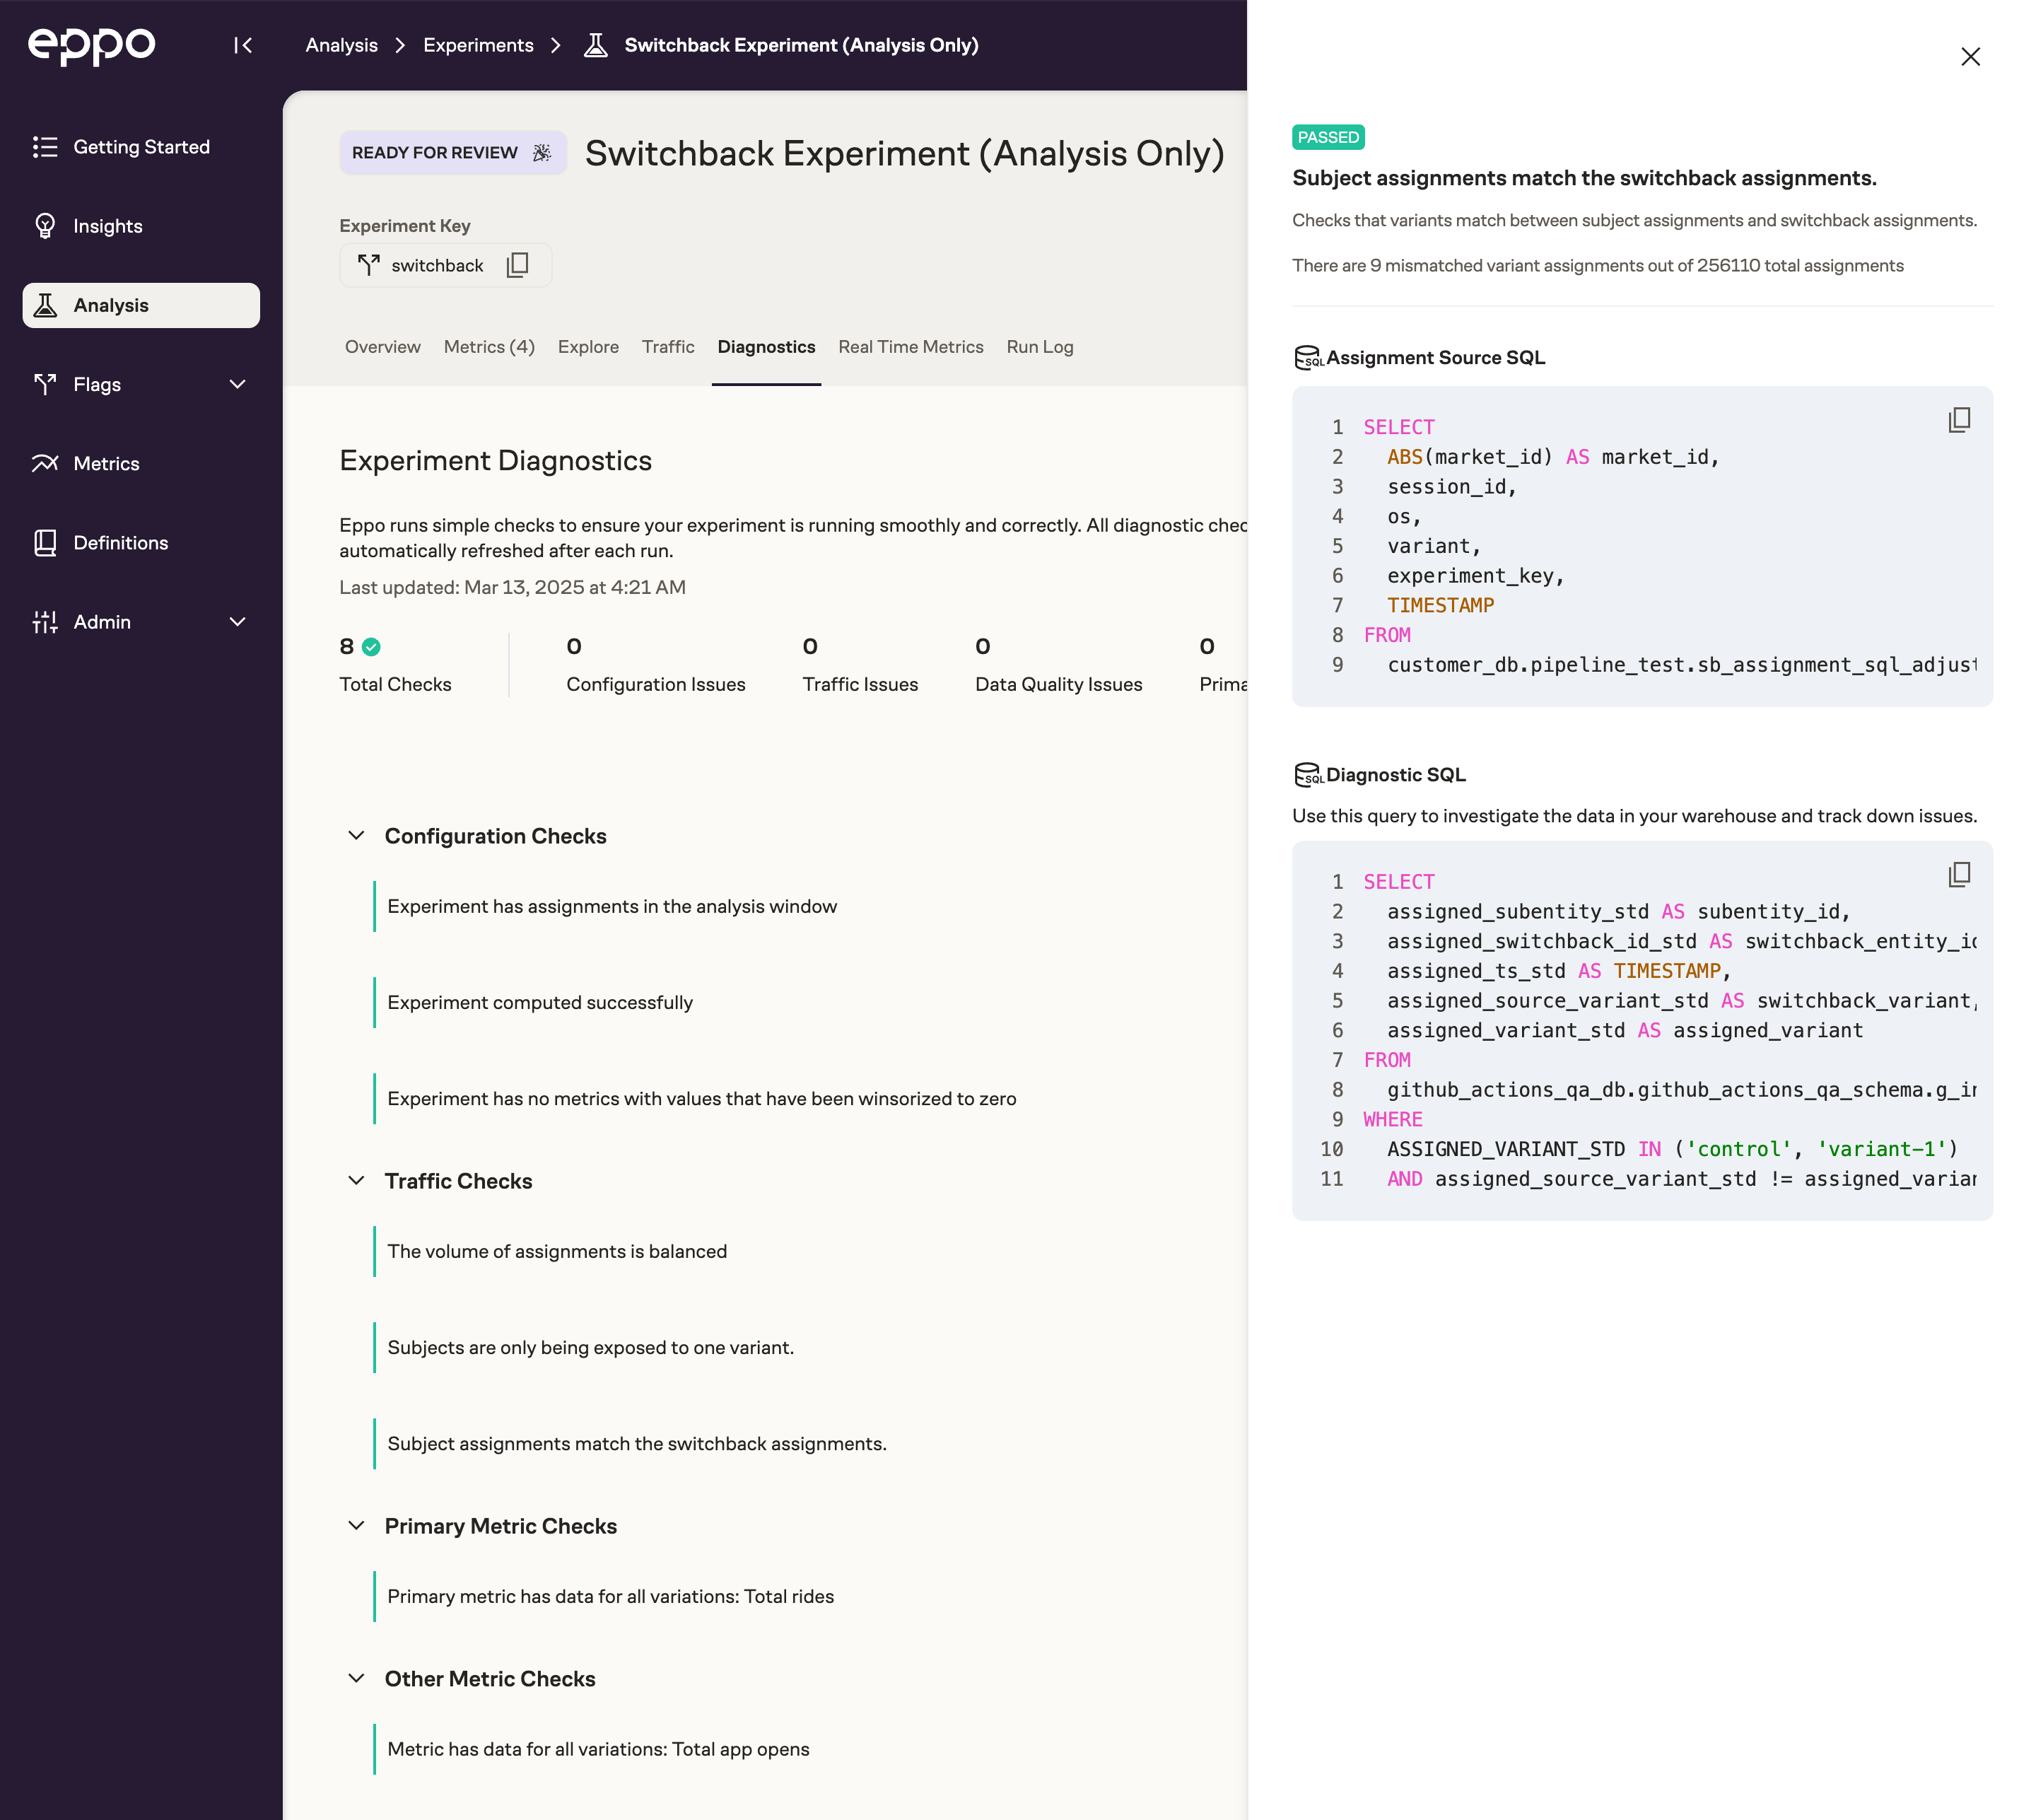
Switchback diagnostics
In addition to Eppo's regular suite of diagnostics, we offer a special Switchback diagnostic that checks that the subject assignments match the switchback assignment. This means we can properly join the different assignment tables such that there is not a misconfiguration. We also provide the SQL we use for this check so that you can check for yourself.
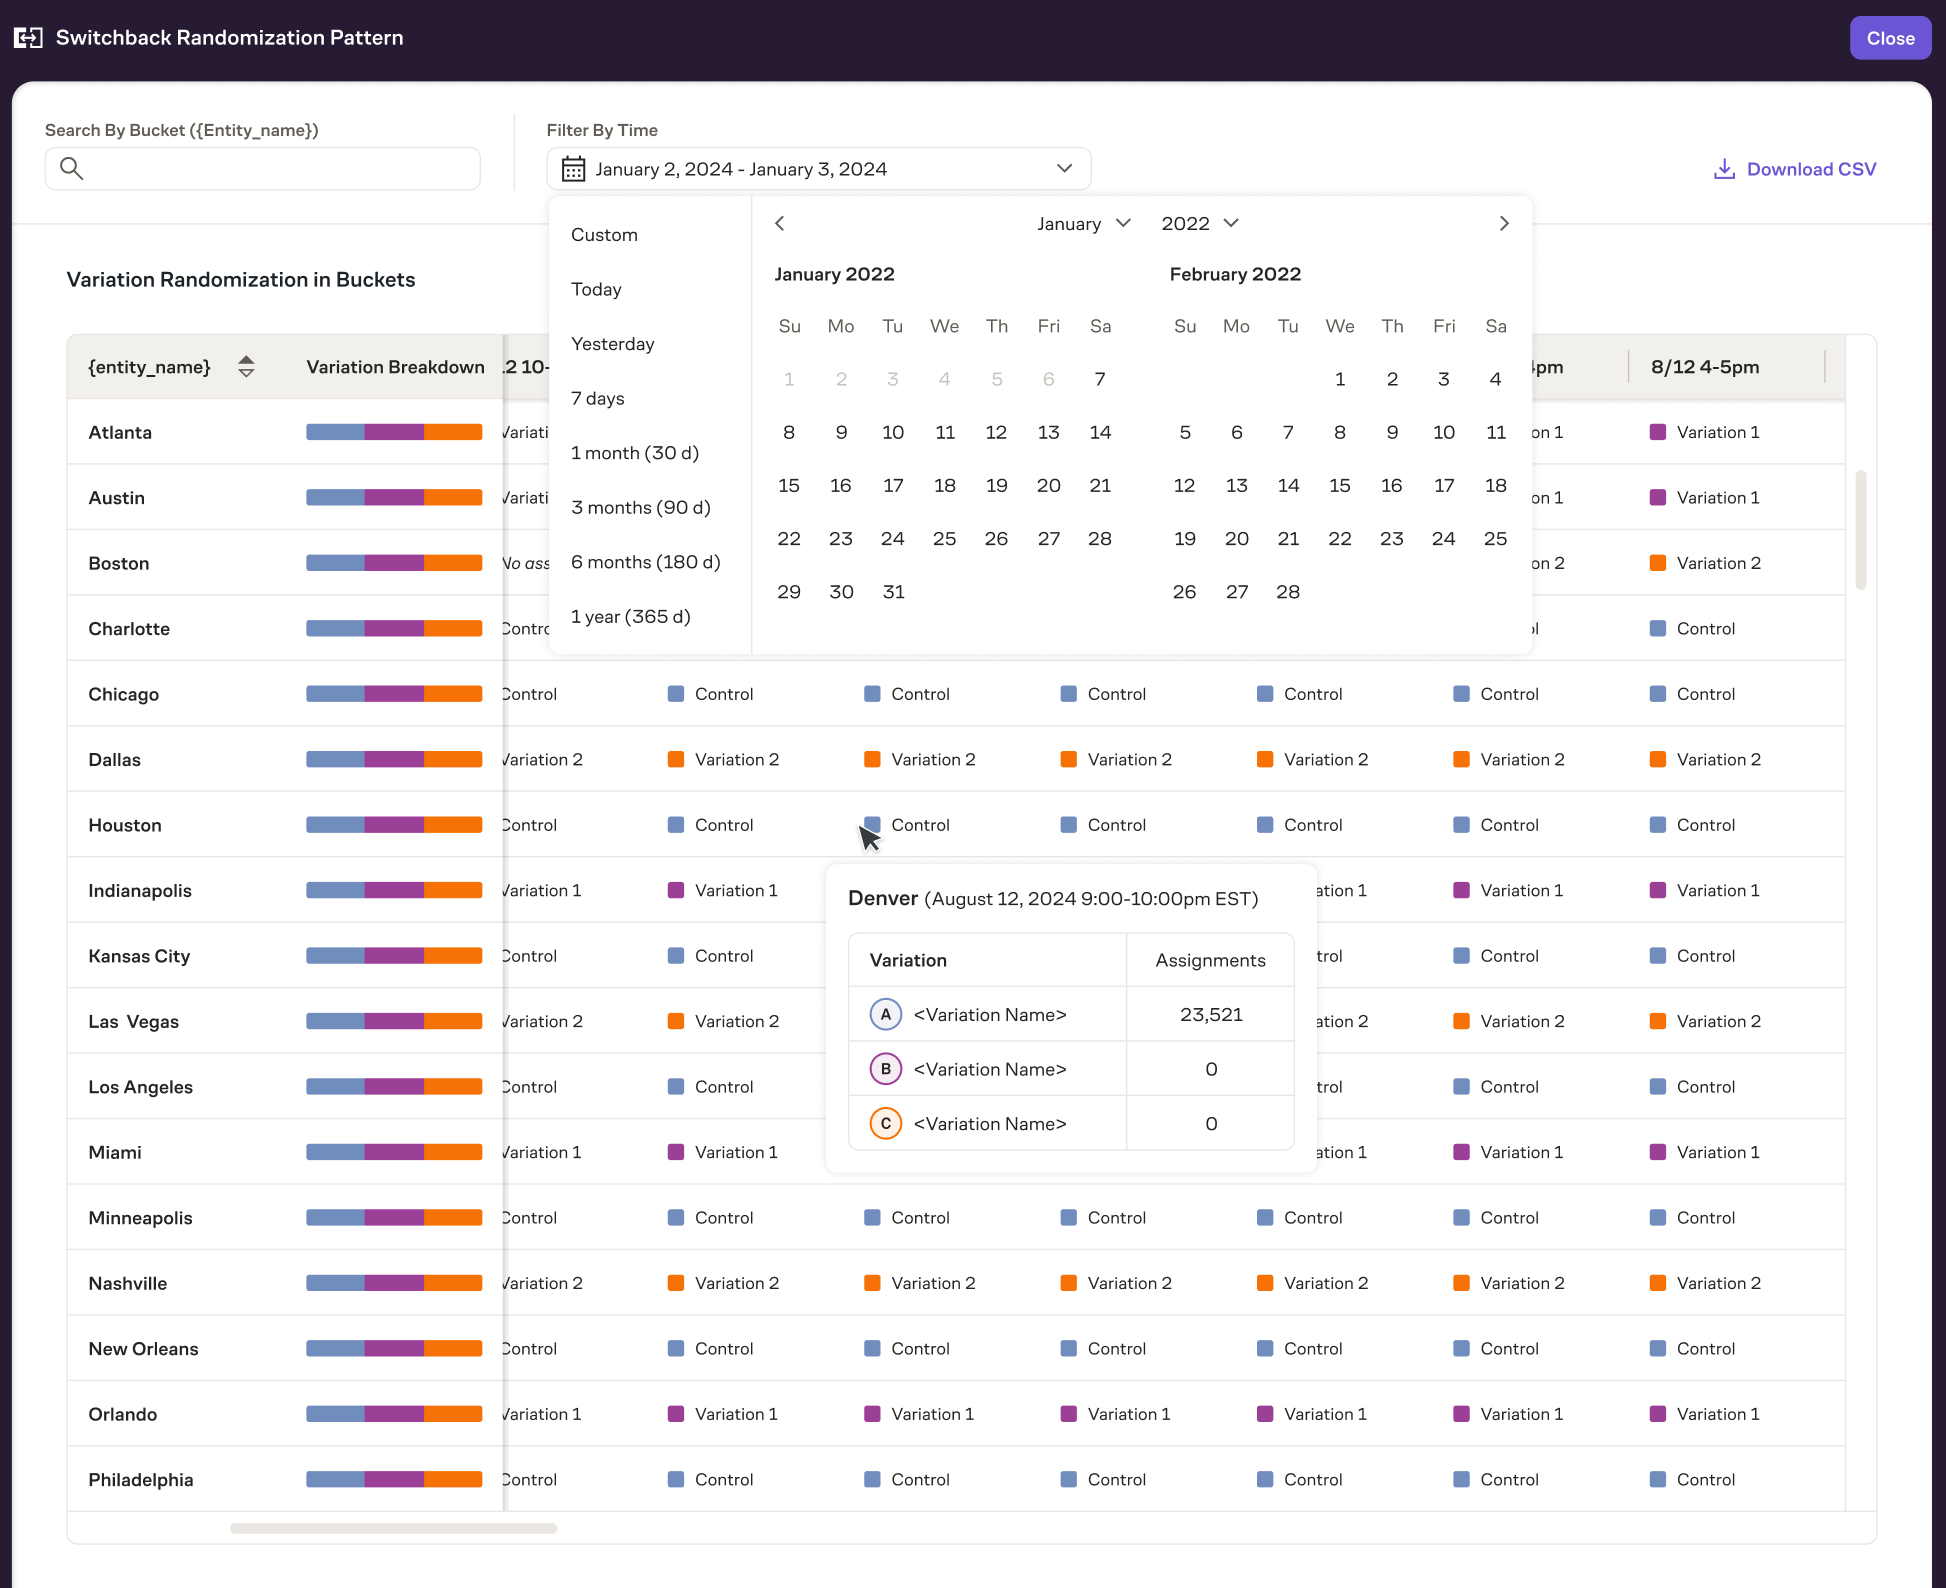
Switchback traffic
For Switchback tests, we also provide a more comprehensive view of your traffic. This is necessary to understand and audit how the different environments were randomized over time.
Navigate to the Traffic tab in an experiment and you'll see a table for the Switchback Randomization Pattern. This provides information at a high level on which environments saw which variation at which time.
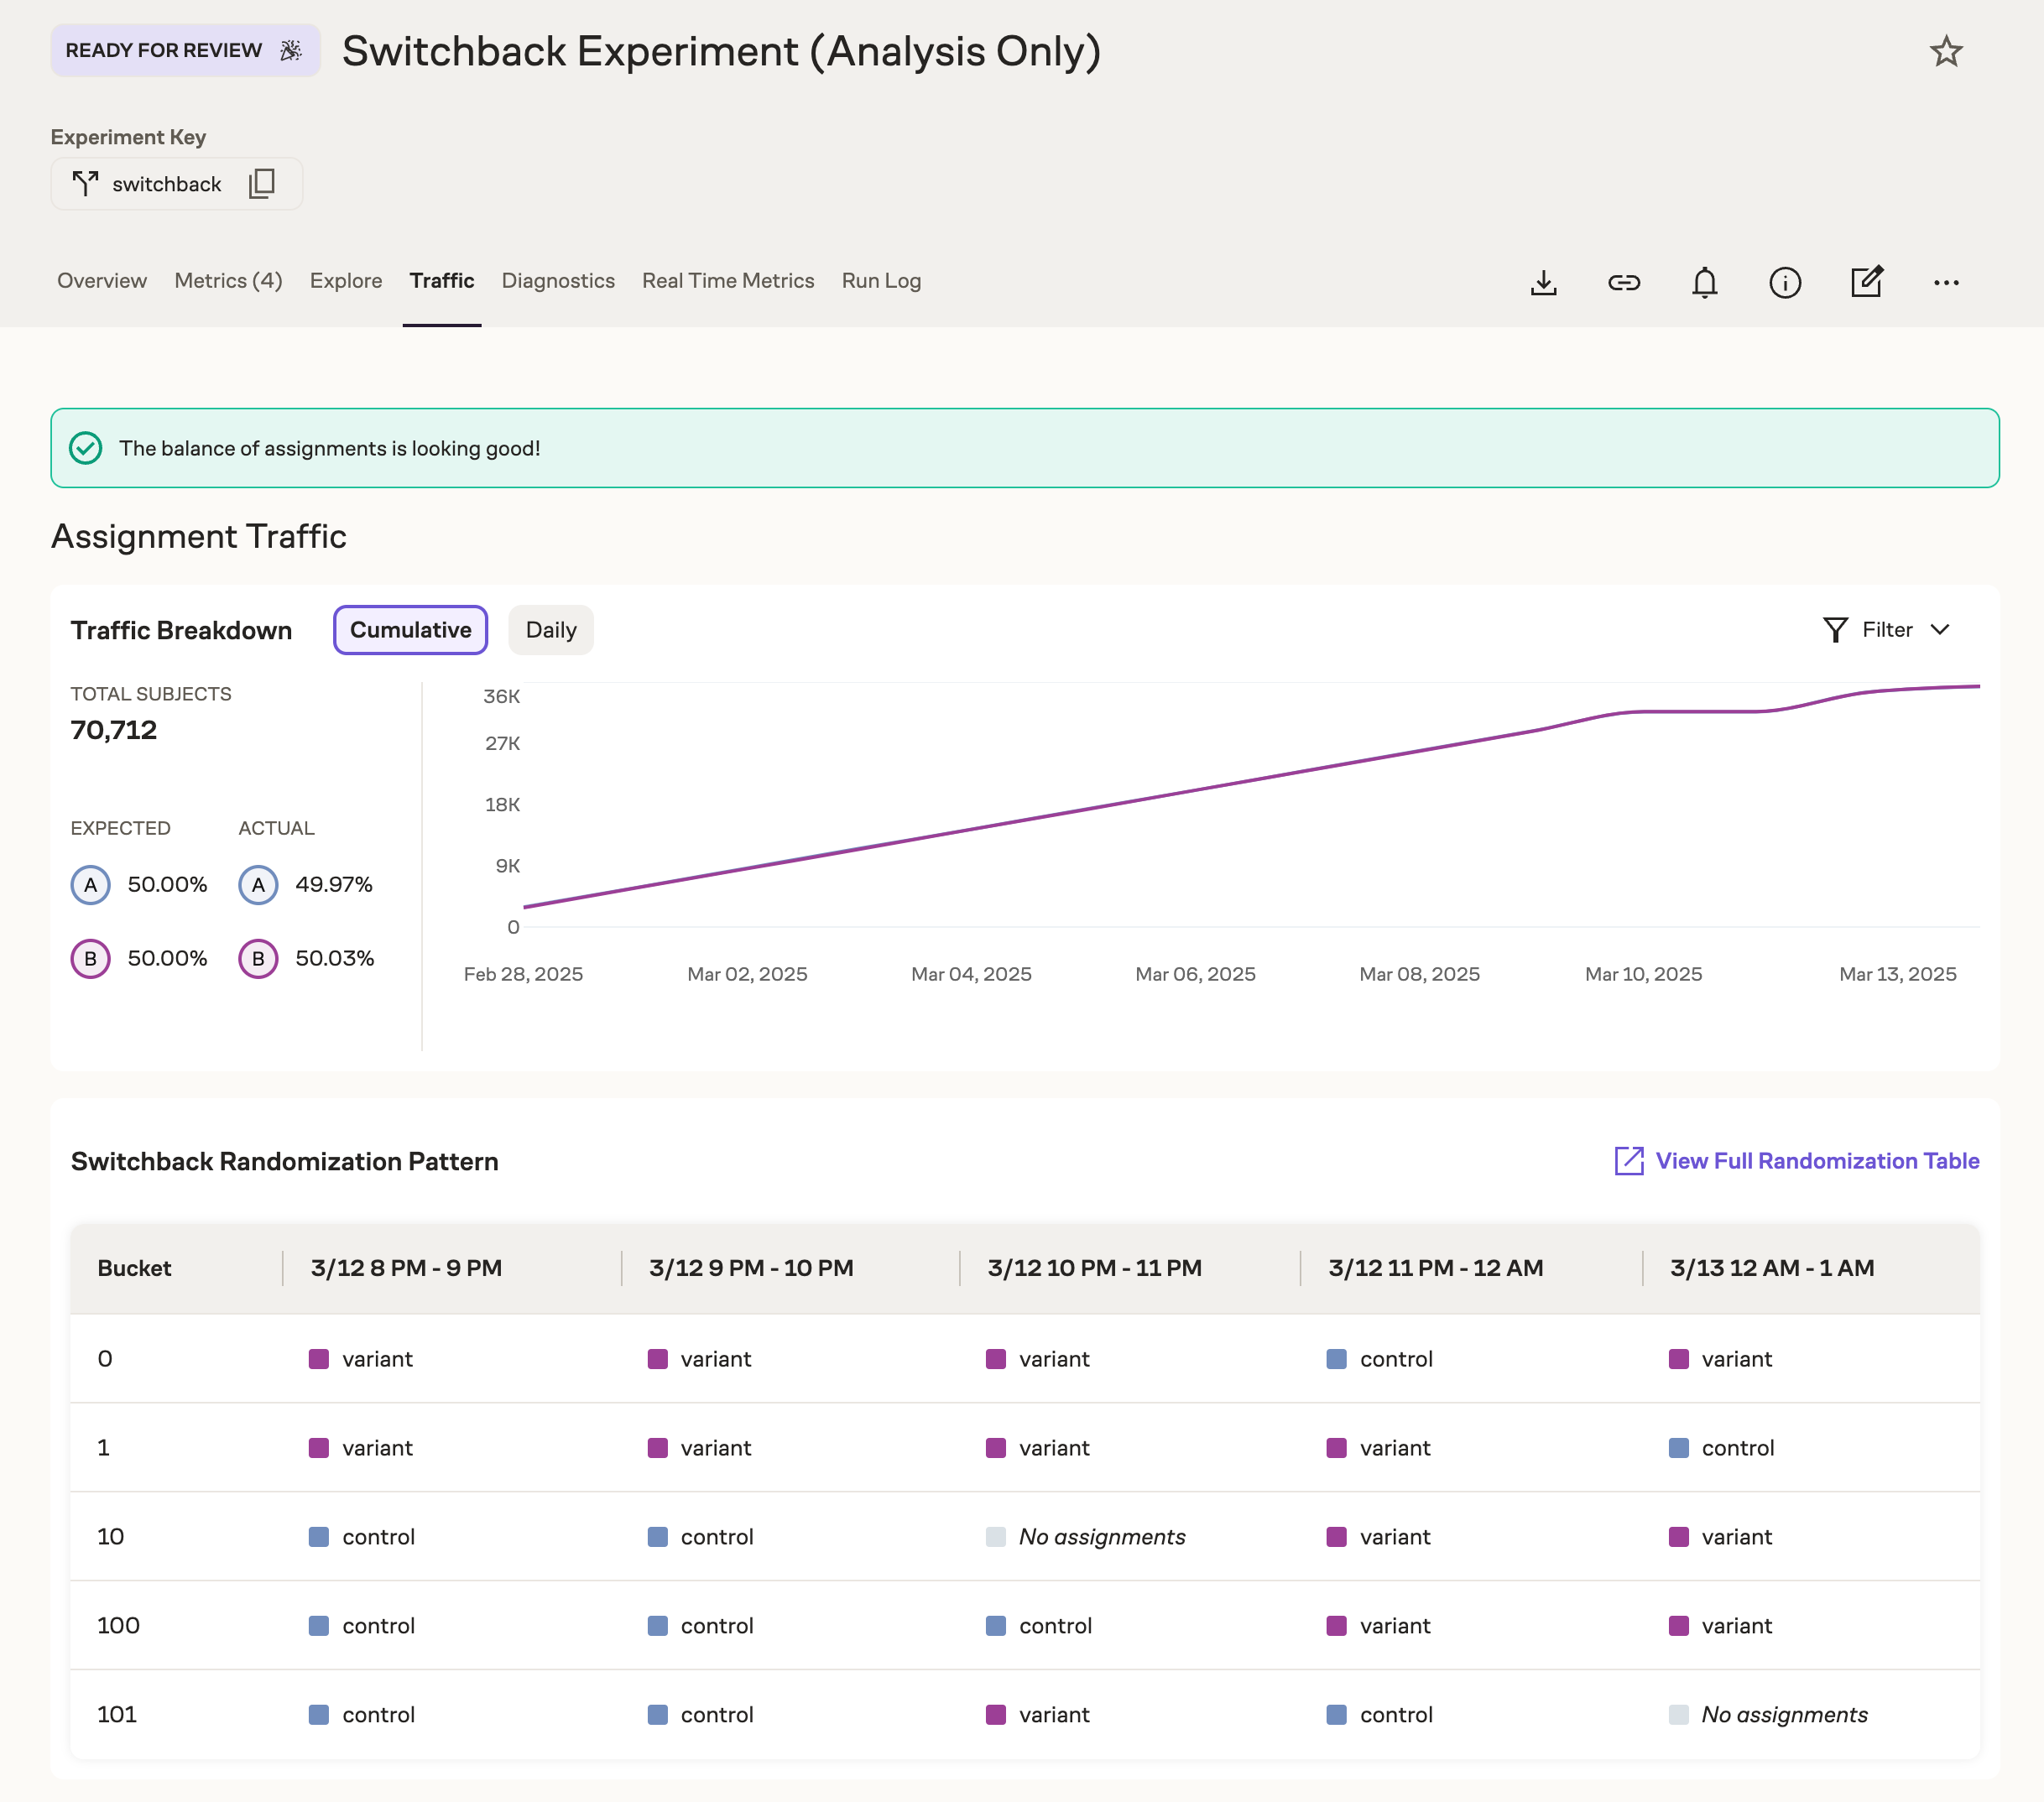
To dive deeper, click "View Full Randomization Table". This provides a comprehensive view of all environments and time periods. There are also filters available on both environment and time such that you can easily find and audit the traffic as you want.