Integrating with Sendgrid
Overview
In this guide we walk through how to experiment on email campaigns sent through Sendgrid. Since Sendgrid is a flexible email provider that offers a few different ways to send out emails, this walkthrough covers how to analyze results from a Single Send in Eppo, and how to use feature flags to test out content in Dynamic Templates with Sendgrid’s API.
Single Sends in Sendgrid are great for sending one time messages to users such as a promotional offer, a newsletter, or an announcement. Single Sends can be created in either the design or code editor in Sendgrid. Dynamic Templates sent with Sendgrid’s Mail Send API are built for sending transactional emails such as receipts, order confirmations, or drip campaigns for onboarding users.
Single Sends
For setting up an A/B test as a Single Send, we recommend using the pre-built A/B testing feature Sendgrid has in their platform along side Eppo; Sendgrid’s tool makes it incredibly easy to set up a test using their visual editor directly in the platform to make changes to content or subjects lines.
Creating the content for variations of an email in Sendgrid is easy, however you will be limited to only measuring events like open rate, click through rate, and unsubscribes. Eppo can help you measure the impact of an email campaign against data warehouse metrics such as revenue, app activations, or retention.
Analyzing results in Eppo
To use Eppo to analyze the results an A/B test of Single Send set up in Sendgrid you need the following:
- An Assignment SQL set up in Eppo that has the Sendgrid assignment data in it.
- A webhook set up in Sendgrid that sends events to a source that eventually ETL or send events to your data warehouse.
Once you have this, you can set up an experiment analysis in Eppo to measure the impact of a Sendgrid experiment against your data warehouse metrics. The step-by-step process is outlined below.
1. Set up your data warehouse table for Sendgrid data to be used in Eppo.
The minimum data required is:
emailused as the id for the entity or to stitch to a user idtimestampused as the timestamp for an experiment assignment or when a Sendgrid event happenedsinglesend_nameused as the experiment keytemplate_idused as the variation keyeventused to generate Assignments and Facts in Eppo
There may be additional data you would like to include from Sendgrid, please refer to their documentation about their webhook events.
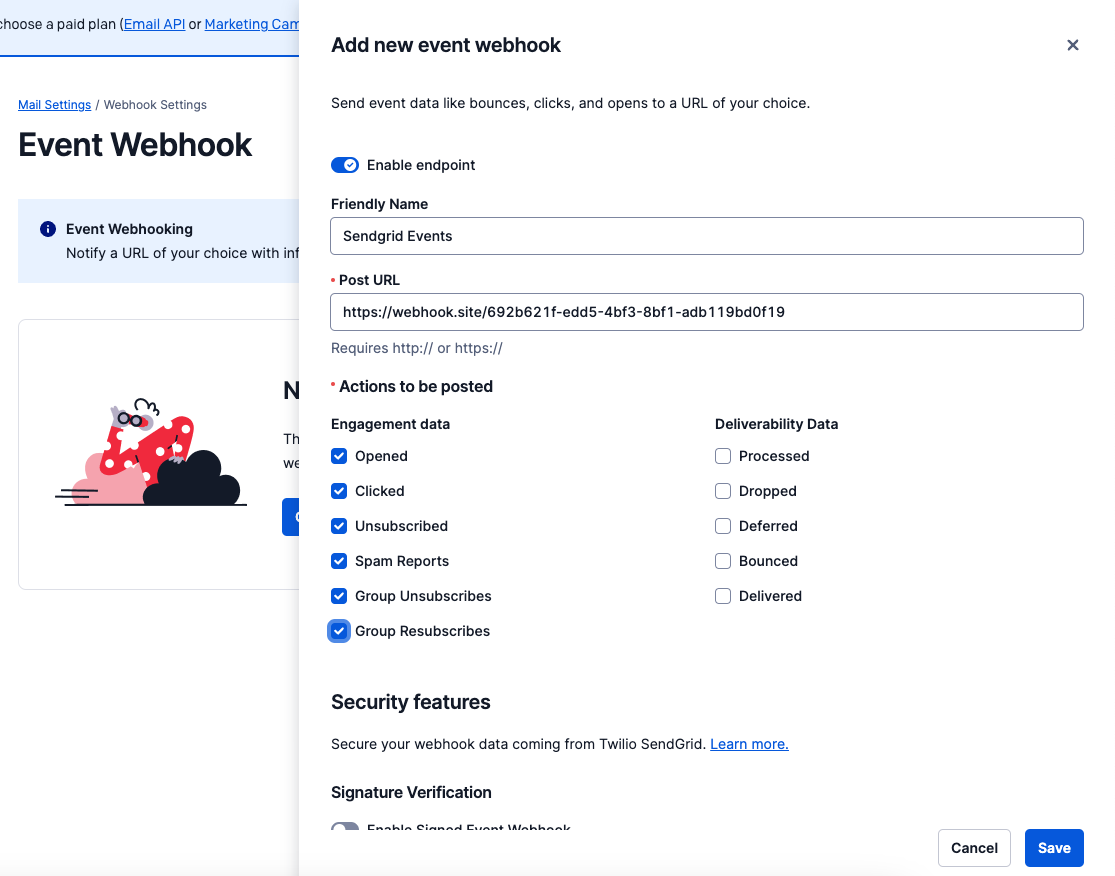
2. Set up the Sendgrid Event Webhook.
Make sure the Sendgrid Event Webhook has the Engagement Data turned on in the Mail Settings.
3. Set up the Assignment SQL in Eppo
Use the following SQL to create your Assignment definition for your Single Send experiment. Note that this filters the SG events by delivered as a proxy for defining when a user was entered into an experiment. In the example below, we are assuming there is a table that stitches the email to a user id. Using the user id for the entity rather than the email for both Sendgrid Assignments and Facts will ensure the ability to tie downstream metrics like purchases and product usage to an email campaign.
SELECT
 sg_events.ts, -- timestamp
 mapping.user_id, -- user id for the entity
 sg_events.email, -- email address to stitch to user_id in mapping table
 sg_events.singlesend_name, -- experiment key
 sg_events.template_id -- variation key

FROM sg_events_table as sg_events
WHERE
 event="delivered";
    LEFT JOIN email_to_user_id_mapping AS mapping
        ON sg_events.email = mapping.user_id
The template_id is randomized from Sendgrid, and you will most likely want a different a more human readable name for naming variations in Eppo. You can make the necessary transformations in your data warehouse before using it in Eppo Assignment SQL or you can take note of which id is which variant when naming the variations in Eppo in your experiment analysis.
4. Set up Fact SQL in Eppo for additional Sendgrid Events To capture email events like ‘open’ or ‘unsubscribed’, use the following SQL to create Facts to be used as Metrics in Eppo. In the example below, we are assuming there is a table that stitches the email to a user id. Using the user id for the entity rather than the email for both Sendgrid Assignments and Facts will ensure the ability to tie downstream metrics like purchases and product usage to an email campaign.
SELECT
    sg_events.ts, -- timestamp
    mapping.user_id, -- userid
    sg_events.email, -- user's email
    sg_event.event -- Sendgrid event type

FROM sg_events_table as sg_events
    LEFT JOIN email_to_user_id_mapping AS mapping
        ON sg_events.email = mapping.user_id
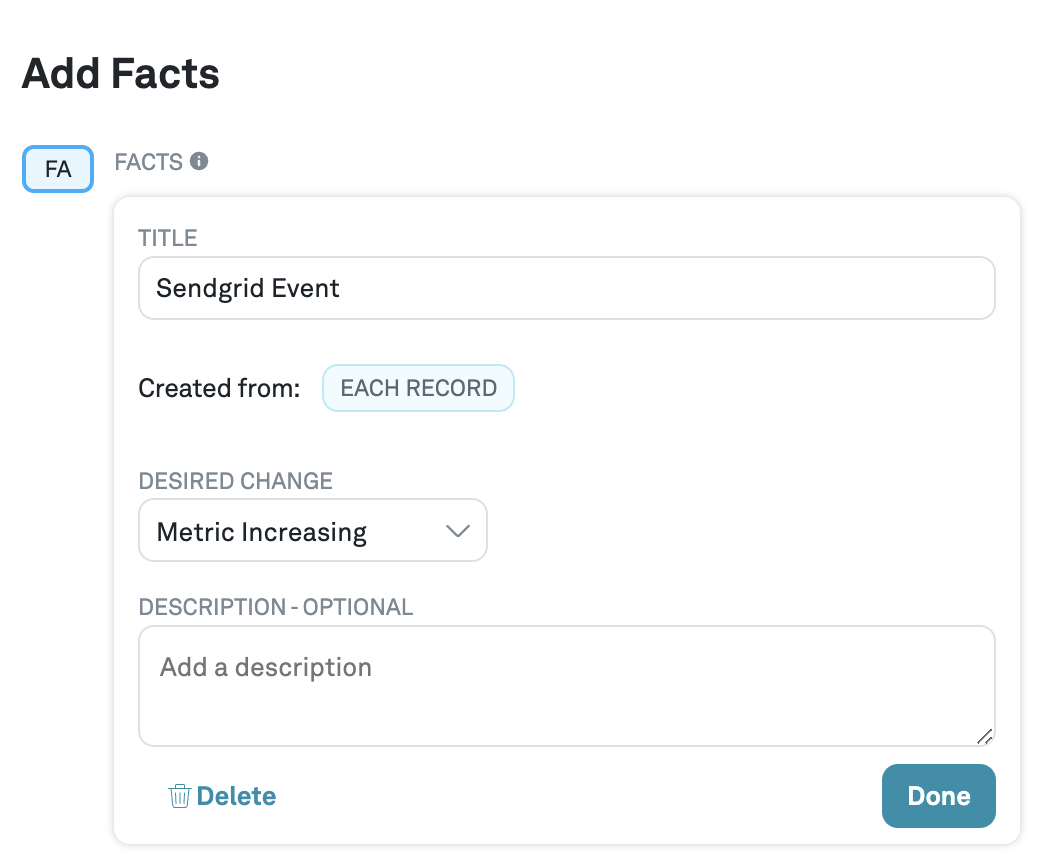
Create a fact called "Sendgrid Event". Once this is set up, Metrics can be set up that filter by each Sendgrid Event type like “open”, “click”, and “unsubscribe”.
API and Dynamic Templates
Why use Eppo to split traffic for an email experiment
An added benefit of using Eppo’s feature flags to split traffic for an email experiment rather than using Sendgrid’s built in editor is the ability to synchronize experiments across email campaigns and product or site experiences. Eppo’s SDKs are stateless, and as long as the same subject key and flag key are provided, the user is bucketed into the same variant. Here are some examples of experiments span across email and product:
- A B2B SaaS company sending out an email to trial users nudging them to use a new feature in their account where the control is a regular trial email and the treatment is a new email explaining the benefits of a new feature.
- An eCommerce company sending a promotional campaign advertising a certain category of clothing; once the user hits the site, that category of clothing is highlighted.
In this section, we walk through how to set up an Eppo JSON feature flag to experiment on content in pre-defined variables in a Sendgrid Dynamic Template.
In this example we show you how to use Eppo to show template A or B in Sendgrid as well as how to populate dynamic variables with content from Eppo. We opted to show the full breadth of how to use Eppo’s feature flags for this use case. In your environment, you may find that you only want to use Eppo to show template A or B or only use Eppo to populate dynamic variables rather than both for your testing use cases with Sendgrid. Additionally, you can extend this use case to emails built out in the API instead of in the visual editor done in the example below.
Sendgrid Setup
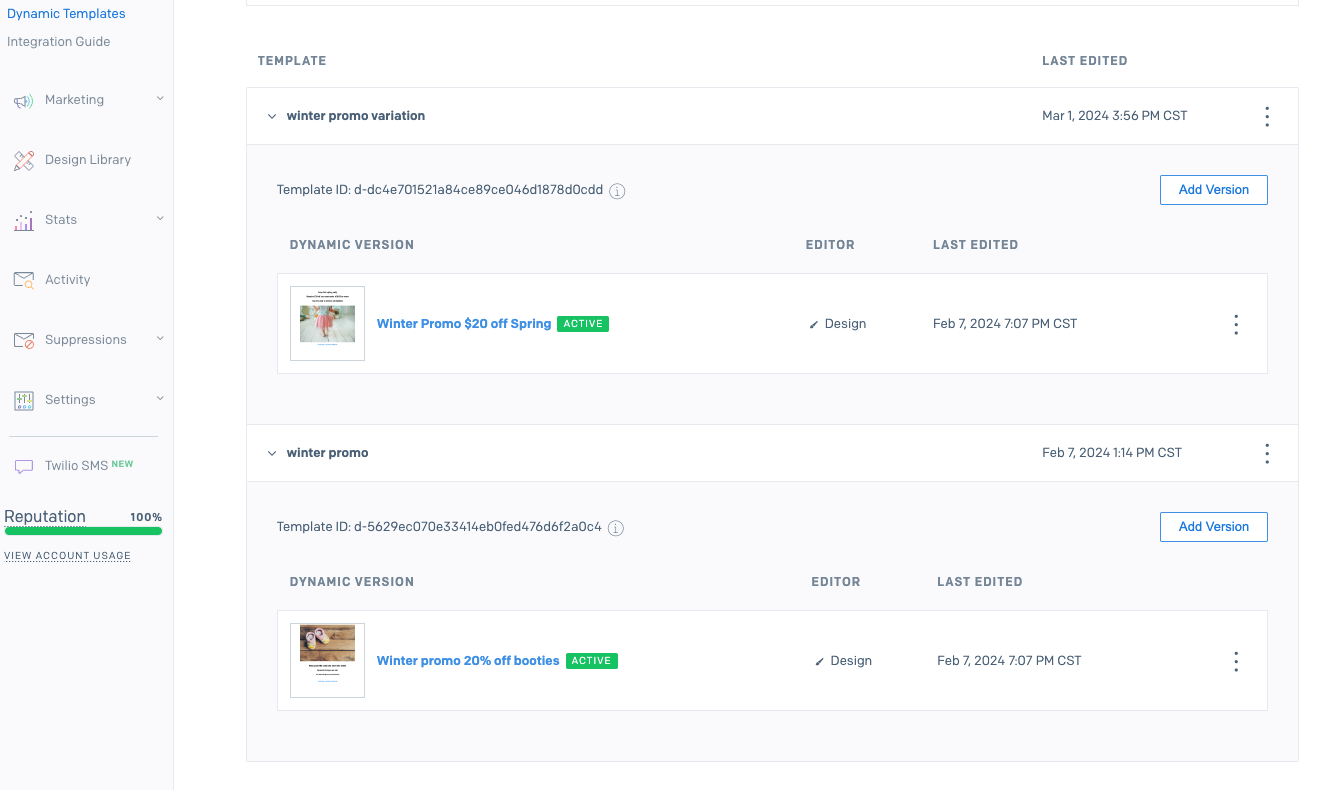
The first step is to create two dynamic templates either in Sendgrid’s Code or Visual editor. After creating these templates save the Template ID associated with each version. We use these Template IDs later when setting up the feature flag.
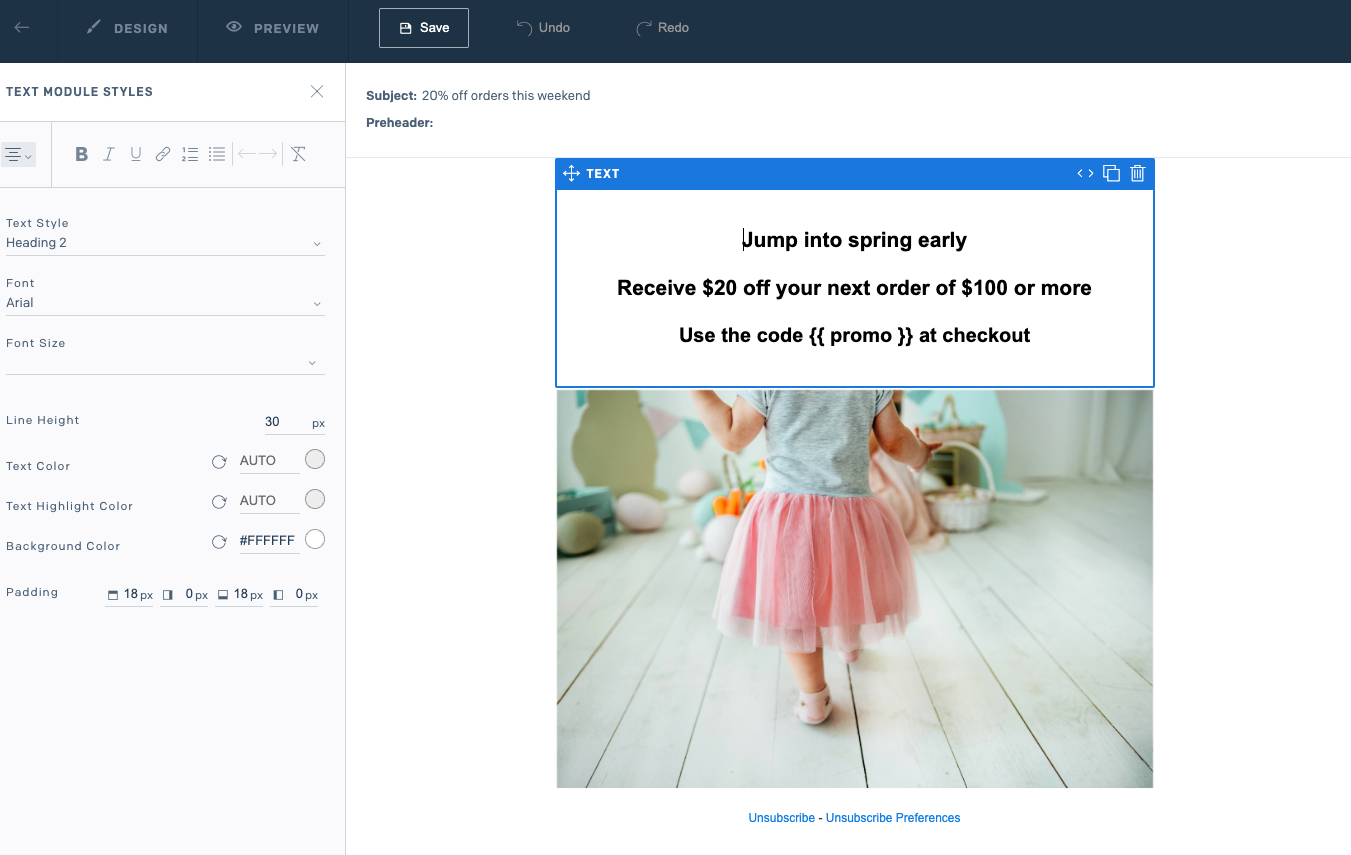
After those templates have been set up, create your variable that you want to test using Handlebars. In the example below, we are testing out the promo code we are offering to individuals. Eppo populates {{ promo }} with text from our feature flag once a user has been assigned to a variation. See the examples below on how the Handlebars variables are included in the Sendgrid Dynamic templates in this example.
Eppo Setup
Once your templates are set up in Sendgrid, the next step is to set up your feature flag in Eppo. Opt to create a JSON flag type and include the following JSON for each variation value:
{
    "template_id": "<SENDGRID-TEMPLATE-ID>",
    "promo_code": "<EXAMPLE-PROMO-CODE>"
}
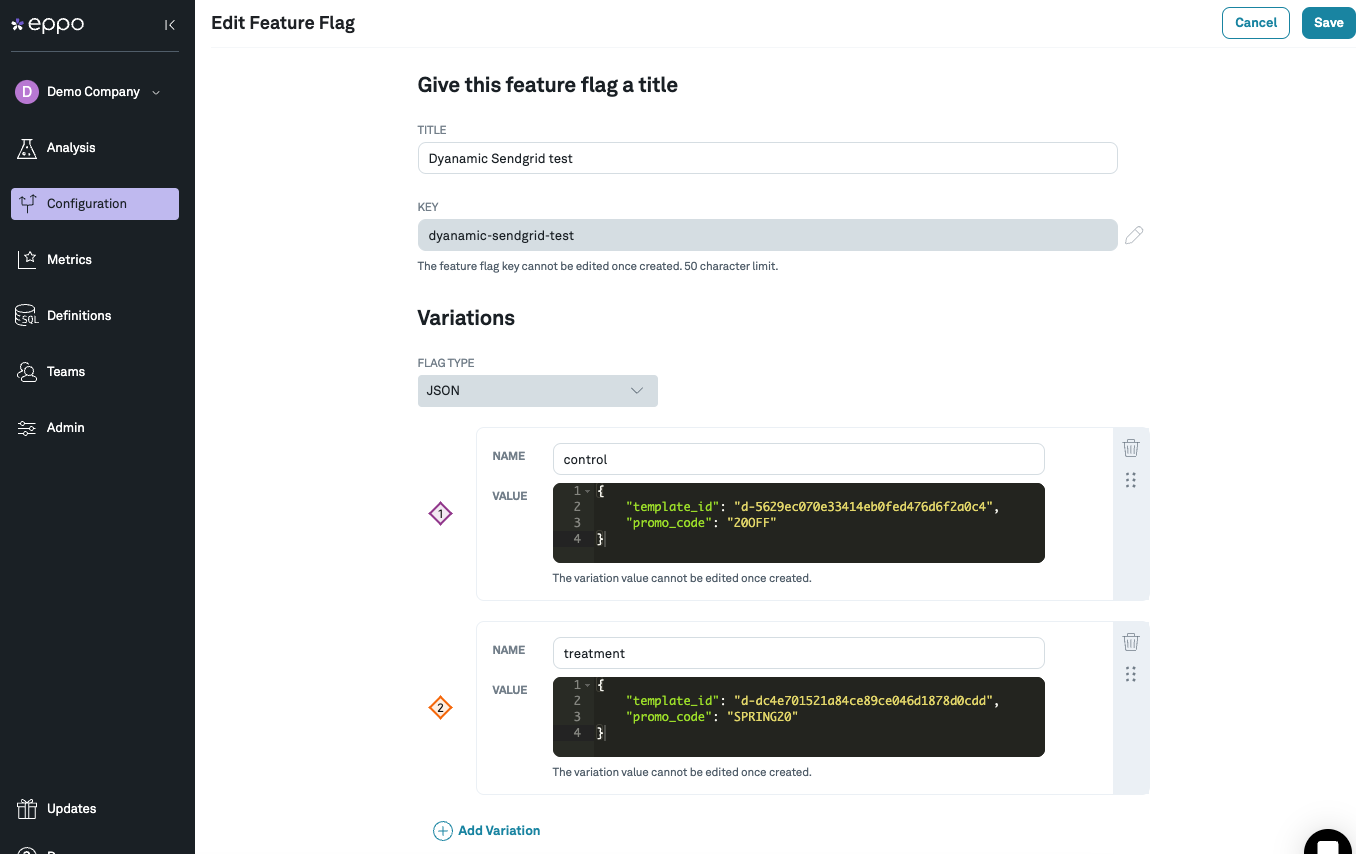
Set the template_id as the Sendgrid template id—this id determines which template to show the user. Then set the promo_code to whatever text you’d like—this string populates the text in the variable {{ promo }} that is in both of our templates. Save and publish this feature flag once you are done.
Code example
The Sendgrid Mail API is what ultimately sends this email. Below is the example code to assign users a variation and send the email with the variable values determined from Eppo. This is also where targeting conditions are put in place. If the experiment is targeting users on “iOS devices”, or users with “gold status”, an object that defines those attributes can be passed in with the .get<Type>Assignment() method. See Eppo’s documentation on targeting in Eppo feature flags.
import sgMail from "@sendgrid/mail";

import { init } from "@eppo/node-server-sdk";
import * as EppoSdk from "@eppo/node-server-sdk";

// Eppo startup
await init({
    apiKey: '<EPPO_SDK_KEY>',
  });

const eppoClient = EppoSdk.getInstance();

// Sendgrid setup
sgMail.setApiKey('<SENDGRID_API_KEY>')

// User's email
const recipient_email

// User attributes used for targeting conditions, replace with your own values if needed
const attributes = {}

// Default value for the SDK to return if no conditions are met, replace with your own values
const default_value = {
  template_id: "<DEFAULT_TEMPLATE_ID>",
  promo_code: "<DEFAULT_PROMO_CODE>"
}

// Loop through list to send email
const variation = eppoClient.getJSONAssignment(
  "<FLAG-KEY>",
  recipient_email,
  attributes,
  default_value
);

const msg = {
  to: recipient_email,
  from: '<SG-FROM-SENDER>',
  template_id: variation.template_id,
  dynamic_template_data: {
    promo: variation.promo_code
  }
}

sgMail
  .send(msg)
  .then(() => {
    console.log('Email sent')
  })
  .catch((error) => {
    console.error(error)
  })
};
Analyzing results in Eppo
To analyze results in Eppo using Dynamic Templates and the Sendgrid API, we recommend using the same method outlined for Single Sends. Set up the Sendgrid webhook to send data to your data warehouse and create experiment analyses as needed in Eppo.