Creating your first feature flag
This 10 minute guide will walk through creating your first feature flag in Eppo. In the example, we'll imagine that we are adding a basic on/off switch for a new onboarding page.
While Eppo's SDK can be used for targeted rollouts, A/B/n experiments, and personalization via Contextual Bandits, this guide will focus on creating a simple on/off switch in Eppo.
Generate an SDK key
From the Configuration section, navigate to the SDK keys tab. Here you can generate keys for both production and testing.
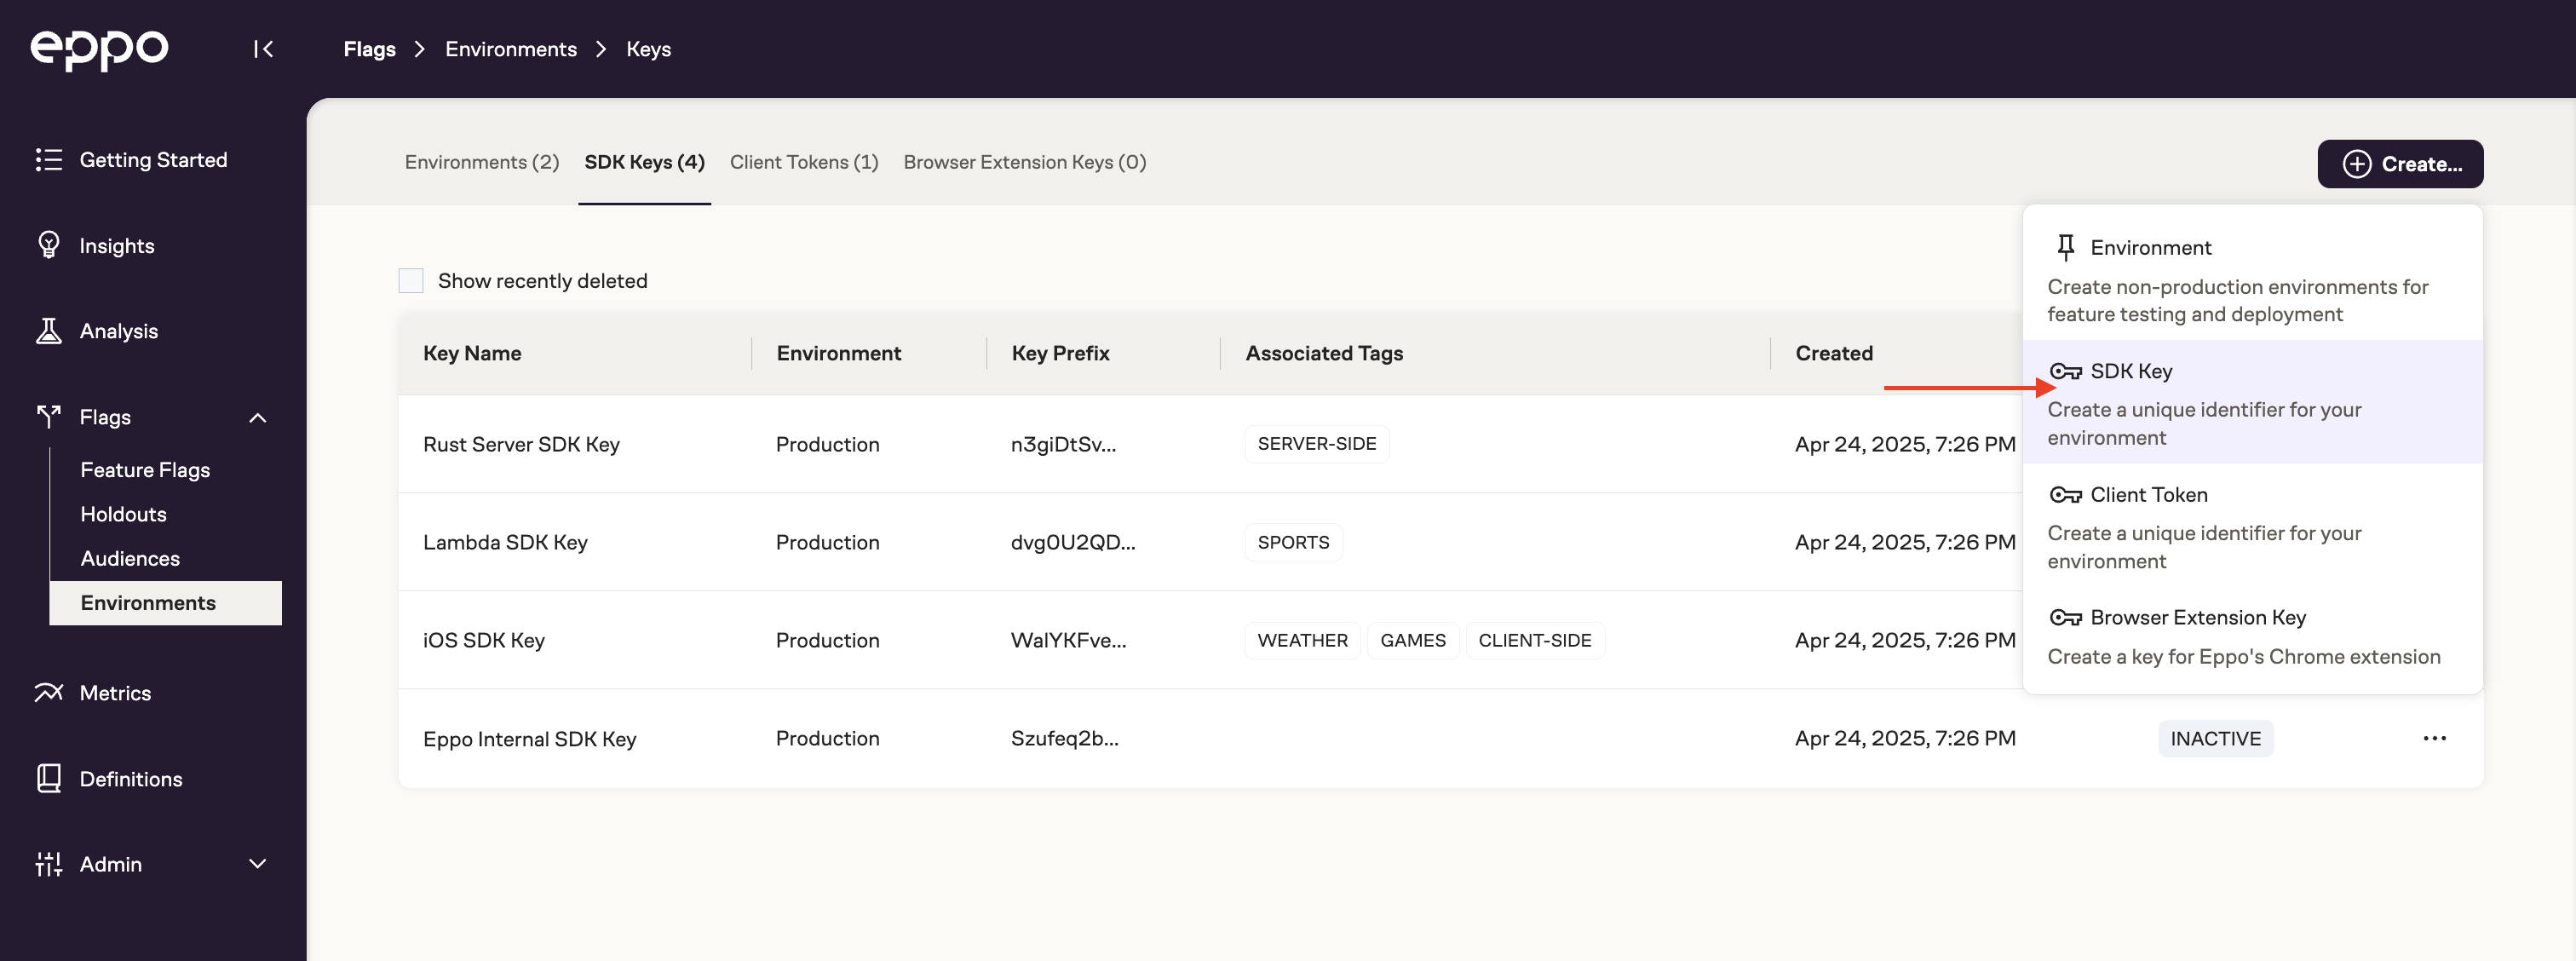
For now, create a Test environment SDK key by clicking Create >> SDK Key. Give the key a name and select Test for the Environment. Each SDK key will be tied to a specific environment. This allows you to toggle a flag's status is each of your development environments independently.
Store the SDK key securely; it is not possible to view it after closing the modal. However, generating a new key is easy in case you do lose it.
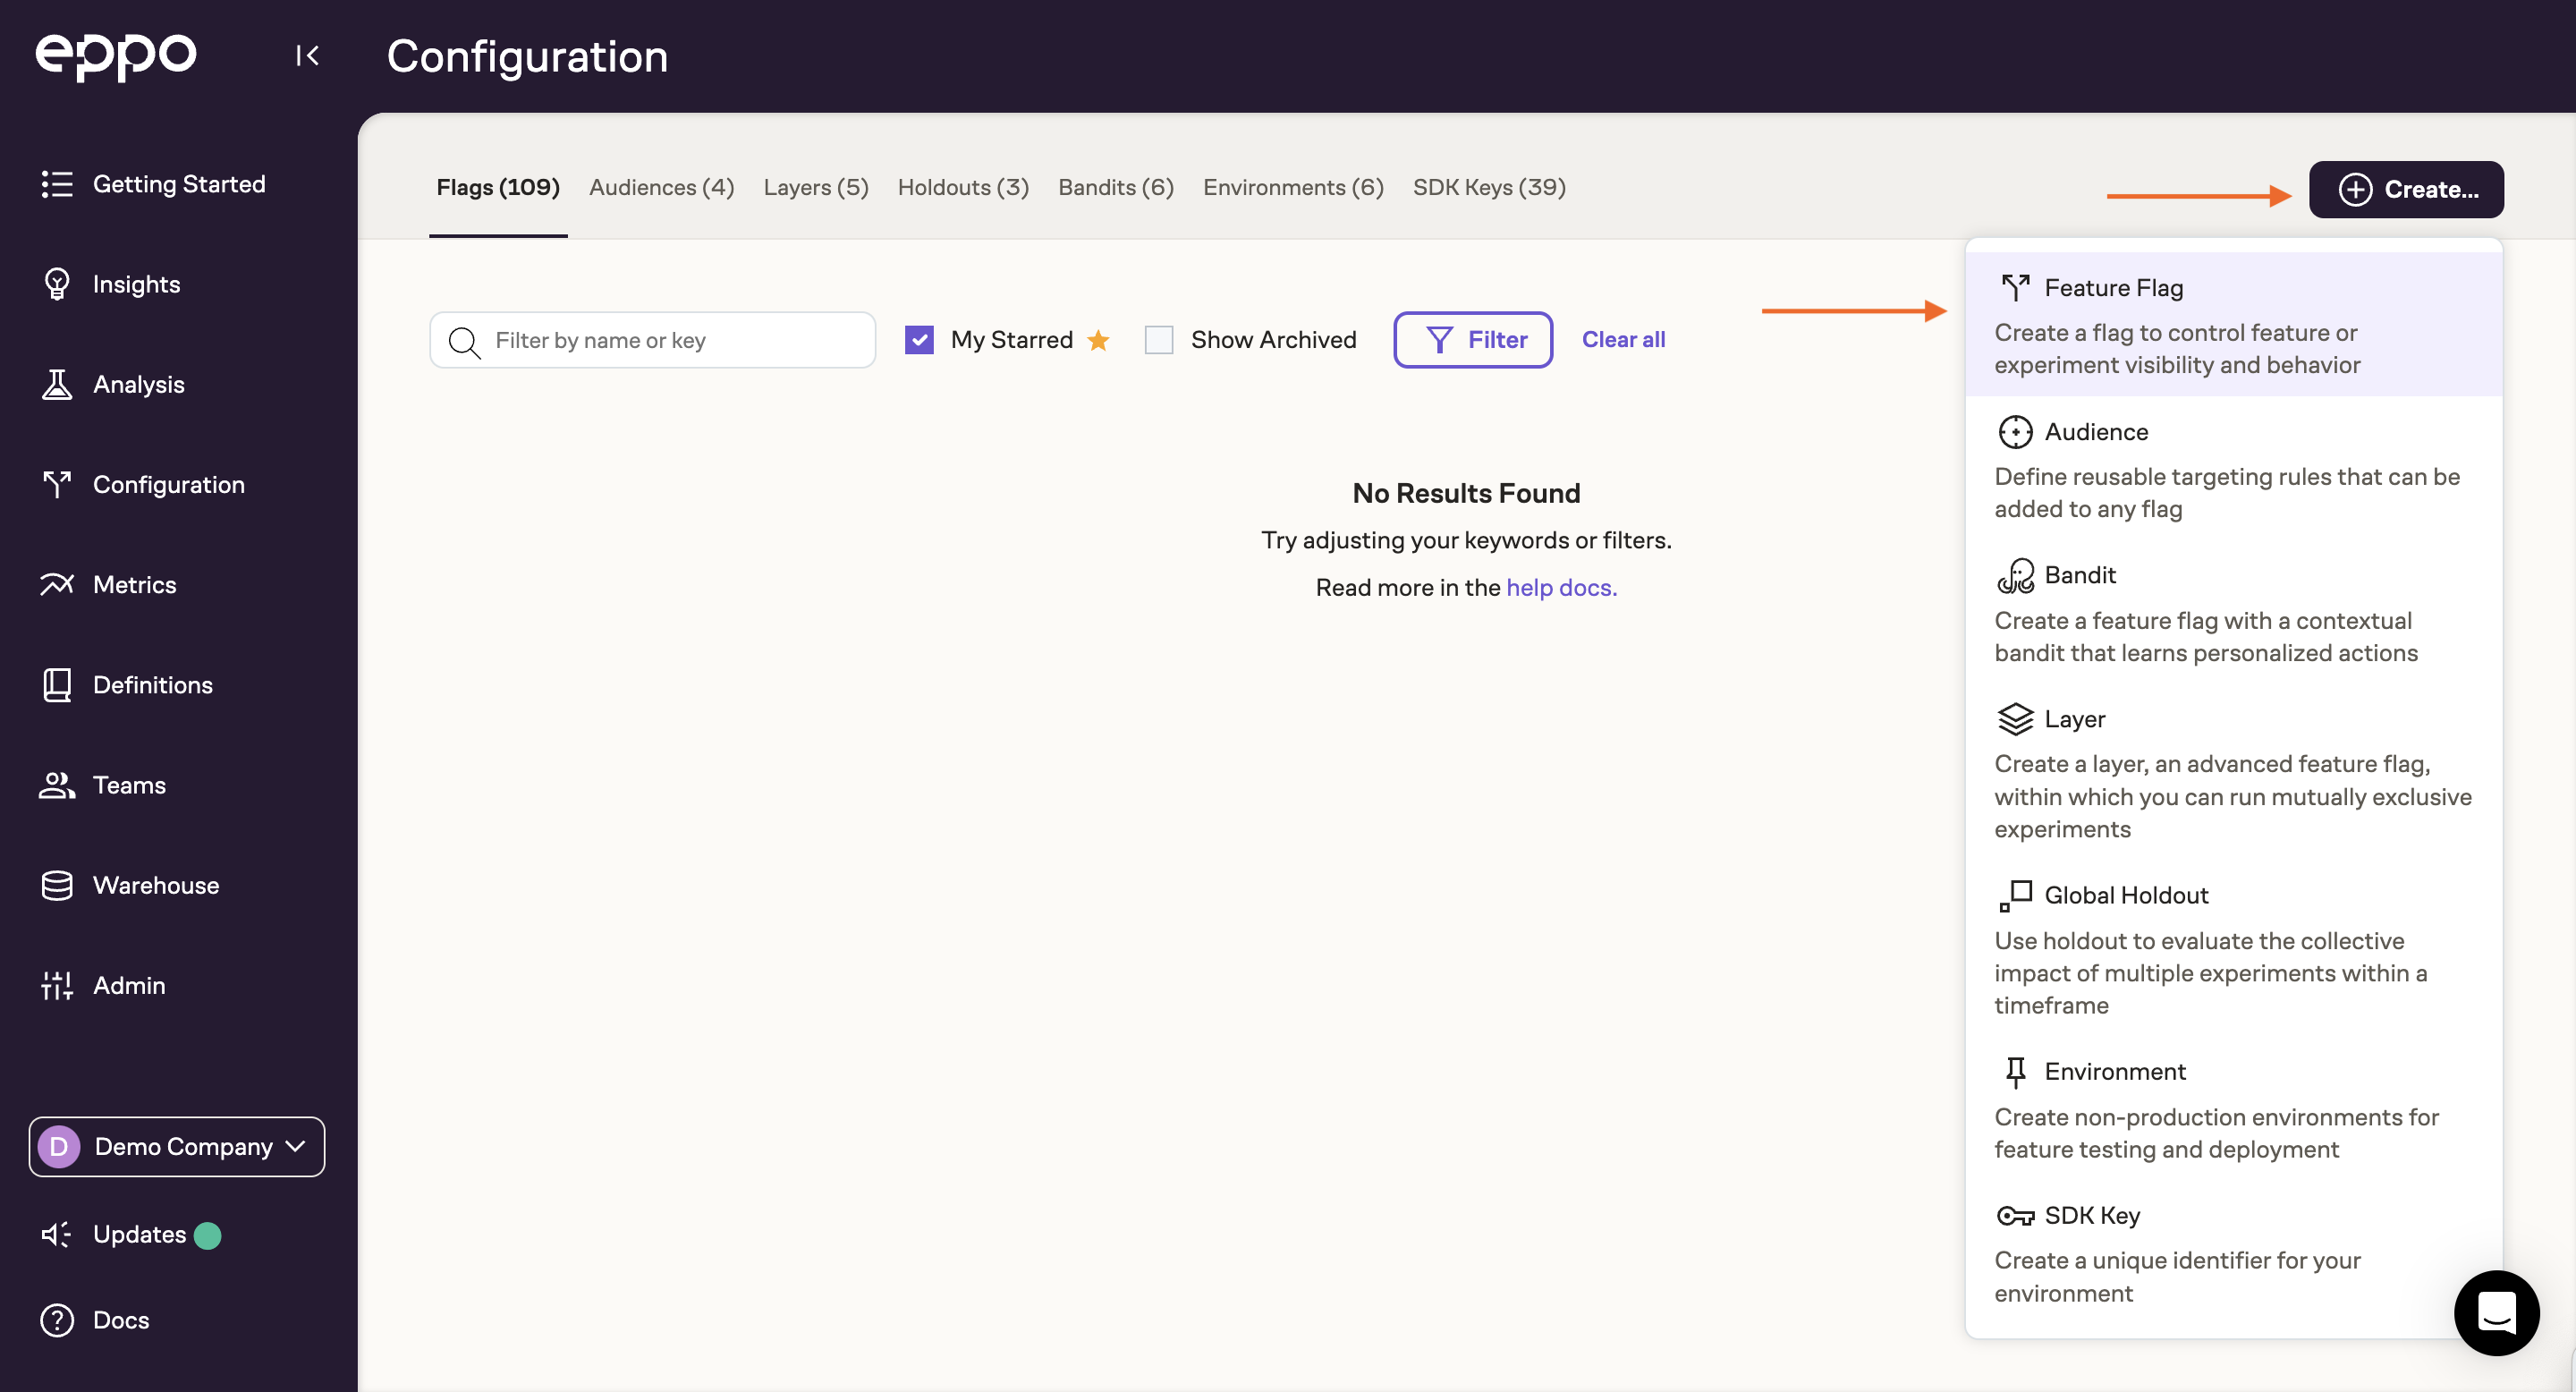
Configure the flag in Eppo's UI
Create a flag
Start by creating a flag for the new feature:
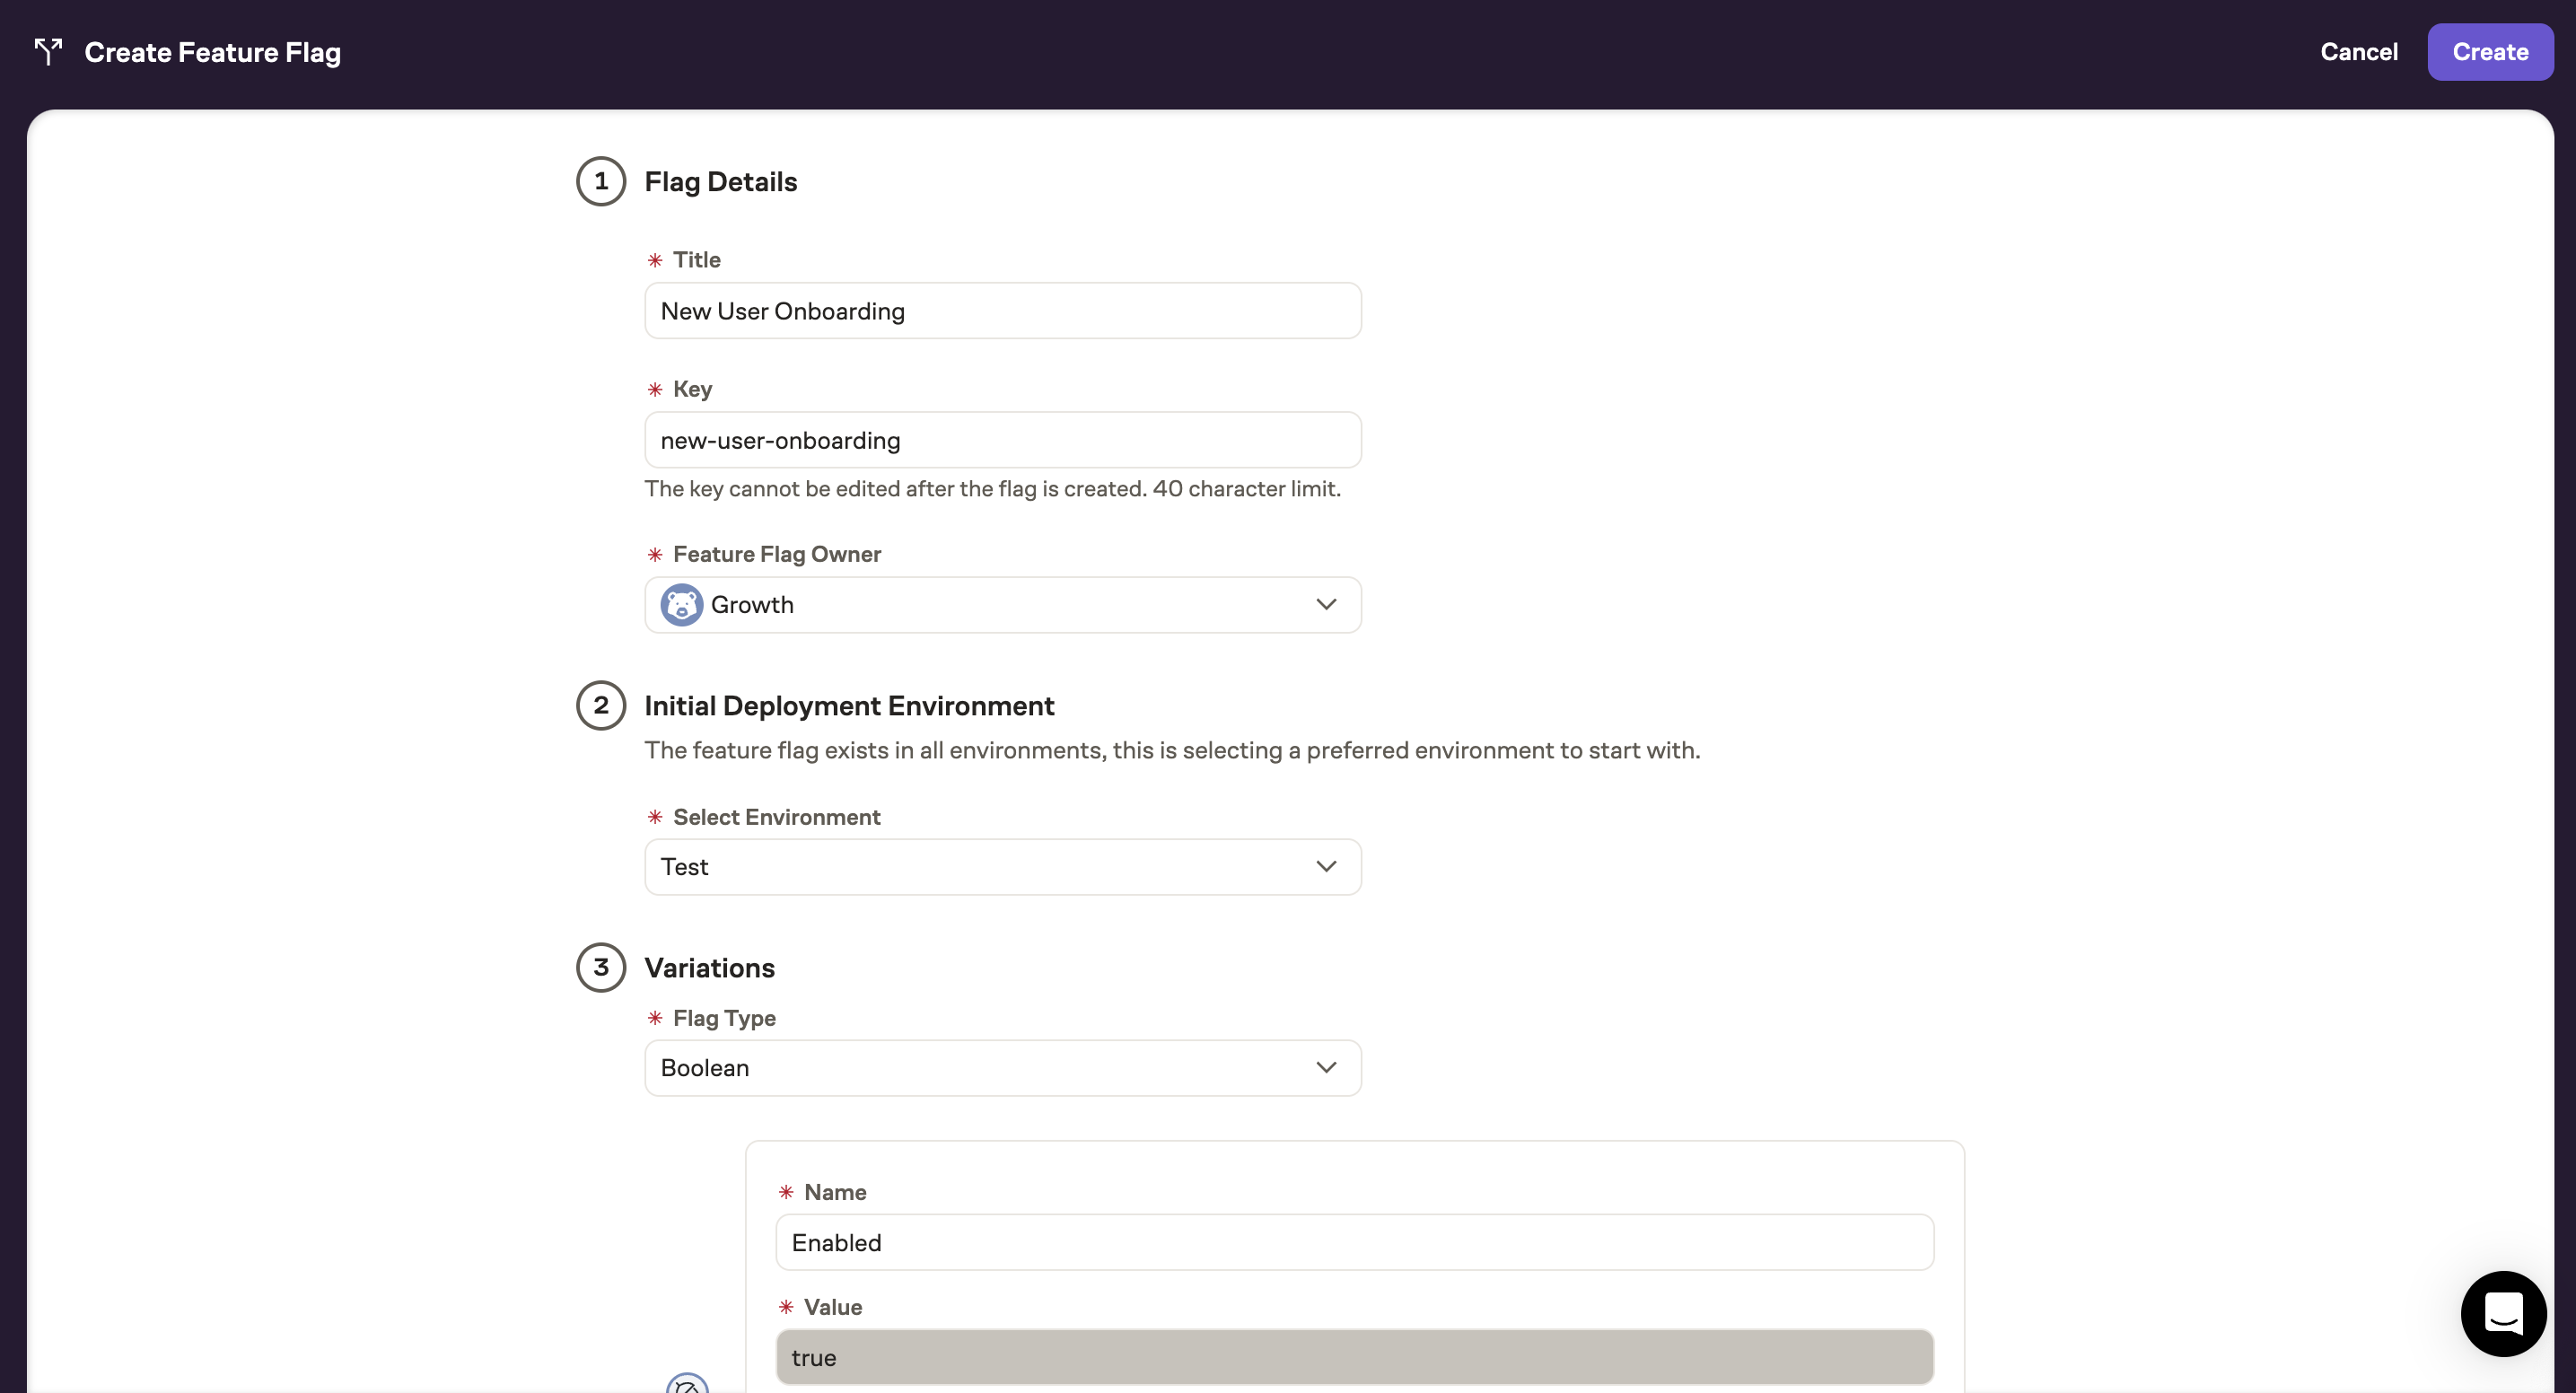
Give the flag a descriptive human readable name and create variations for each version of the feature. In this example we only have two states: enabled and disabled. If your flag is more involved, you can change the flag type to be string, numeric, or JSON-valued. Read more about flag types here.
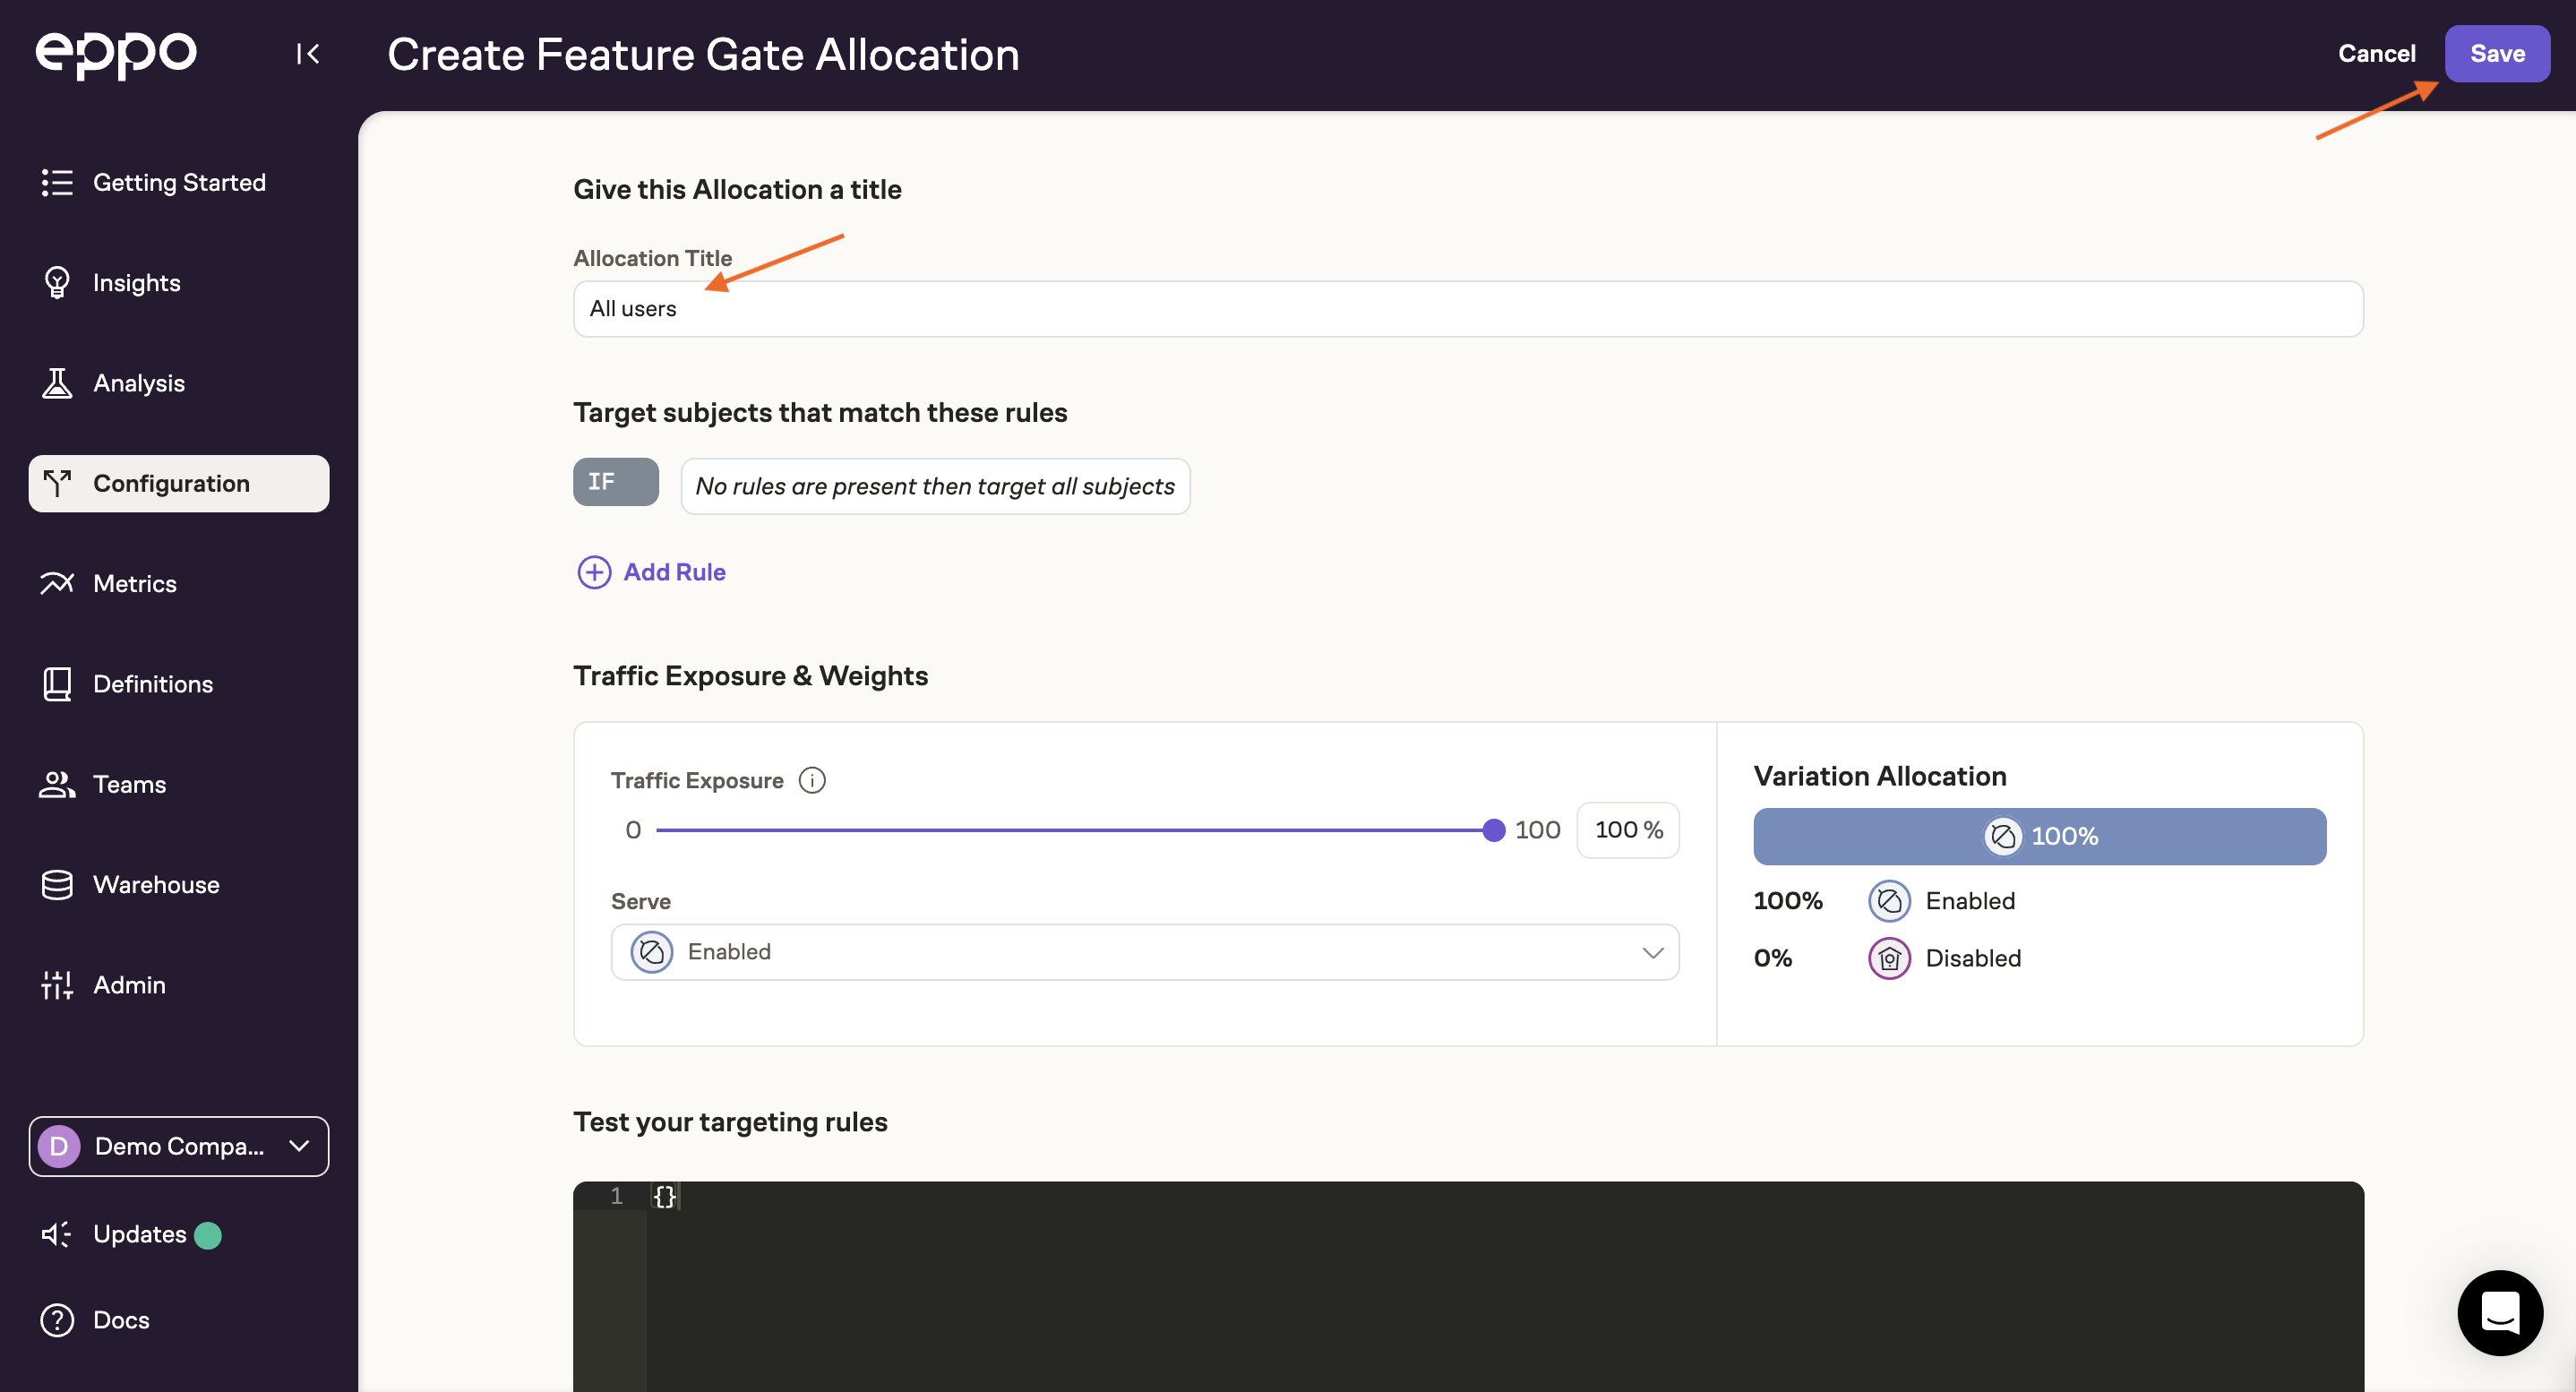
Create a Feature Gate allocation
After creating the flag, you'll see a page where you can define how variants should be allocated in each environment. Make sure you are in the Test environment, and click Add Allocation >> Feature Gate.
Note that if you wanted to instead turn the feature flag on for a random set of users, you would follow this same process, but select Experiment instead of Feature Gate.
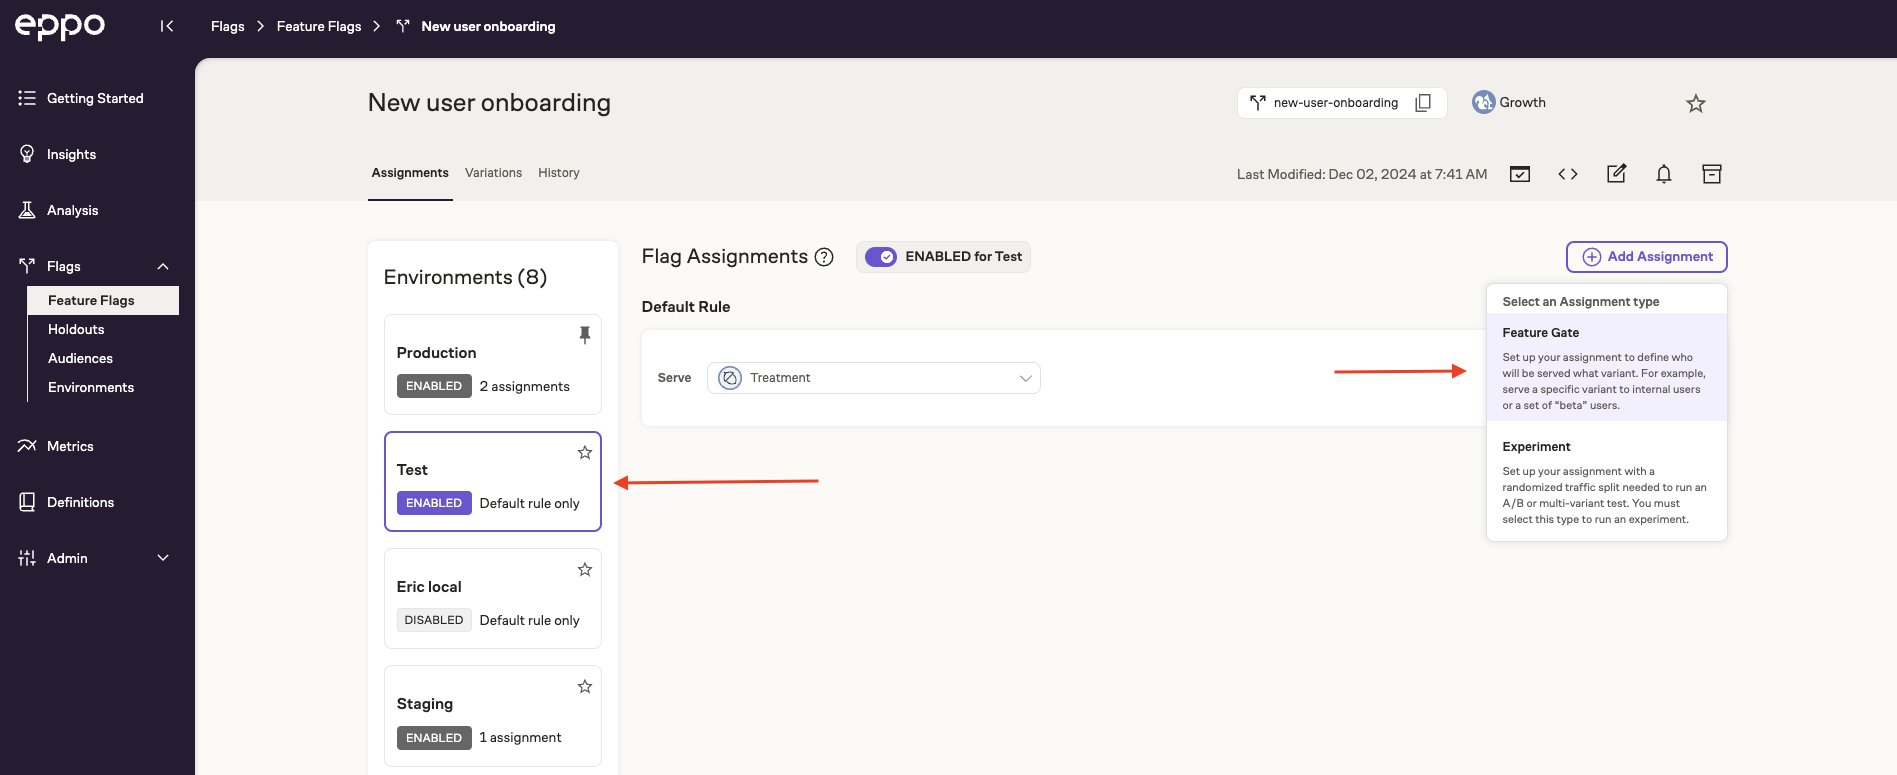
For this example, we will assign all users to the Enabled version of the flag. If you want to target specific users, you can add targeting rules to the allocation. You can read more about targeting here.
Integrate the SDK
Now that we have created a flag and an allocation, we can start getting variations from the SDK. This section walks through basic integration for a few common frameworks, for a full list of SDKs and integration options, see the SDKs section of the docs.
Install the SDK
- JavaScript
- Node
- iOS
- Android
- Python
The JavaScript SDK is intended for use in browser applications. For server-side applications, use the Node SDK.
yarn add @eppo/js-client-sdk
You can also install the SDK with NPM or via a script tag. For more information, see the JavaScript SDK documentation.
npm install @eppo/node-client-sdk
You can also install the Node SDK with NPM. For more information, see the Node JS SDK documentation.
While in XCode:
- Choose
Package Dependencies- Click
+and enter package URL:git@github.com:Eppo-exp/eppo-ios-sdk.git- Set dependency rule to
Up to Next Minor Versionand selectAdd Package- Add to your project's target.
You can install the SDK using Gradle by adding to your build.gradle file:
implementation 'cloud.eppo:android-sdk:3.3.0'
pip install eppo-server-sdk
Initialize the SDK
Now that you've installed the appropriate Eppo SDK, you'll need to initialize the SDK in your application. Once initialized, you can create an Eppo client and assign flag variations in your application, all without any additional network requests.
- JavaScript
- Node
- iOS
- Android
- Python
import { init } from "@eppo/js-client-sdk";

await init({
  apiKey: '<SDK_KEY>'
});
If you are using React, we have some React specific recommendations.
import { init } from "@eppo/node-client-sdk";

await init({
  apiKey: '<SDK_KEY>'
});
EppoClient.initialize(sdkKey: "SDK_KEY");
import cloud.eppo.android.EppoClient;

EppoClient eppoClient = EppoClient.init("SDK_KEY");
import eppo_client
from eppo_client.config import Config, AssignmentLogger

client_config = Config(api_key="<SDK_KEY>",
                       assignment_logger=AssignmentLogger())
eppo_client.init(client_config)
Get flag variations
Once the SDK is initialized, use getBooleanAssignment to check which variation a user should see:
- JavaScript
- Node
- iOS
- Android
- Python
import * as EppoSdk from "@eppo/js-client-sdk";

const eppoClient = EppoSdk.getInstance();

const variation = eppoClient.getBooleanAssignment(
  "new-user-onboarding", // flag key
  user.id, // subject key
  {}, // userProperties
  false, // default value
);

return variation ? <NewCheckoutPage /> : <OldCheckoutPage />
import * as EppoSdk from "@eppo/node-server-sdk";

const eppoClient = EppoSdk.getInstance();

const variation = eppoClient.getBooleanAssignment(
  "new-user-onboarding", // flag key
  user.id, // subject key
  {}, // userProperties
  false, // default value
);

return variation ? <NewCheckoutPage /> : <OldCheckoutPage />
Task {
    do {
        try await EppoClient.initialize(sdkKey: "YOUR_EPPO_API_KEY");
        self.assignment = try EppoClient.shared().getBooleanAssignment(
            flagKey: "new-user-onboarding", // flag key
            subjectKey: "test-user", // subject key
            subjectAttributes: [], // subject attributes
            defaultVariation: "control" // default value
        );
    } catch {
        self.assignment = nil;
    }
}
It is recommended to wrap initialization in a Task block in order to perform network request asynchronously. For more information, see the iOS SDK documentation.
import cloud.eppo.android.EppoClient;

EppoClient eppoClient = EppoClient.getInstance(); // requires the SDK to have already been initialized
String variation = eppoClient.getStringAssignment(
  "new-user-onboarding", // flag key
  "test-user", // subject key
  "control" // default value
);
import eppo_client

client = eppo_client.get_instance()

variation = client.get_boolean_assignment(
  "new-user-onboarding", # flag key
  user.id, # subject key
  {}, # user properties
  false, # default value
)
Note that the get<Type>Assignment methods in Eppo are deterministic, meaning that they will always return the same flag status for a given subject (e.g., user) wherever the flag is called.
Turn on the flag
Flip the flag on in the Test environment to start serving the new feature.
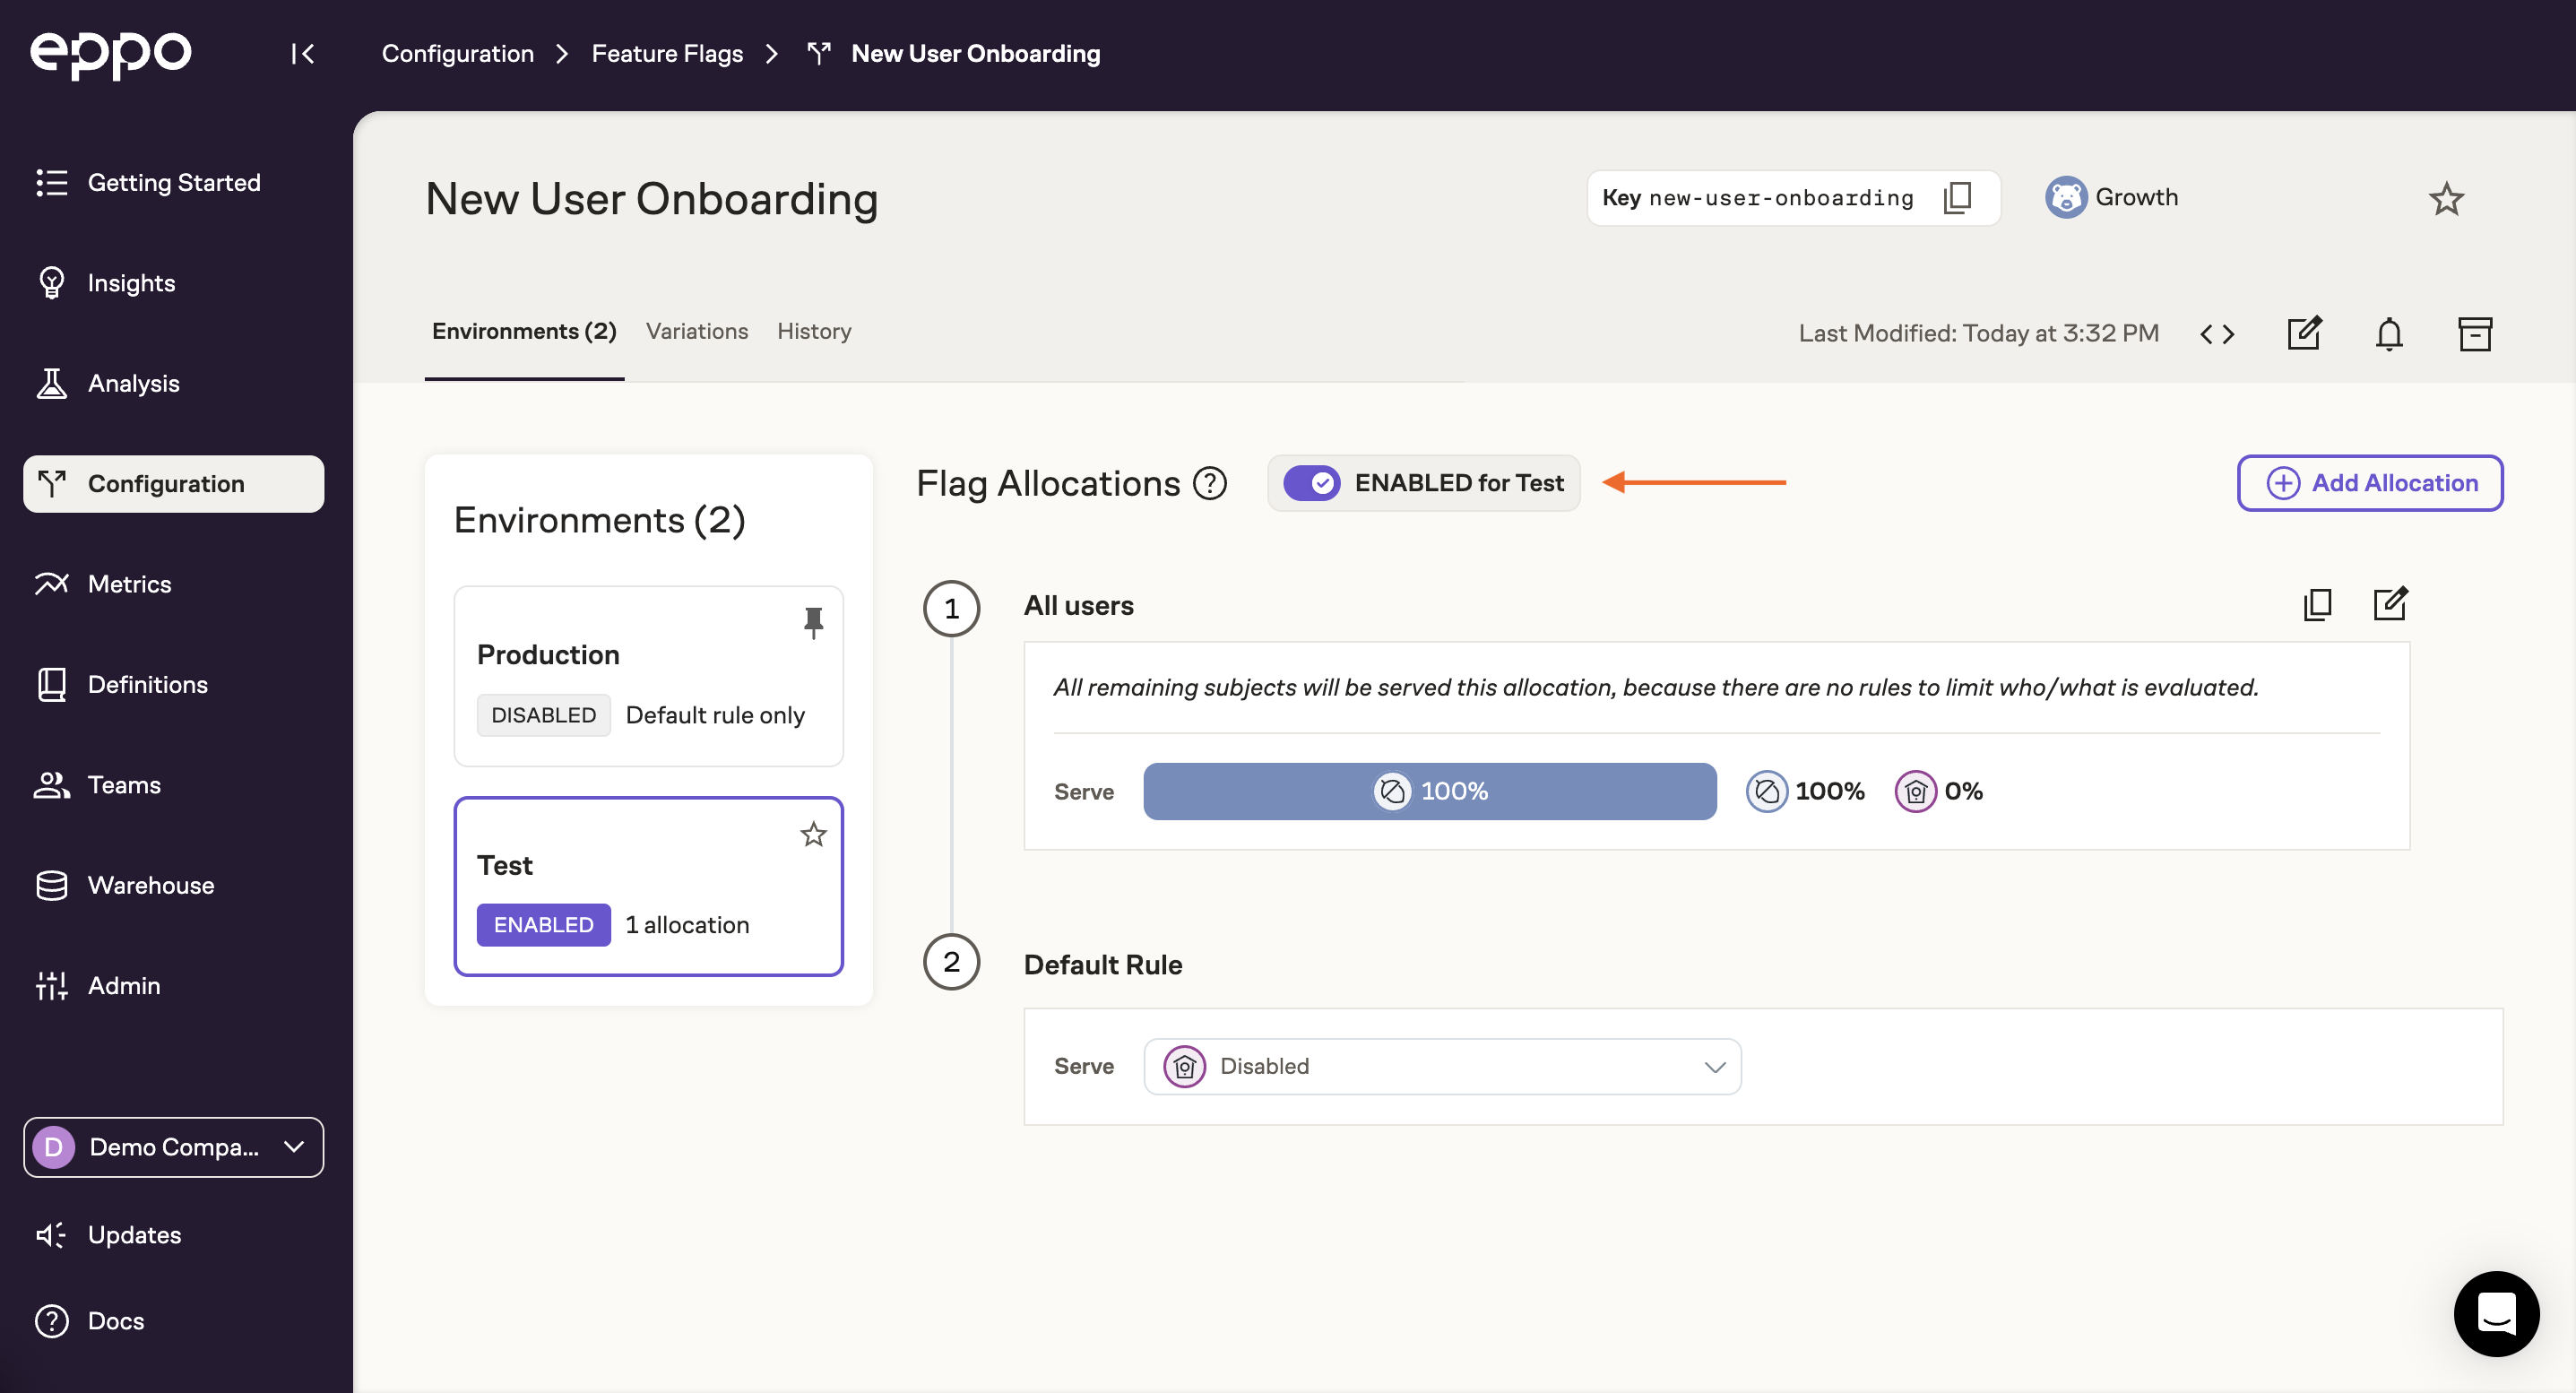
You should now see assignments coming through the Eppo SDK!
To deploy to production, create a new SDK key for the production environment, create a production feature gate allocation, and enable the flag.