Sizing an experiment
Eppo makes it easy to plan and size your experiments. Before starting an experiment, it's useful to understand how long an experiment will need to run to reach a given precision target.
Eppo lets you size experiments off of the different Entry Points is your user journey. For example, an eCommerce business might have an entry point for when a product is viewed, one for when a product is added to cart, and a third for when a product is purchased.
You can add these events as Entry Points in Eppo and understand how much of a lift we can measure at different trafic exposures and experiment durations. For instance, enrolling 20% of the traffic on the homepage could allow us to measure a 1% lift in conversion after 1 week.
This page will walk you through the process of creating an Entry Point and using it to size an experiment. You can find the full sample size calculation documentation here.
In order to size an experiment, you'll need to have both connected your data warehouse and created your first metric.
1. Creating an Entry Point
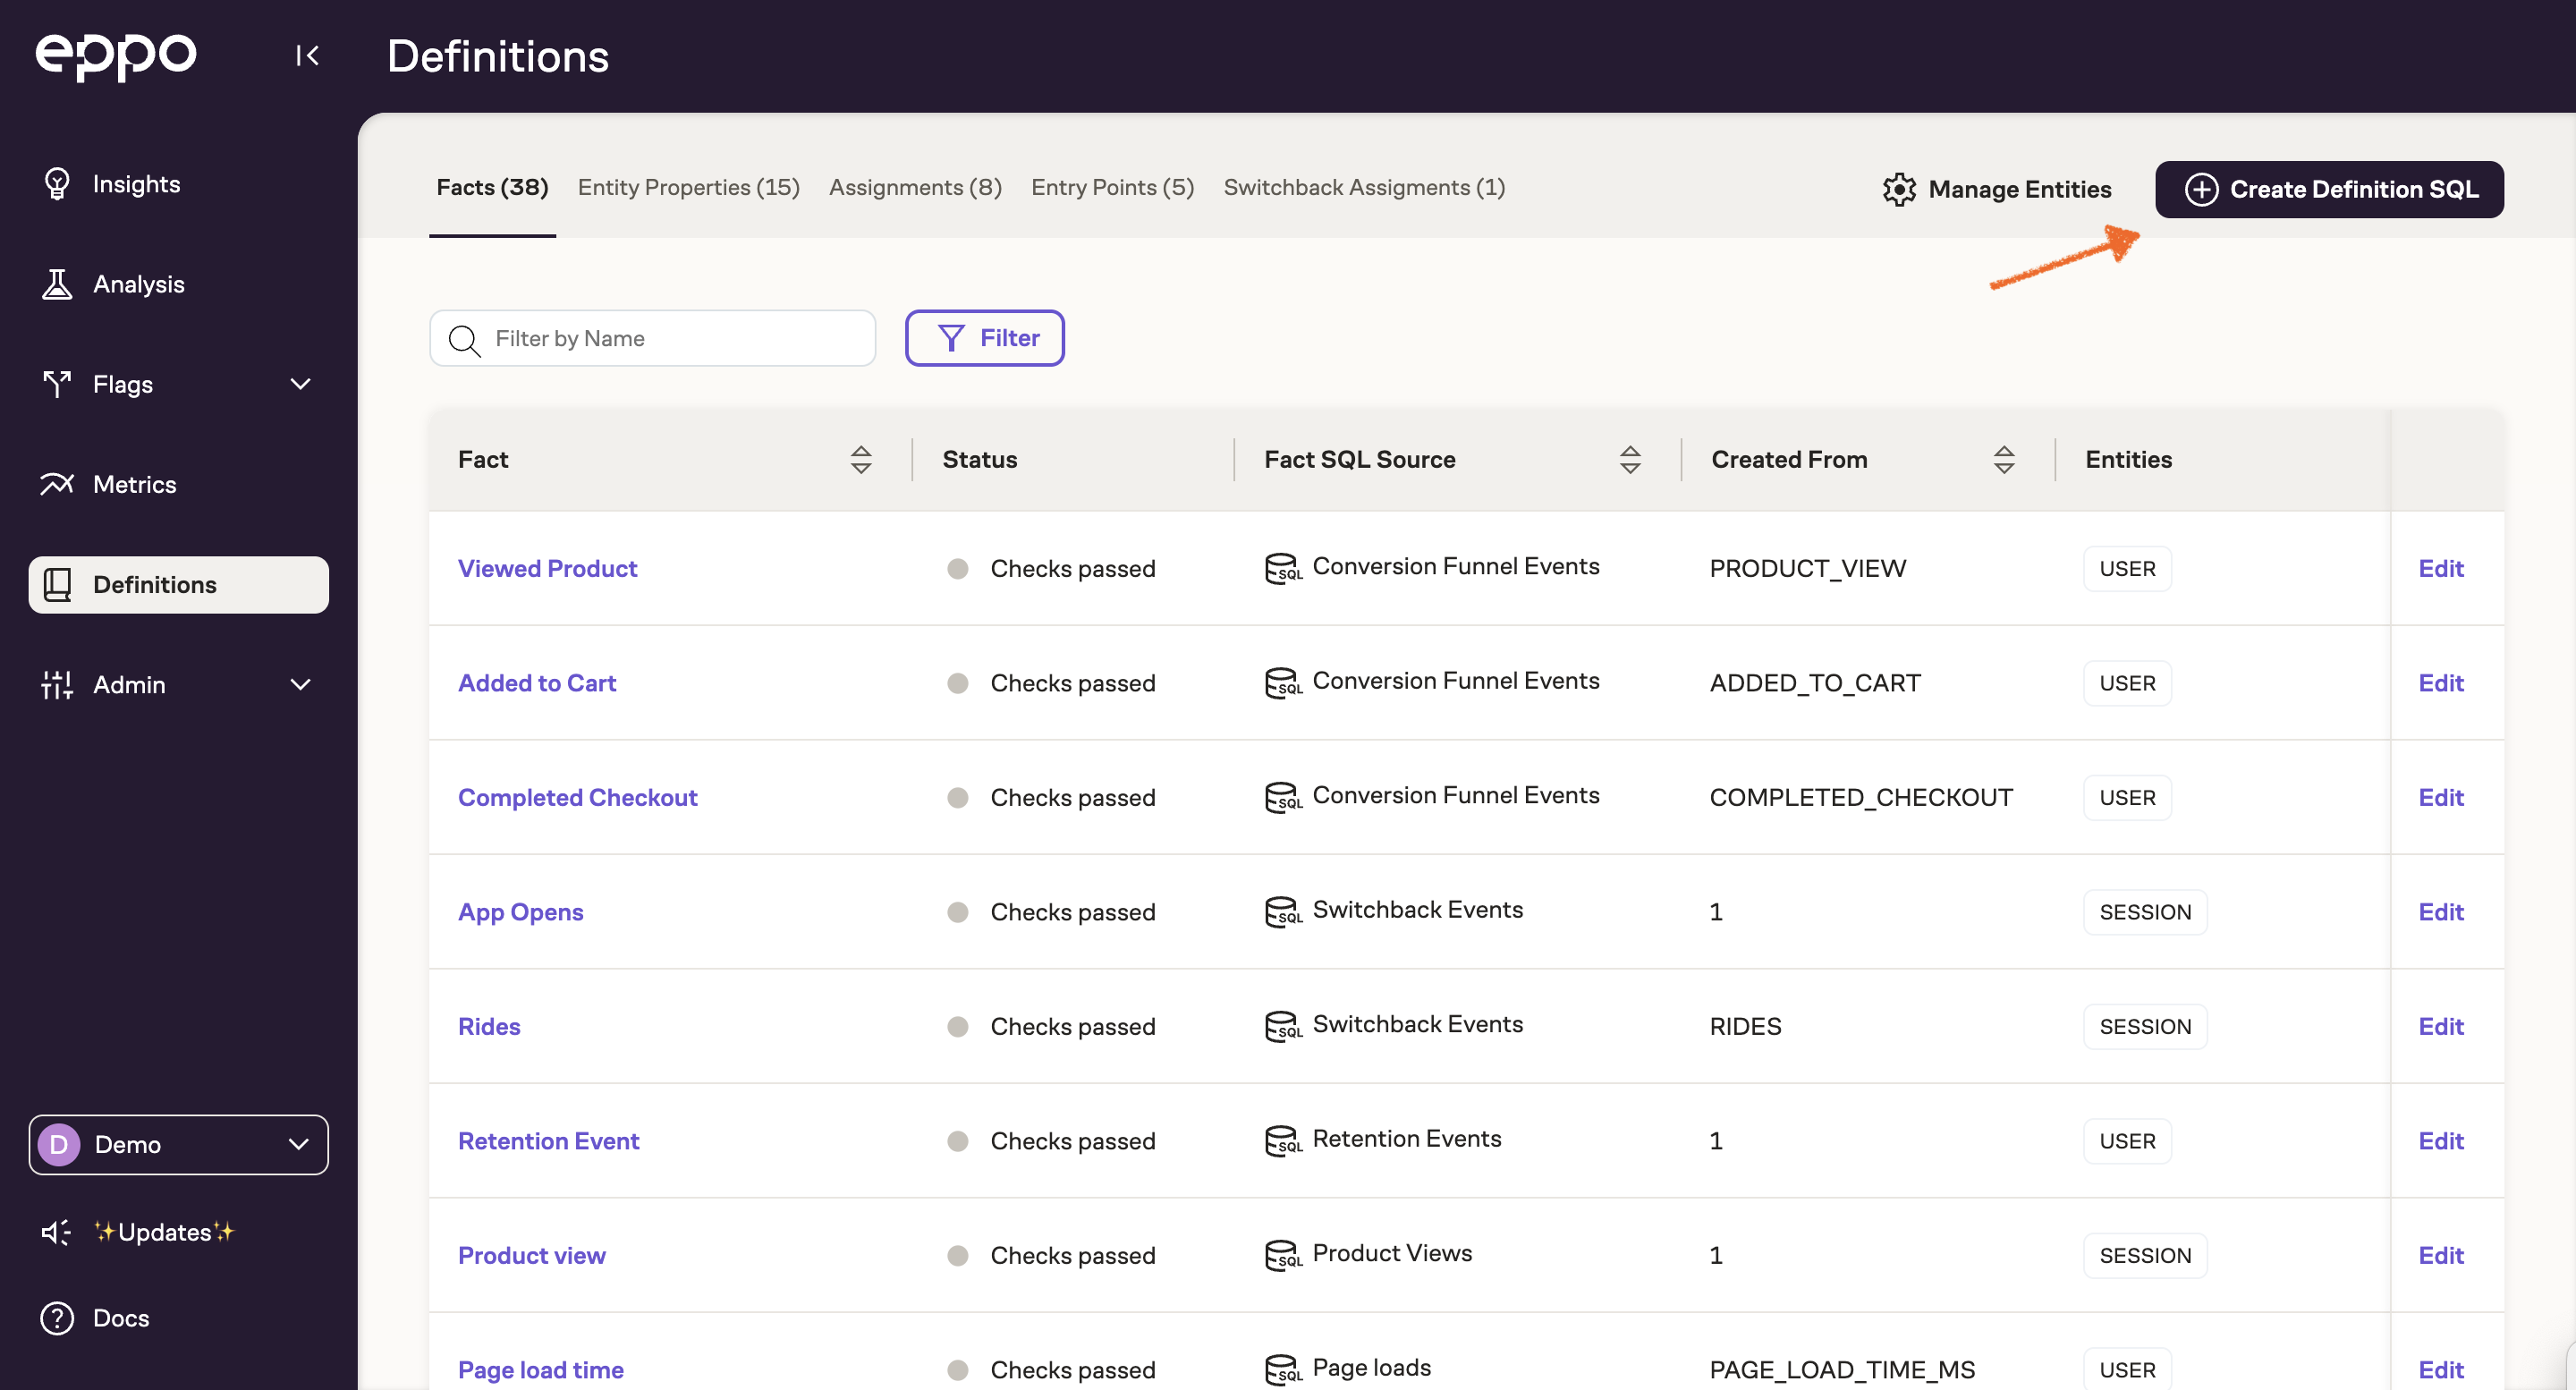
To start, you'll need to define an Entry Point. On the Definitions page, click Create Definition SQL and select Entry Point:
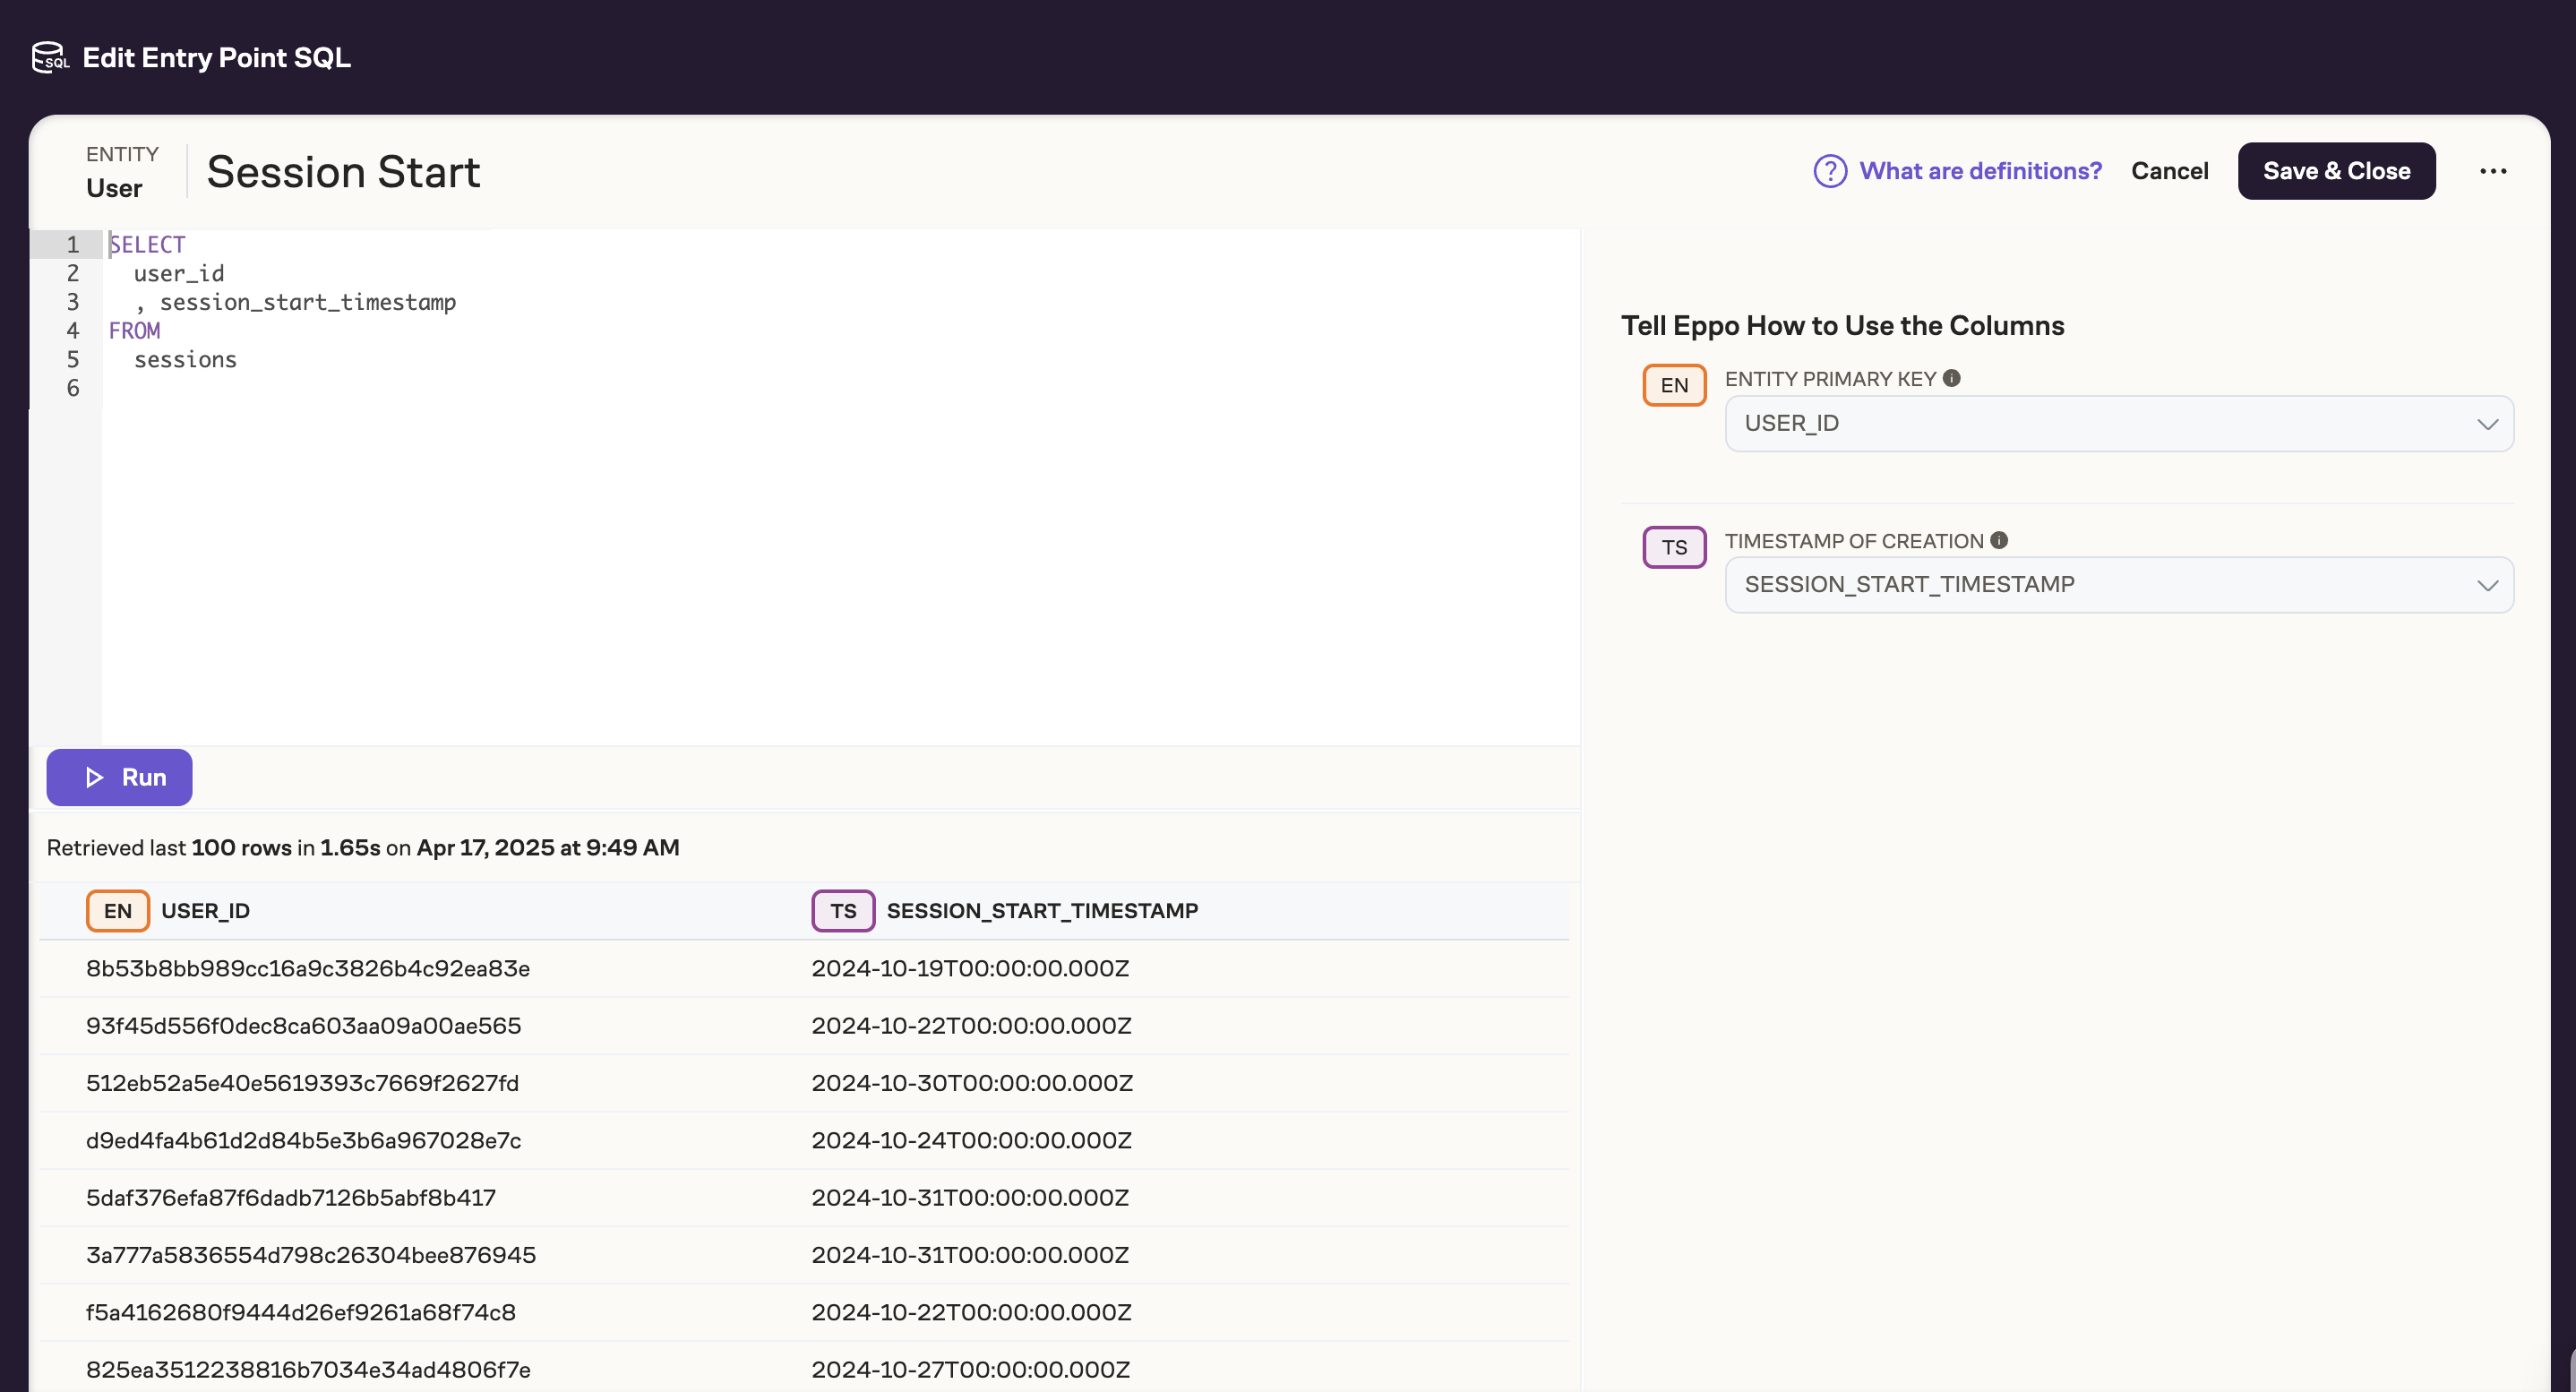
You can now define your Entry Point in SQL. All that this SQL needs to return is a subject key (e.g. user_id) and a timestamp. Map the appropriate columns on the right side panel, and click Save & Close:
2. Setting up a Sample Size Calculation
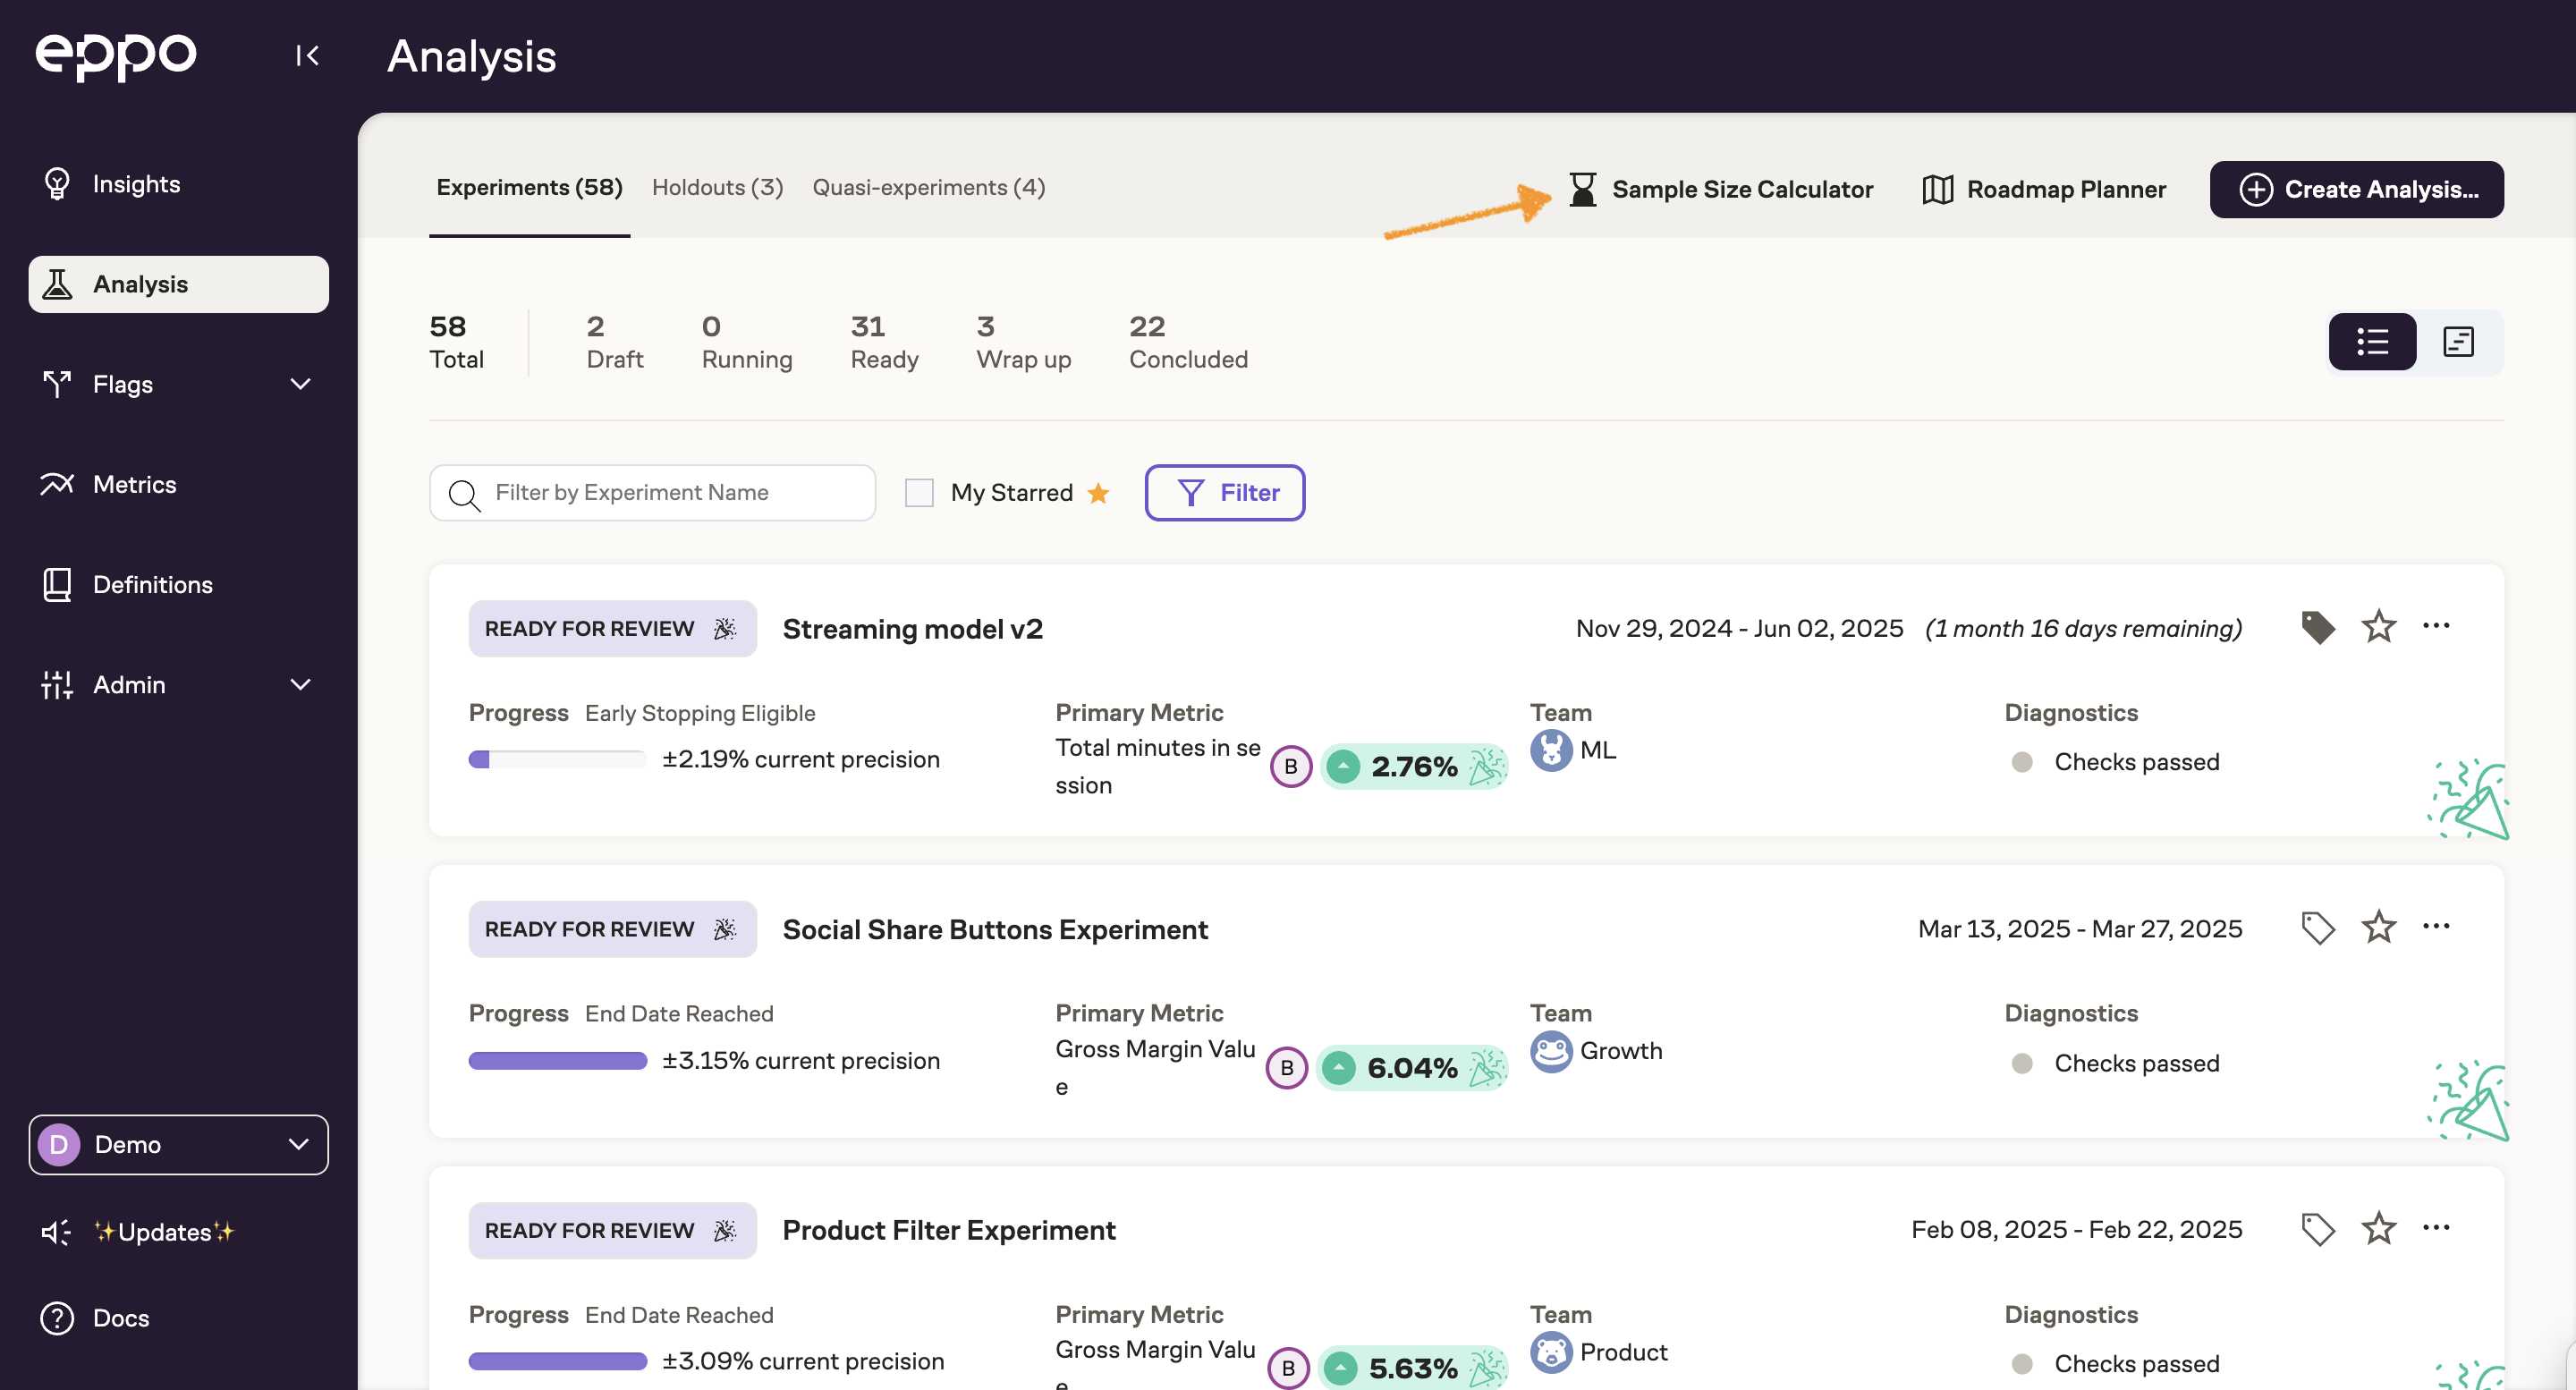
You can now create a sample size calculation by clicking Analysis and then Sample Size Calculator in the top right corner:
To perform a sample size calculation, you'll need to provide the following inputs:
- Entity - On what type of subject are you running your experiment? User, cookie, etc.
- Entry Point - The moment in your user journey on which you're interested in experimenting.
- Name - The name of your sample size calculation.
- Metrics - The metrics you're interested in measuring.
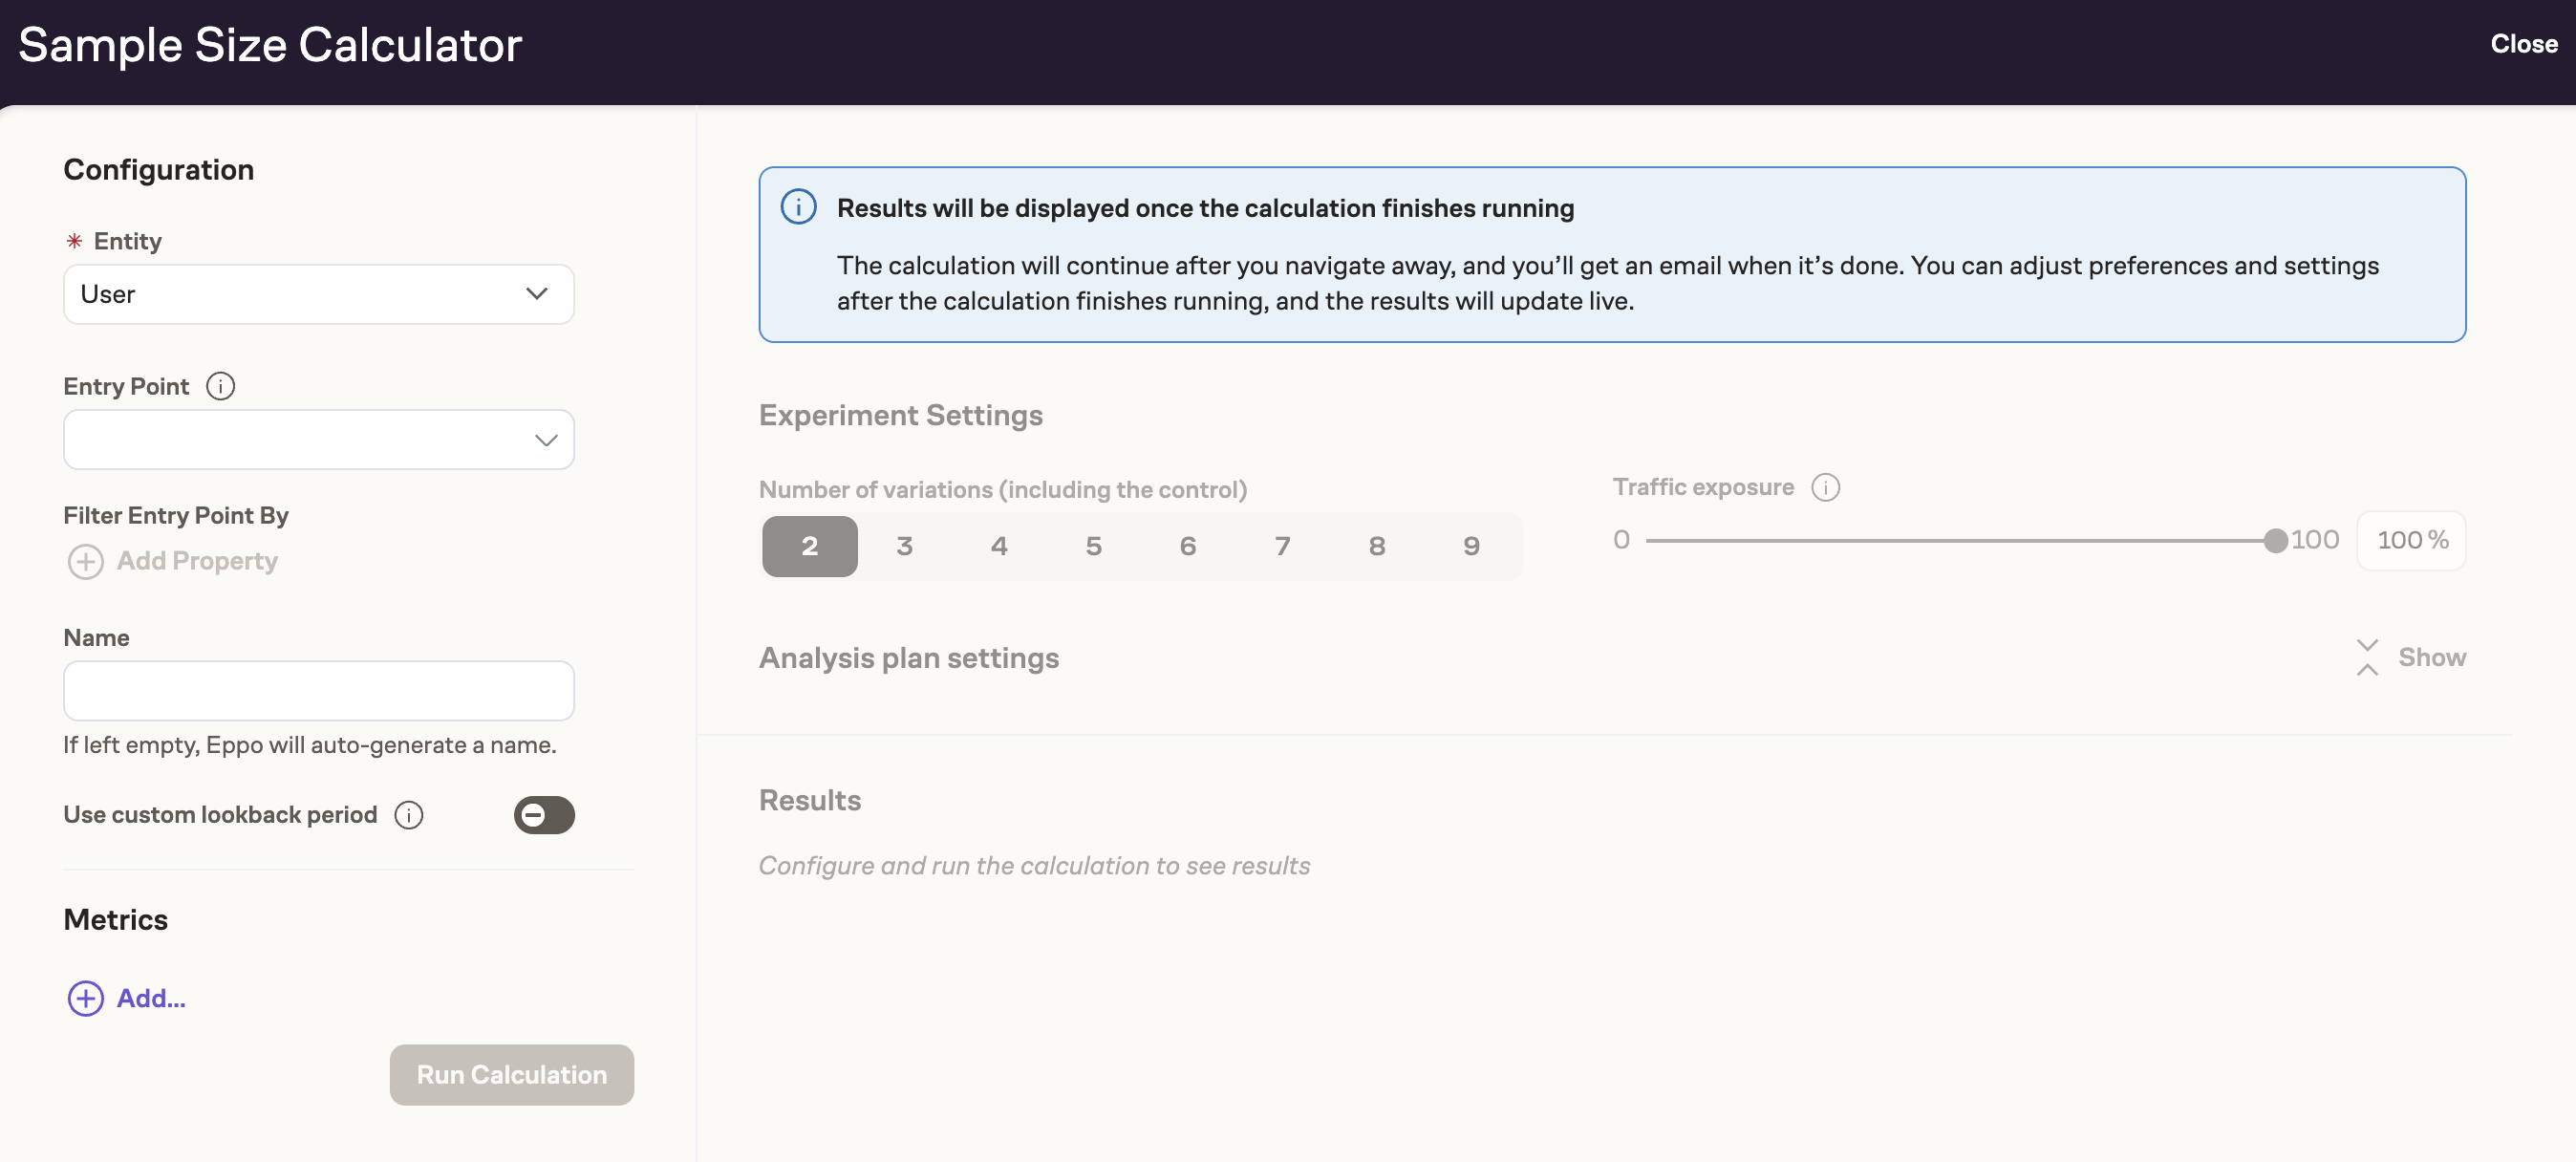
Once you've provided these inputs, click Run Calculate to kick off the sample size calculation.
3. Interpreting Results
Once the calculation completes, you'll be able to see the minimum detectable effect (MDE) for each metric at different experiment durations:
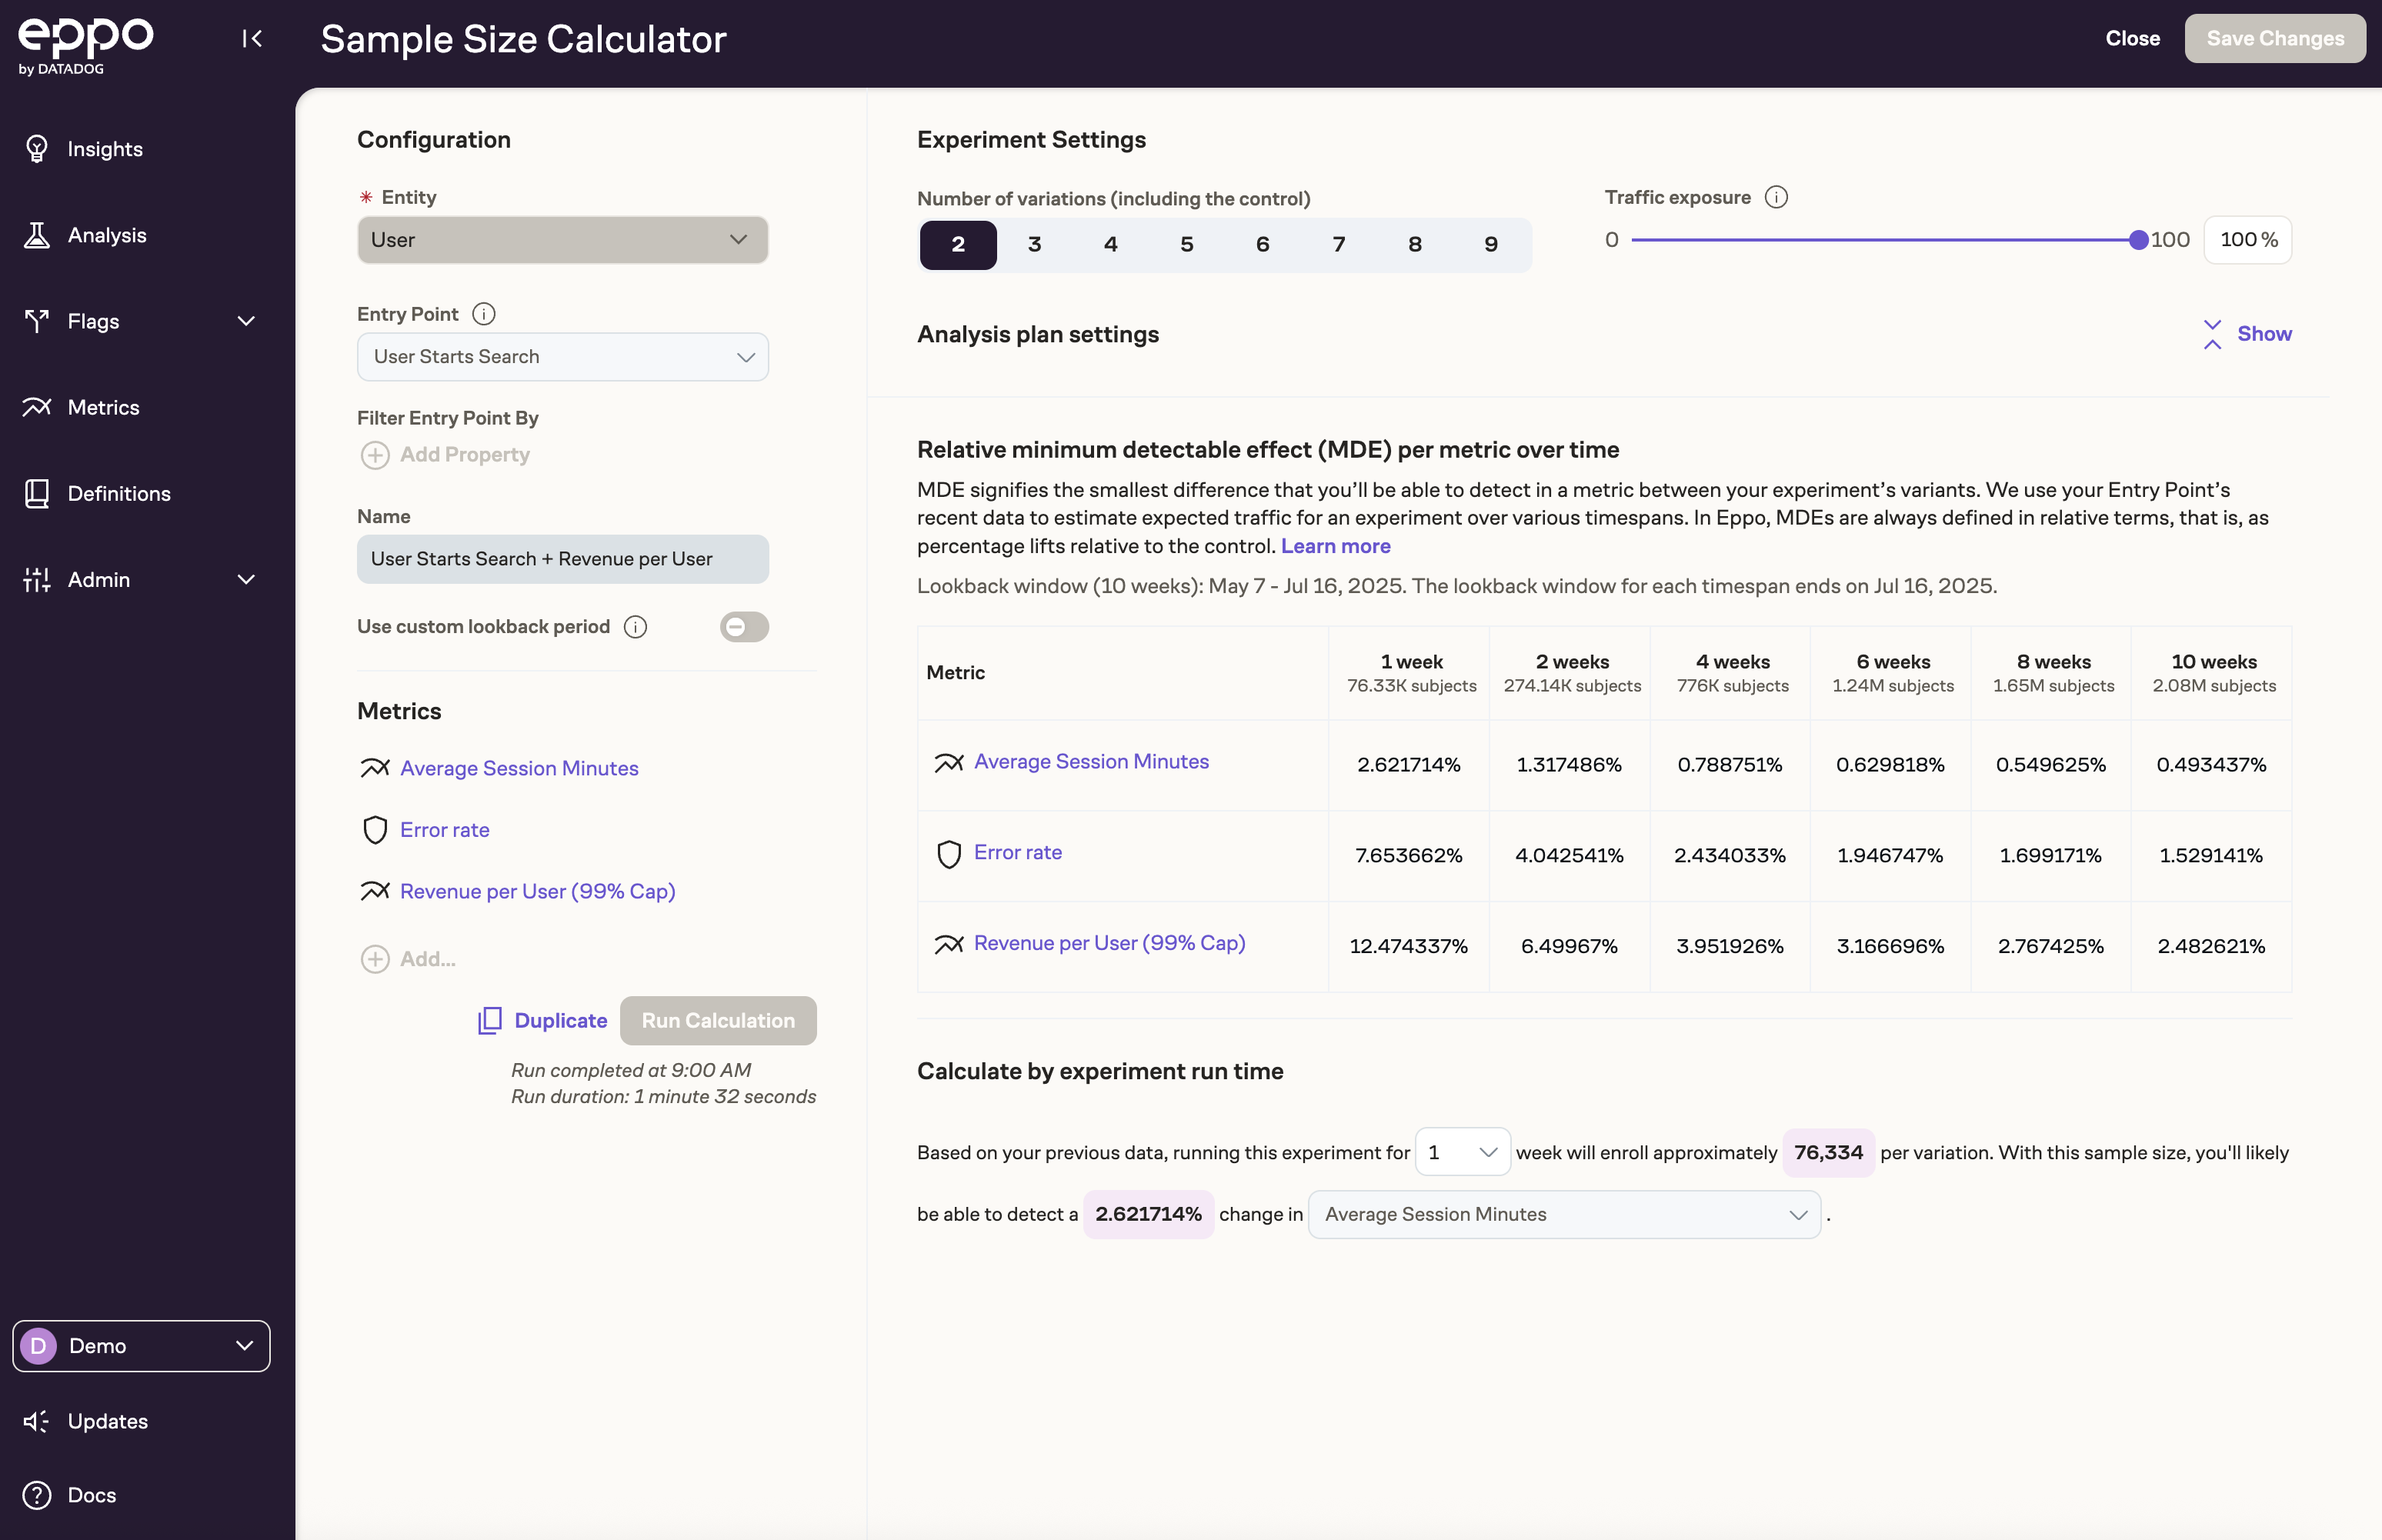
The table on the right can be used to understand what size signal we'll be able to detect at different timeframes. For instance, if we run a test for 4 weeks, we expect to be able to measure a 3.7% lift in revenue per user, and a 1.3% lift in average session minutes.
Under Experiment Settings you can set different variant counts and traffic exposures. You can also test advanced analysis settings such as confidence interval methodology, confidence level, and statistical power. To learn more about Eppo's statistics engine and these advanced settings, see the statistics section of the docs.
As you change the number of variants, traffic exposure, and any other advanced settings, you'll be able to see the minimum detectable effect of each metric change in real time.
Next steps
This page provided a quick walkthrough of how to size an experiment. If you're interested in learning more about how to size experiments, we recommend exploring the full sample size calculator docs.
If you plan on running many experiments on the entry point that you used in the sizing exercise above, you can create an Experiment Protocol based on the metrics and statistical settings used in the calculation. To get started, see the next quickstart guide on creating an experiment protocol.