Running your first Contextual Bandit
This 10-minute guide will walk through configuring and running your first Contextual Bandit with Eppo. Note that Contextual Bandits leverage the Eppo SDK and this guide will walk through SDK setup.
In order to optimize a Bandit, you must have created your first metric.
1. Generate an SDK key
From the Configuration section, navigate to the SDK keys tab. Here you can generate keys for both production and testing.
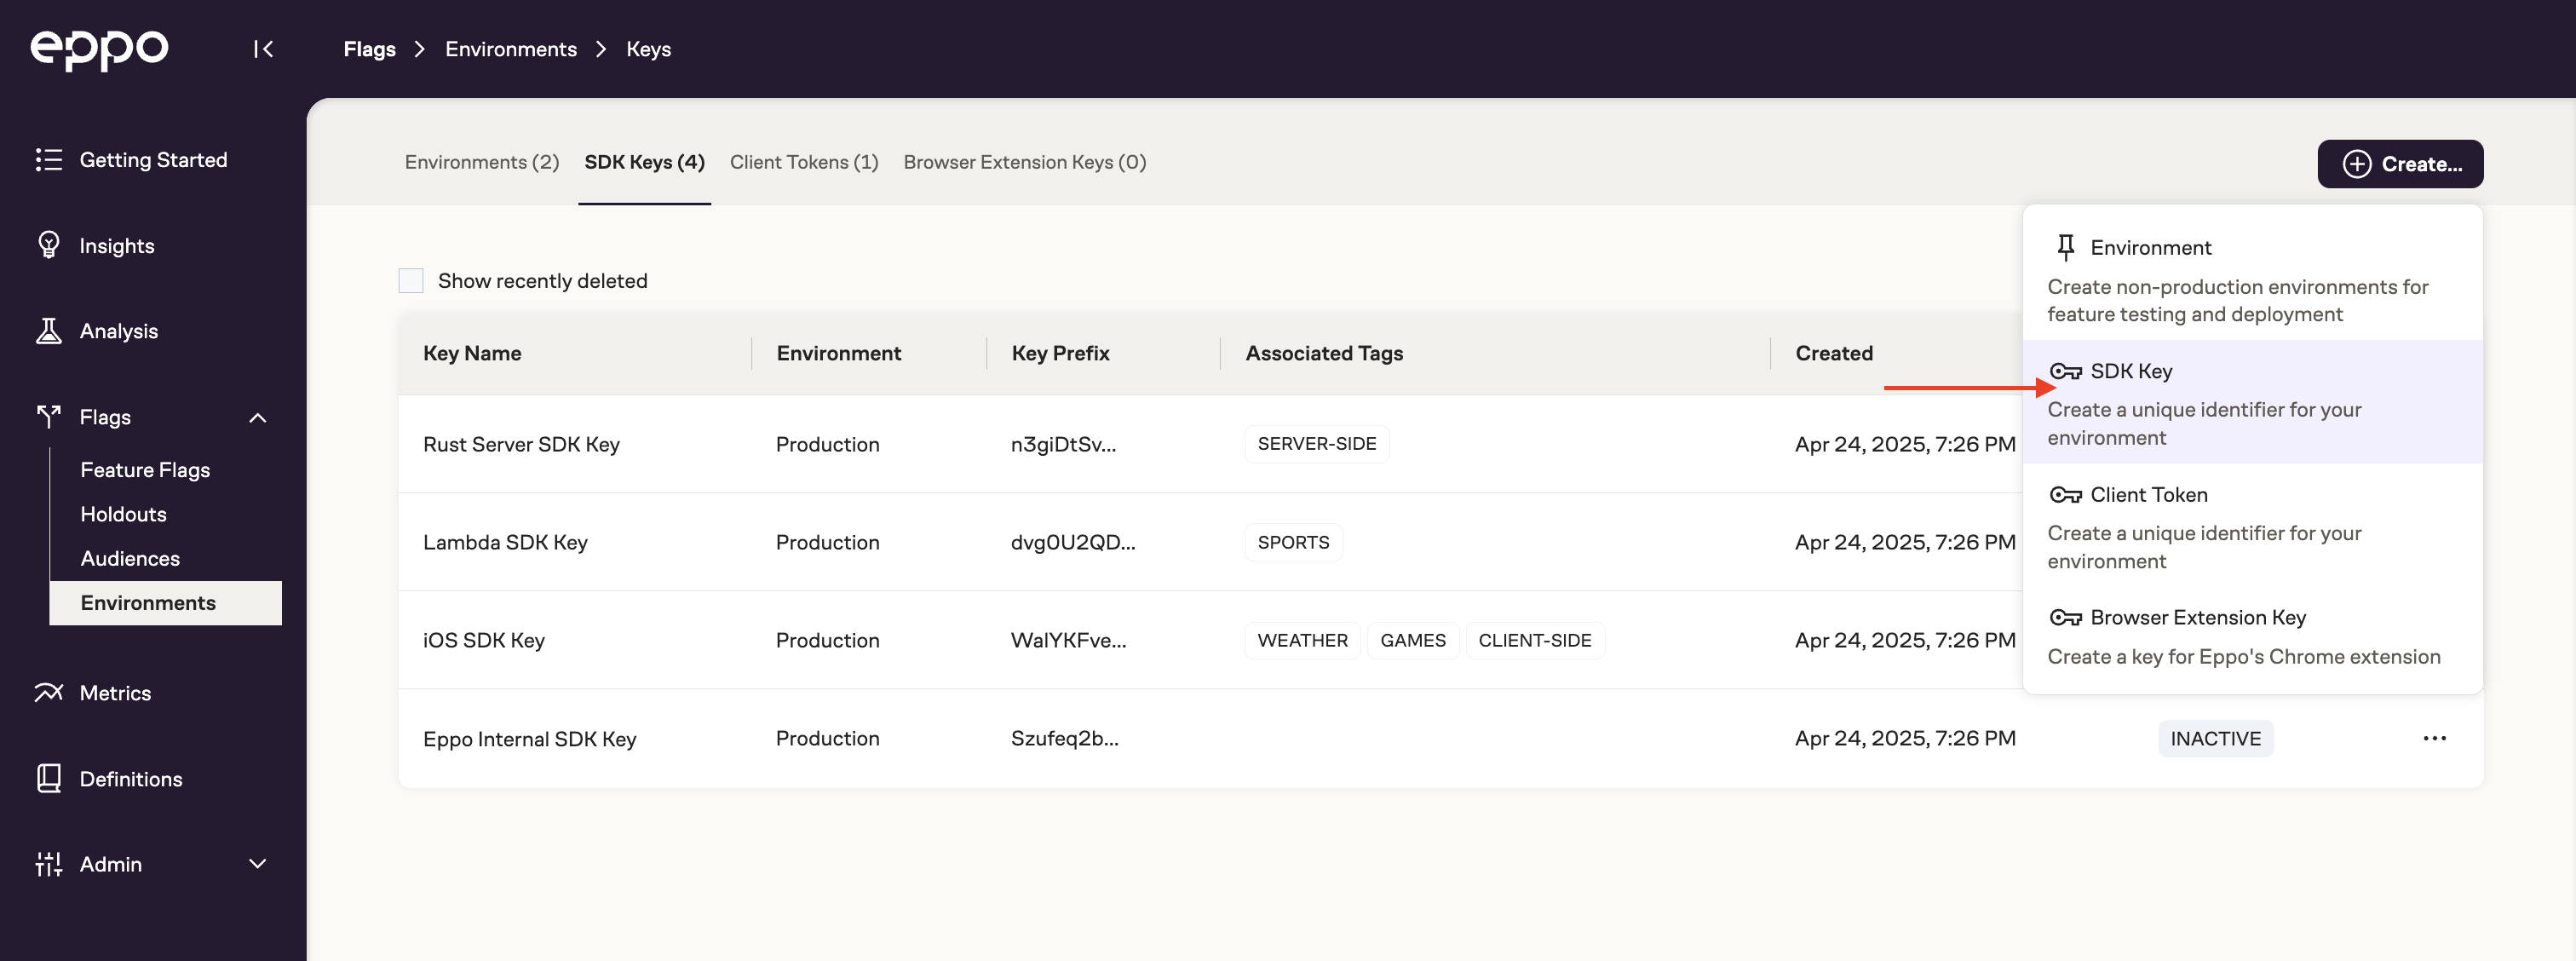
For now, create a Test environment SDK key by using the "New SDK Key" button. Give the key a name and select "Test" for the Environment.
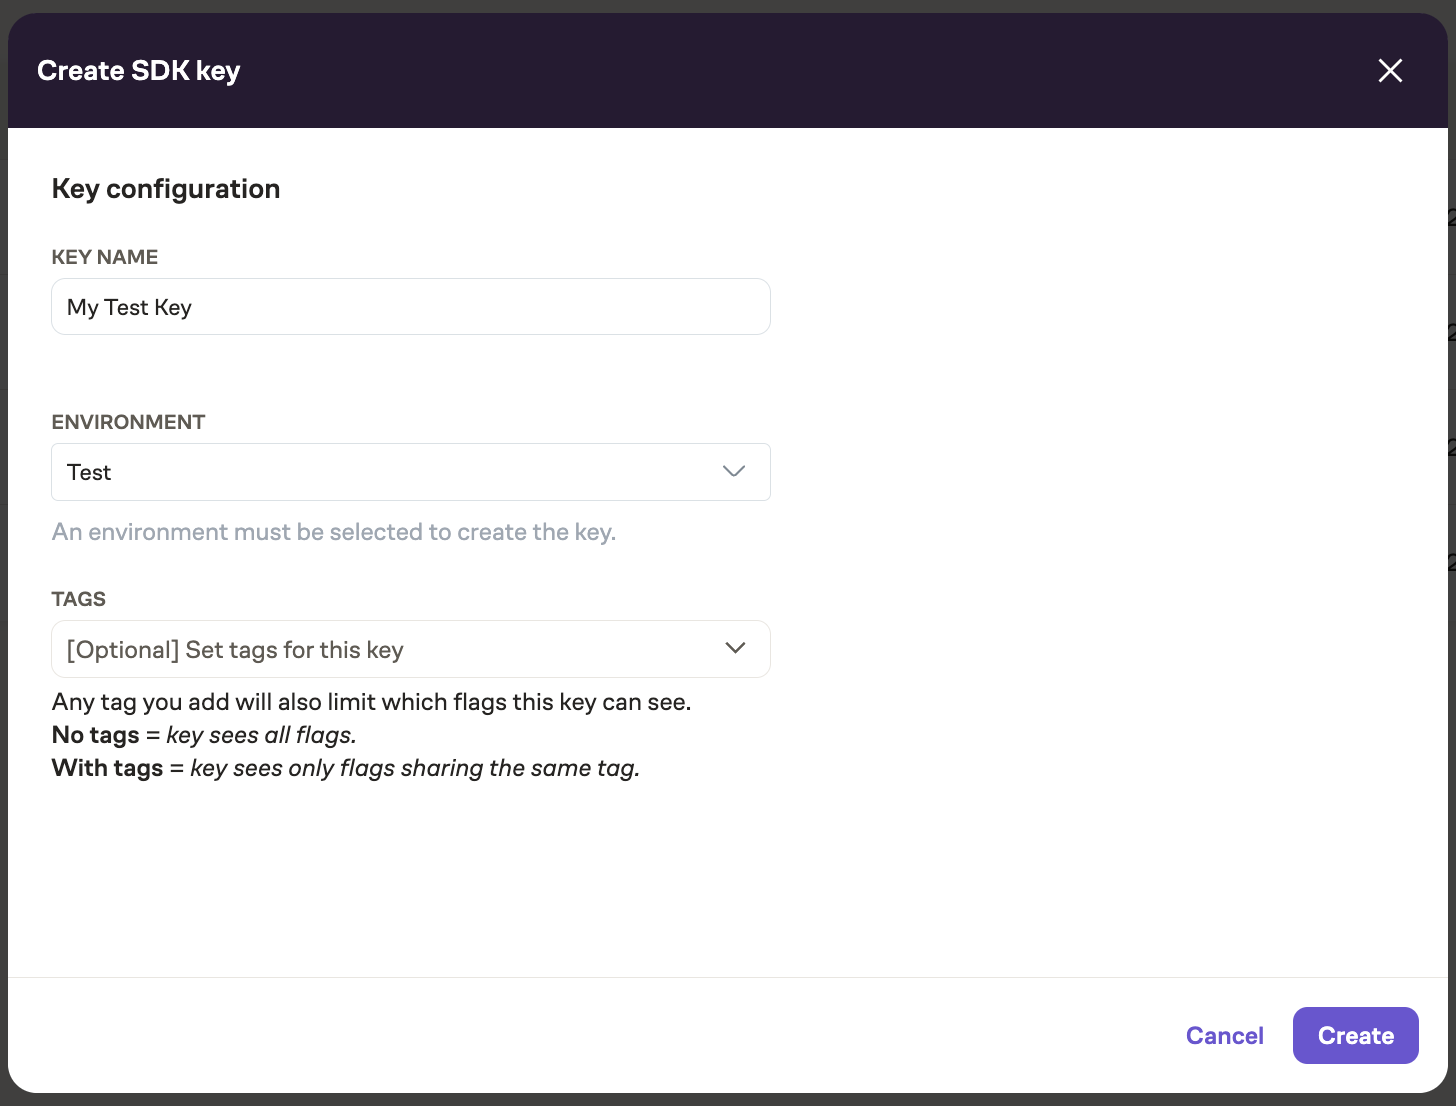
Store the SDK key securely; it is not possible to view it after closing the modal. However, generating a new key is easy in case you do lose it.
2. Connect a logging function to the Eppo SDK
Eppo leverages your existing event logging infrastructure to track experiment assignments. Whether you use a third-party system to log events to the data warehouse or have an internally built solution, you'll simply pass in a logging function when initializing the SDK.
The Assignment event logging page has more information on how to set up logging using different logging tools.
This logger should write to a table with columns with the following names (they can be in any order):
- timestamp - Timestamp of the bandit assignment
- bandit_key - The key (unique identifier) of the bandit
- subject - The unique identifier for the subject being assigned
- subject_numeric_attributes - Mapping of attribute names to numbers, in JSON format, for the numeric-valued attributes of the subject
- subject_categorical_attributes - Mapping of attribute names to strings, in JSON format, for the non-numeric-valued attributes of the subject
- action - The action assigned by the bandit
- action_numeric_attributes - Mapping of attribute names to numbers, in JSON format, for the numeric-valued attributes of the assigned action
- action_categorical_attributes - Mapping of attribute names to strings, in JSON format, for the non-numeric-valued attributes of the assigned action
Additional information that is provided to the logger that can optionally--but is recommended--be logged includes:
- feature_flag - The key of the feature flag corresponding to the bandit
- model_version - The current version identifier of the model used to determine action weights
- action_probability - The probability (weight) given to the assigned action at the time of assignment
- optimality_gap - The difference between the score of the selected action and the highest-scored action
- metadata - Any additional freeform metadata, in JSON format, such as the version of the SDK
Below is an example bandit assignment logger for the Java SDK, defined when building the SDK client. This example writes directly to Snowflake. This is illustrative and not recommended practice. Refer to our assignment logging page for recommended options.
.banditLogger(logData -> {
    String sql = "INSERT INTO bandit_assignments " +
      "(timestamp, experiment, bandit_key, subject," +
      " action, action_probability, model_version," +
      " subject_numeric_attributes, subject_categorical_attributes," +
      " action_numeric_attributes, action_categorical_attributes) " +
      "SELECT ?, ?, ?, ?," +
      " ?, ?, ?," +
      " parse_json(?), parse_json(?)," +
      " parse_json(?), parse_json(?)";

    try (PreparedStatement statement = snowflakeConnection.prepareStatement(sql)) {
      statement.setTimestamp(1, new Timestamp(logData.timestamp.getTime()));
      statement.setString(2, logData.experiment);
      statement.setString(3, logData.banditKey);
      statement.setString(4, logData.subject);
      statement.setString(5, logData.action);
      statement.setDouble(6, logData.actionProbability);
      statement.setString(7, logData.modelVersion);
      if (logData.subjectNumericAttributes == null) {
        statement.setNull(8, Types.NULL);
      } else {
        statement.setString(8, EppoAttributes.serializeNonNullAttributesToJSONString(logData.subjectNumericAttributes));
      }
      if (logData.subjectCategoricalAttributes == null) {
        statement.setNull(9, Types.NULL);
      } else {
        statement.setString(9, EppoAttributes.serializeNonNullAttributesToJSONString(logData.subjectCategoricalAttributes));
      }
      if (logData.actionNumericAttributes == null) {
        statement.setNull(10, Types.NULL);
      } else {
        statement.setString(10, EppoAttributes.serializeNonNullAttributesToJSONString(logData.actionNumericAttributes));
      }
      if (logData.actionNumericAttributes == null) {
        statement.setNull(11, Types.NULL);
      } else {
        statement.setString(11, EppoAttributes.serializeNonNullAttributesToJSONString(logData.actionCategoricalAttributes));
      }

      statement.executeUpdate();
    } catch (SQLException e) {
      throw new RuntimeException("Unable to log bandit assignment "+e.getMessage(), e);
    }
})
Note the name of this table in your data warehouse. We will use it in the next step.
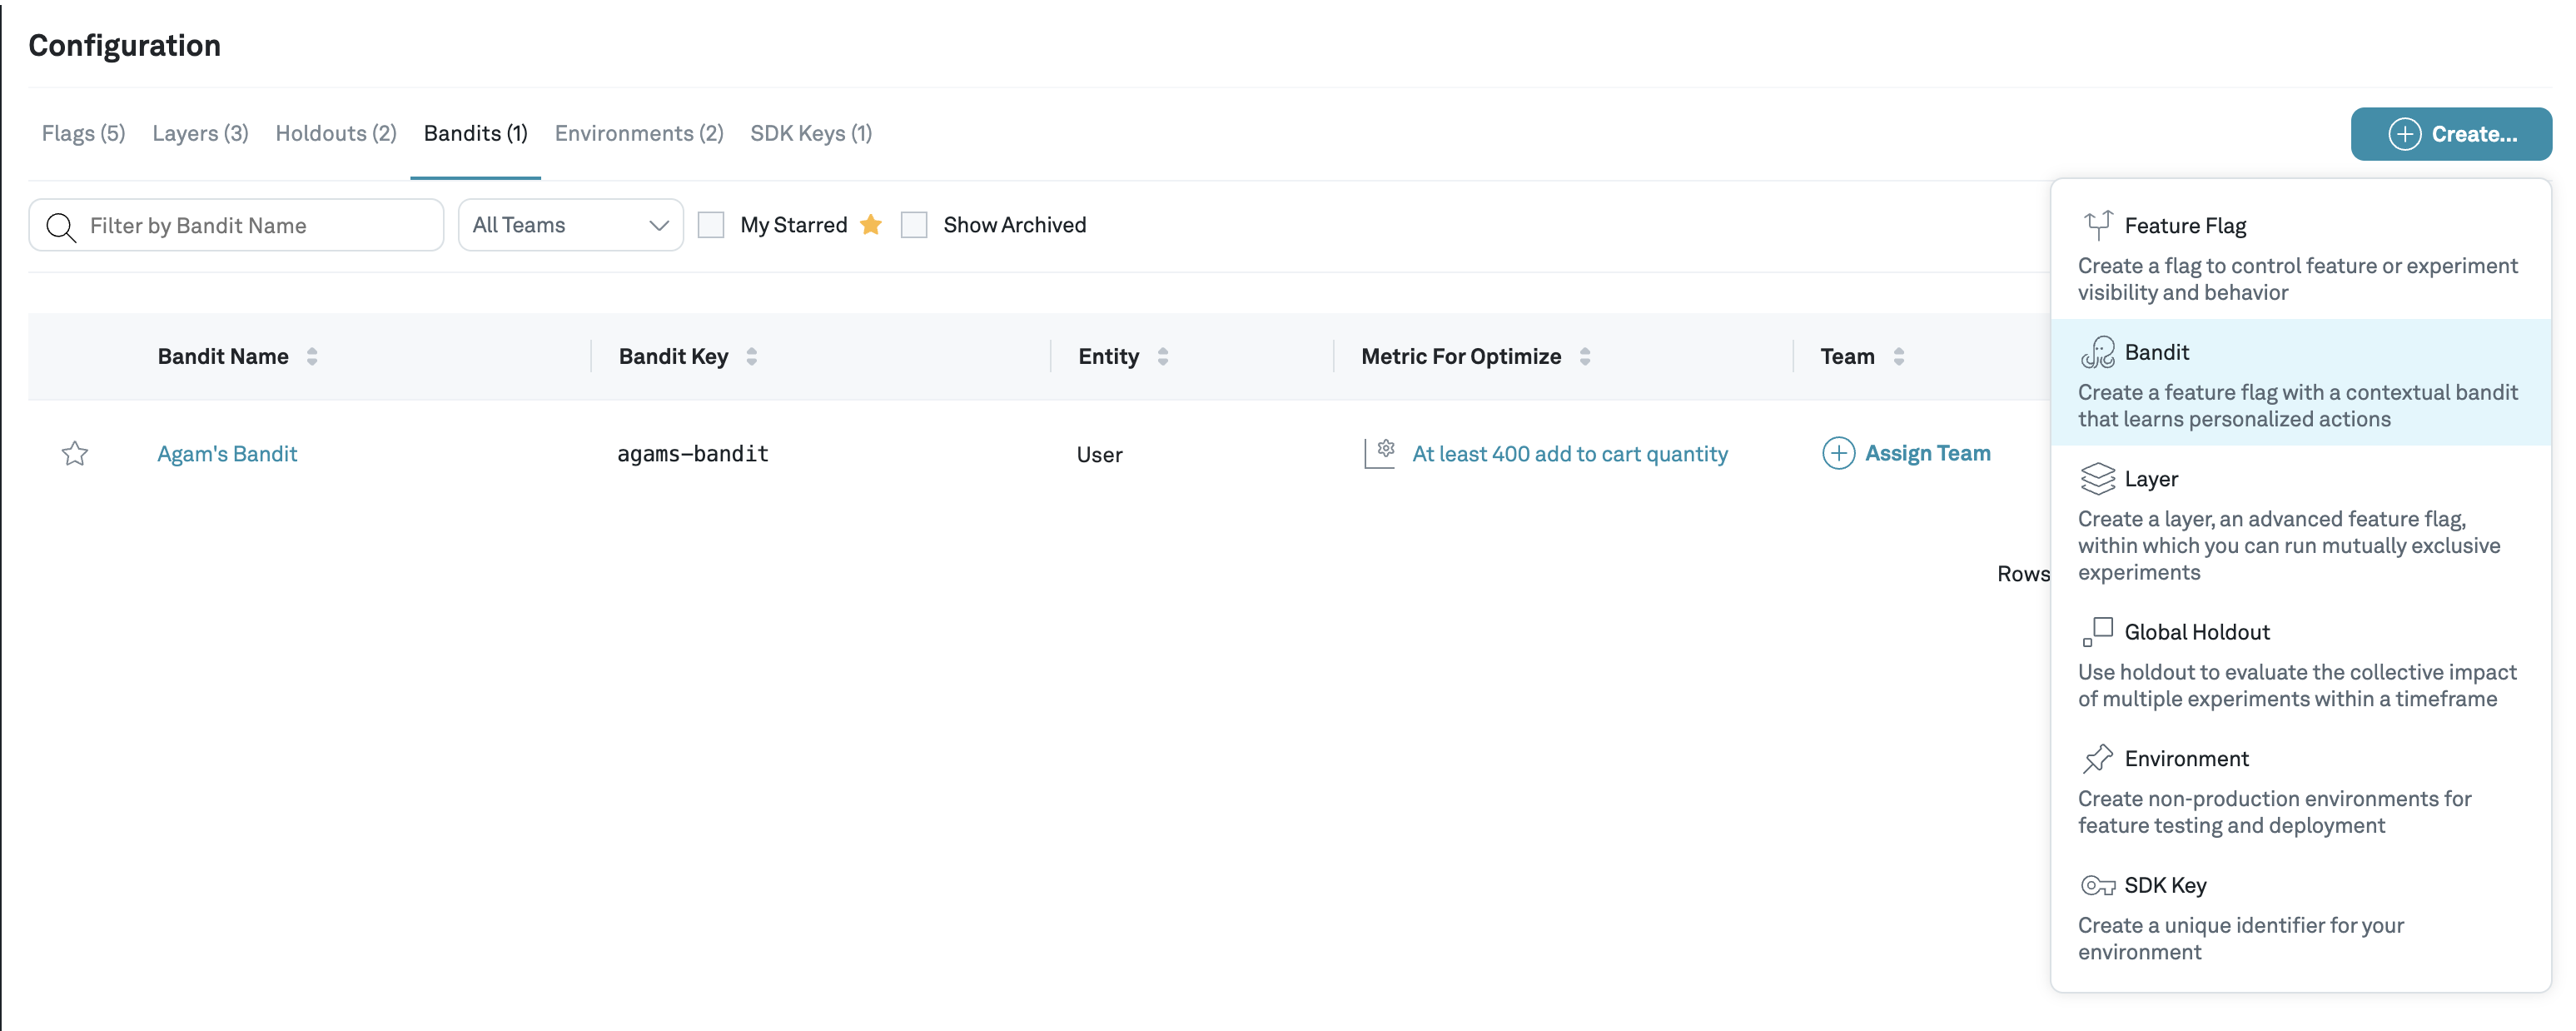
3. Create a bandit
Start by creating a Bandit for the new page from the "Create" button on in the Configuration section:
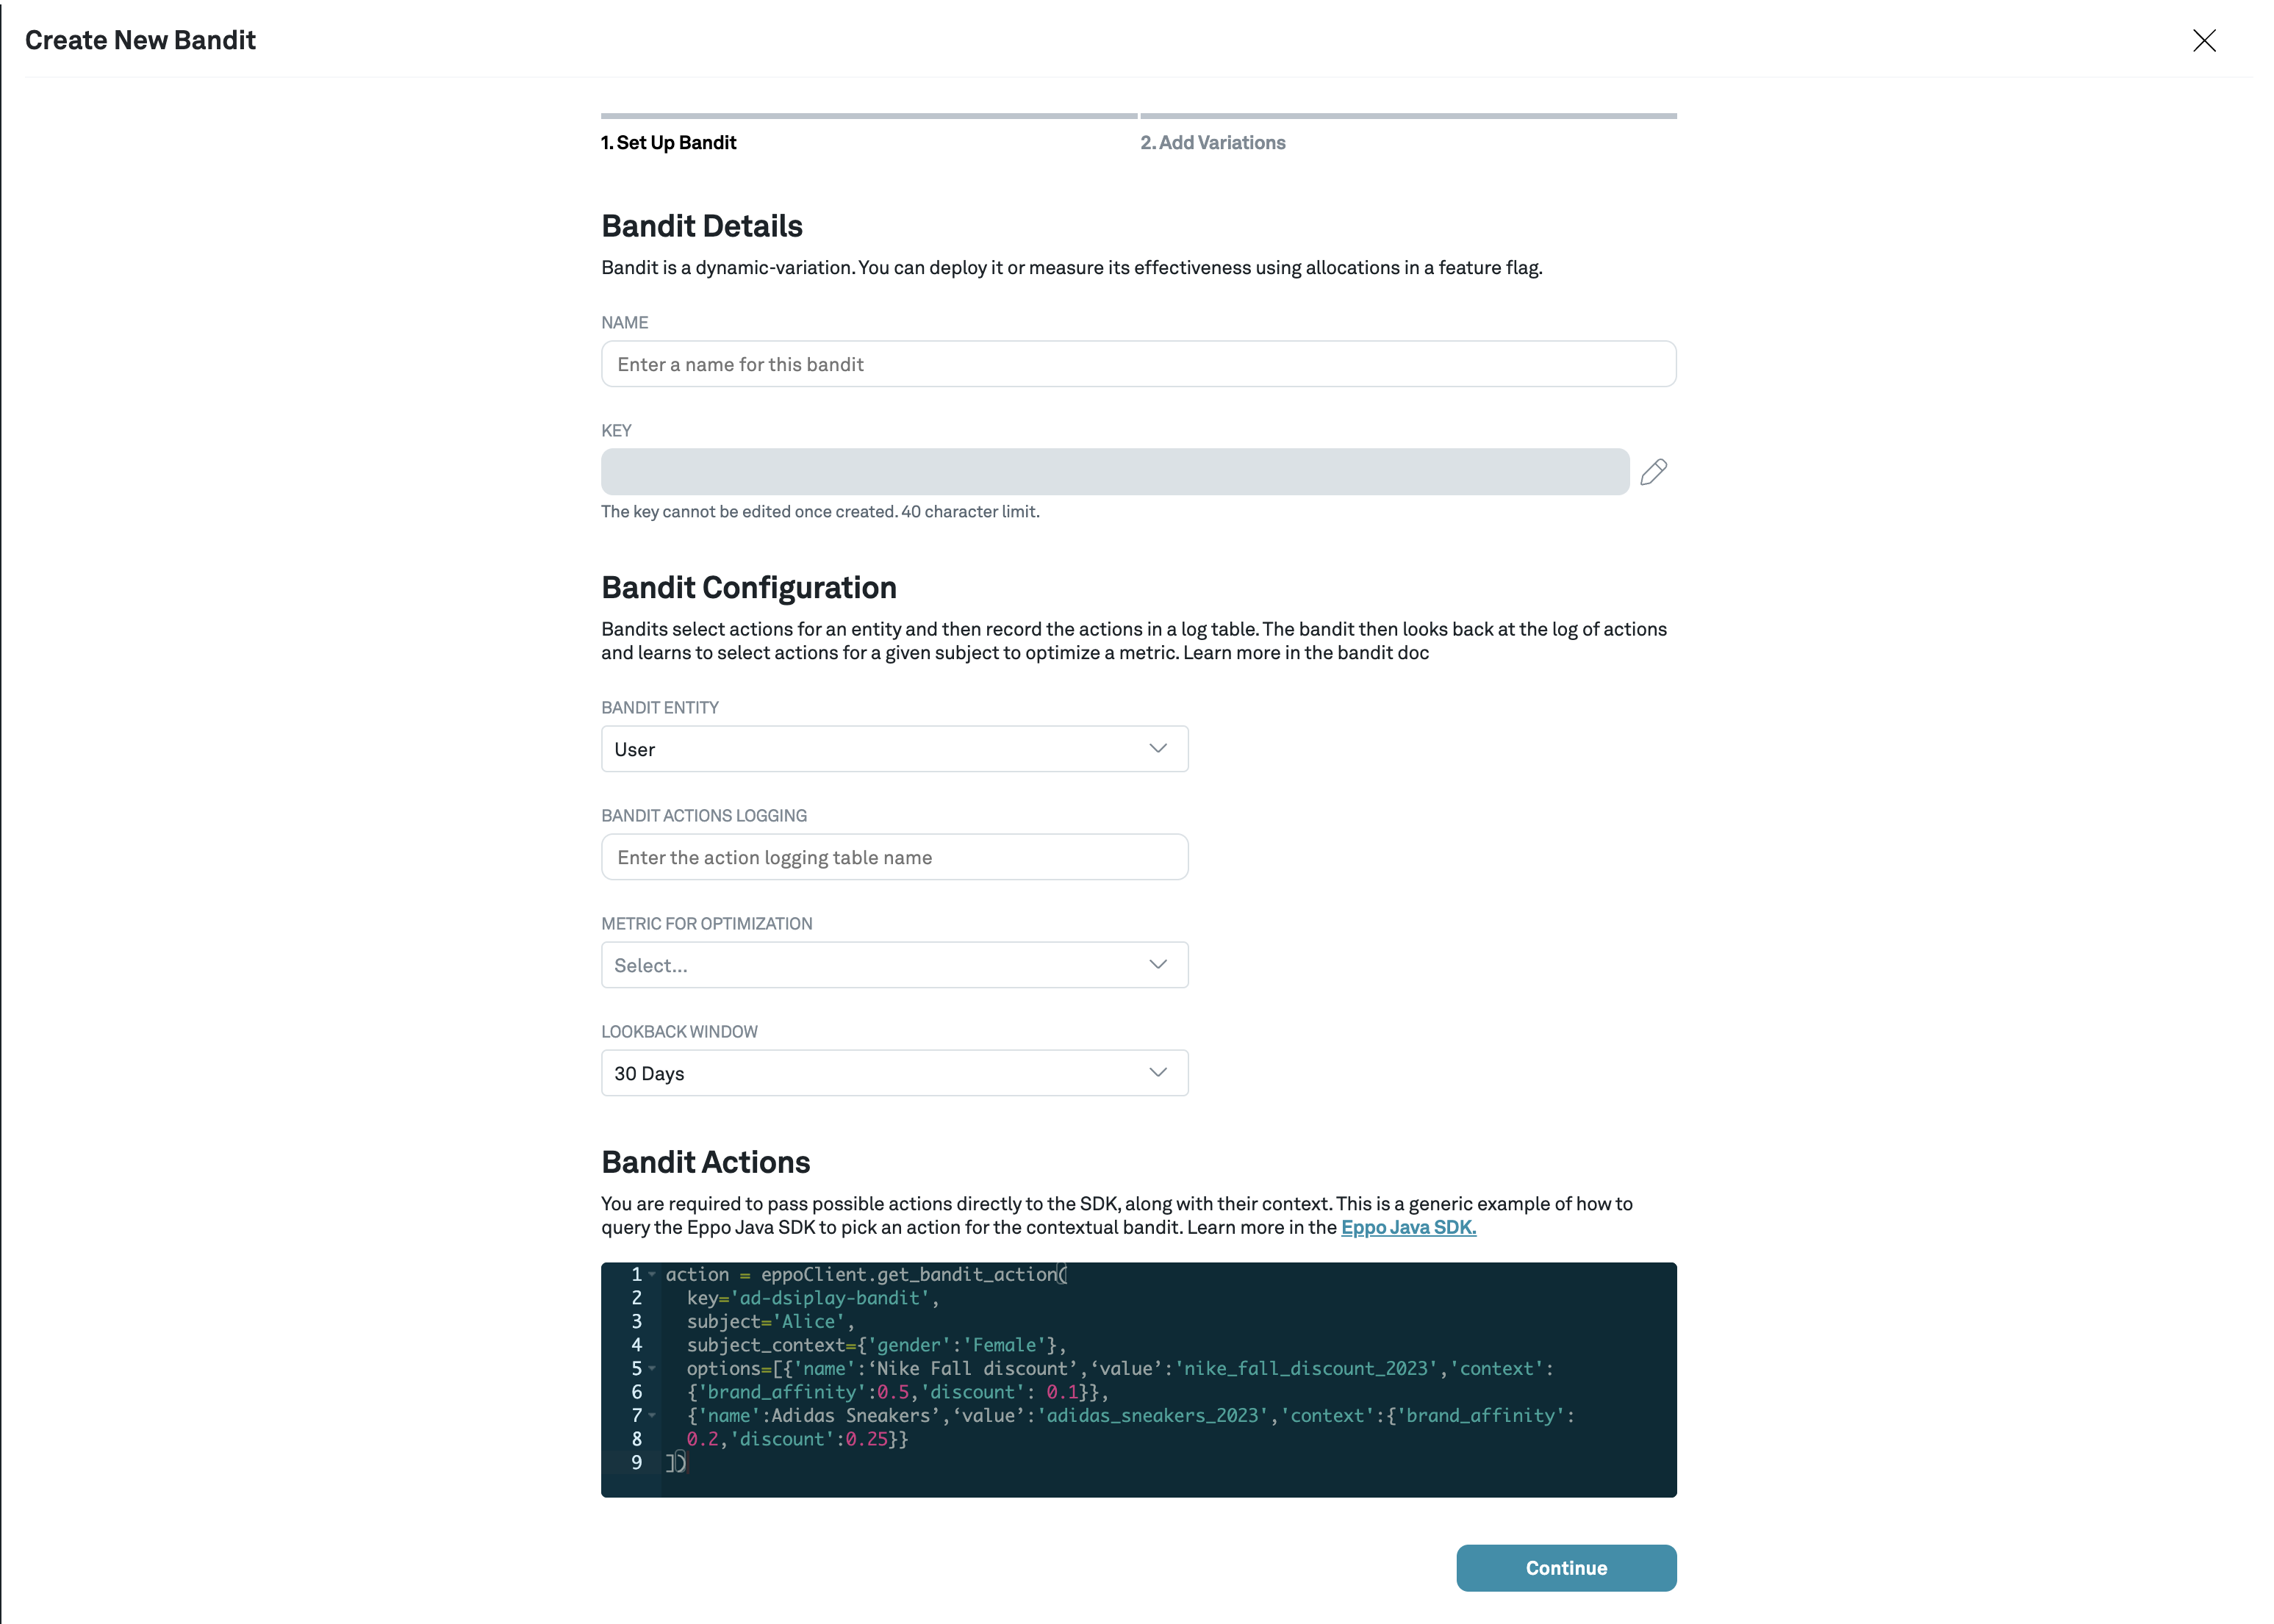
Give the Bandit a descriptive human readable name. Select the entity and input the name of table in your warehouse where you are logging bandit actions from Step 2. Choose a metric to optimize the Bandit for and how long you want the lookback window to be. The lookback window defines the time period the Bandit looks for changes in the optimization metric for subjects who were assigned.
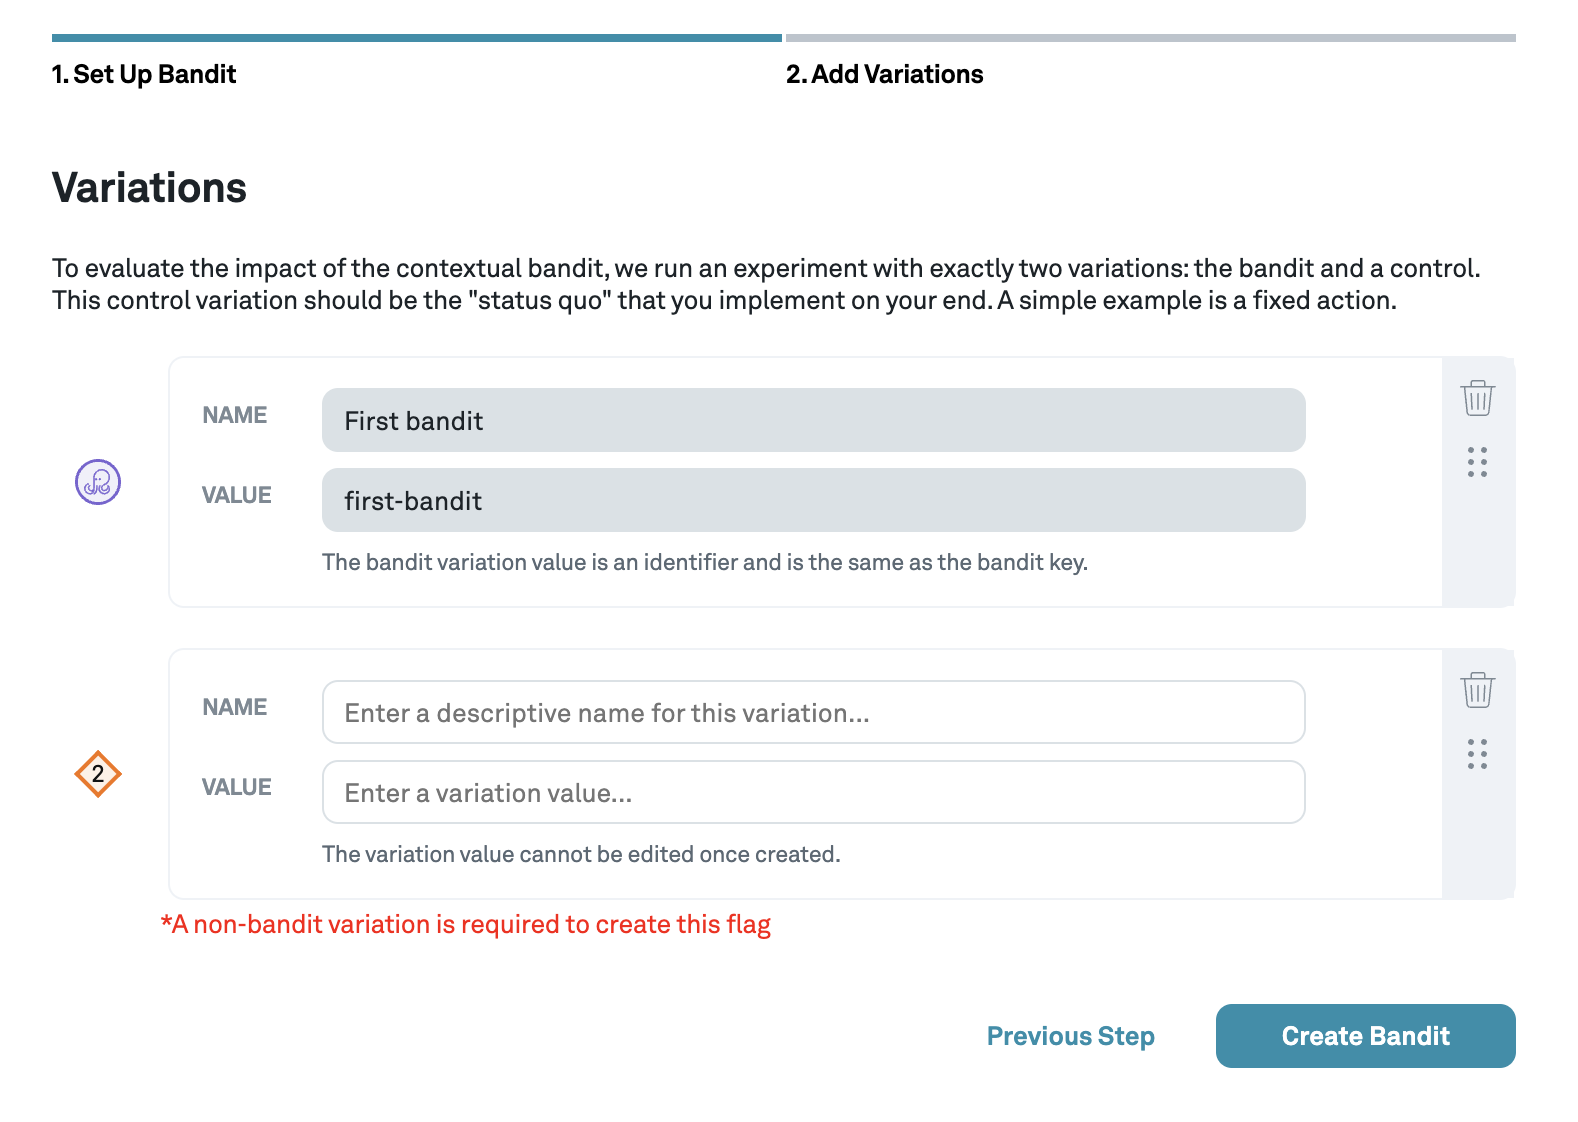
4. Add variations
To evaluate the impact of the Contextual Bandit, we run an experiment with exactly two variations: the bandit and a control. This control variation should be the "status quo" that you implement on your end. A simple example is a fixed action.
5. Initialize the SDK
Choose the Eppo SDK that fits in your stack. You'll need to initialize the SDK in your app and create an Eppo client. Here is an example in Java:
EppoClientConfig config = EppoClientConfig.builder()
        .apiKey("<api-key>")
        .assignmentLogger((data) -> System.out.println(data.toString()))
        .banditLogger((logData) -> System.out.println(data.toString()))
        .build();
EppoClient eppoClient = EppoClient.init(config);
Note, here is where you use the SDK key generated in step 1.
6. Embed the Bandit in your code
Once the SDK is initialized, use getStringAssignment() to check what variation a user should see. When requesting an assignment from a flag with a bandit, the set of actions and their attributes are provided as an additional argument.
In the Java SDK, the call may look like:
// Flag that has a bandit variation
String banditTestFlagKey = "bandit-test";

// Subject information--same as for retrieving simple flag or experiment assignments
String subjectKey = username;
EppoAttributes subjectAttributes = userAttributes;

// Action set for bandits
Map<String, EppoAttributes> actionsWithAttributes = Map.of(
    "dog", new EppoAttributes(Map.of(
    "legs", EppoValue.valueOf(4),
    "size", EppoValue.valueOf("large")
  )),
    "cat", new EppoAttributes(Map.of(
    "legs", EppoValue.valueOf(4),
    "size", EppoValue.valueOf("medium")
  )),
    "bird", new EppoAttributes(Map.of(
    "legs", EppoValue.valueOf(2),
    "size", EppoValue.valueOf("medium")
  )),
    "goldfish", new EppoAttributes(Map.of(
    "legs", EppoValue.valueOf(0),
    "size", EppoValue.valueOf("small")
  ))
);

Optional<String> banditAssignment = eppoClient.getStringAssignment(subjectKey, flagKey, subjectAttributes, actionsWithAttributes);
If the actions don't have attributes for the context, you can simply provide a set of actions without attributes:
Set<String> actions = Set.of("dog", "cat", "bird", "goldfish");

Optional<String> banditAssignment = eppoClient.getStringAssignment(subjectKey, flagKey, subjectAttributes, actions);
Note that the getStringAssignment method in Eppo is deterministic, meaning that it will return the same variant for a given subject (e.g., user) for two consecutive calls. (The variant may change over time as the bandit learns how which variants perform best for different attributes.)
7. Train the Bandit
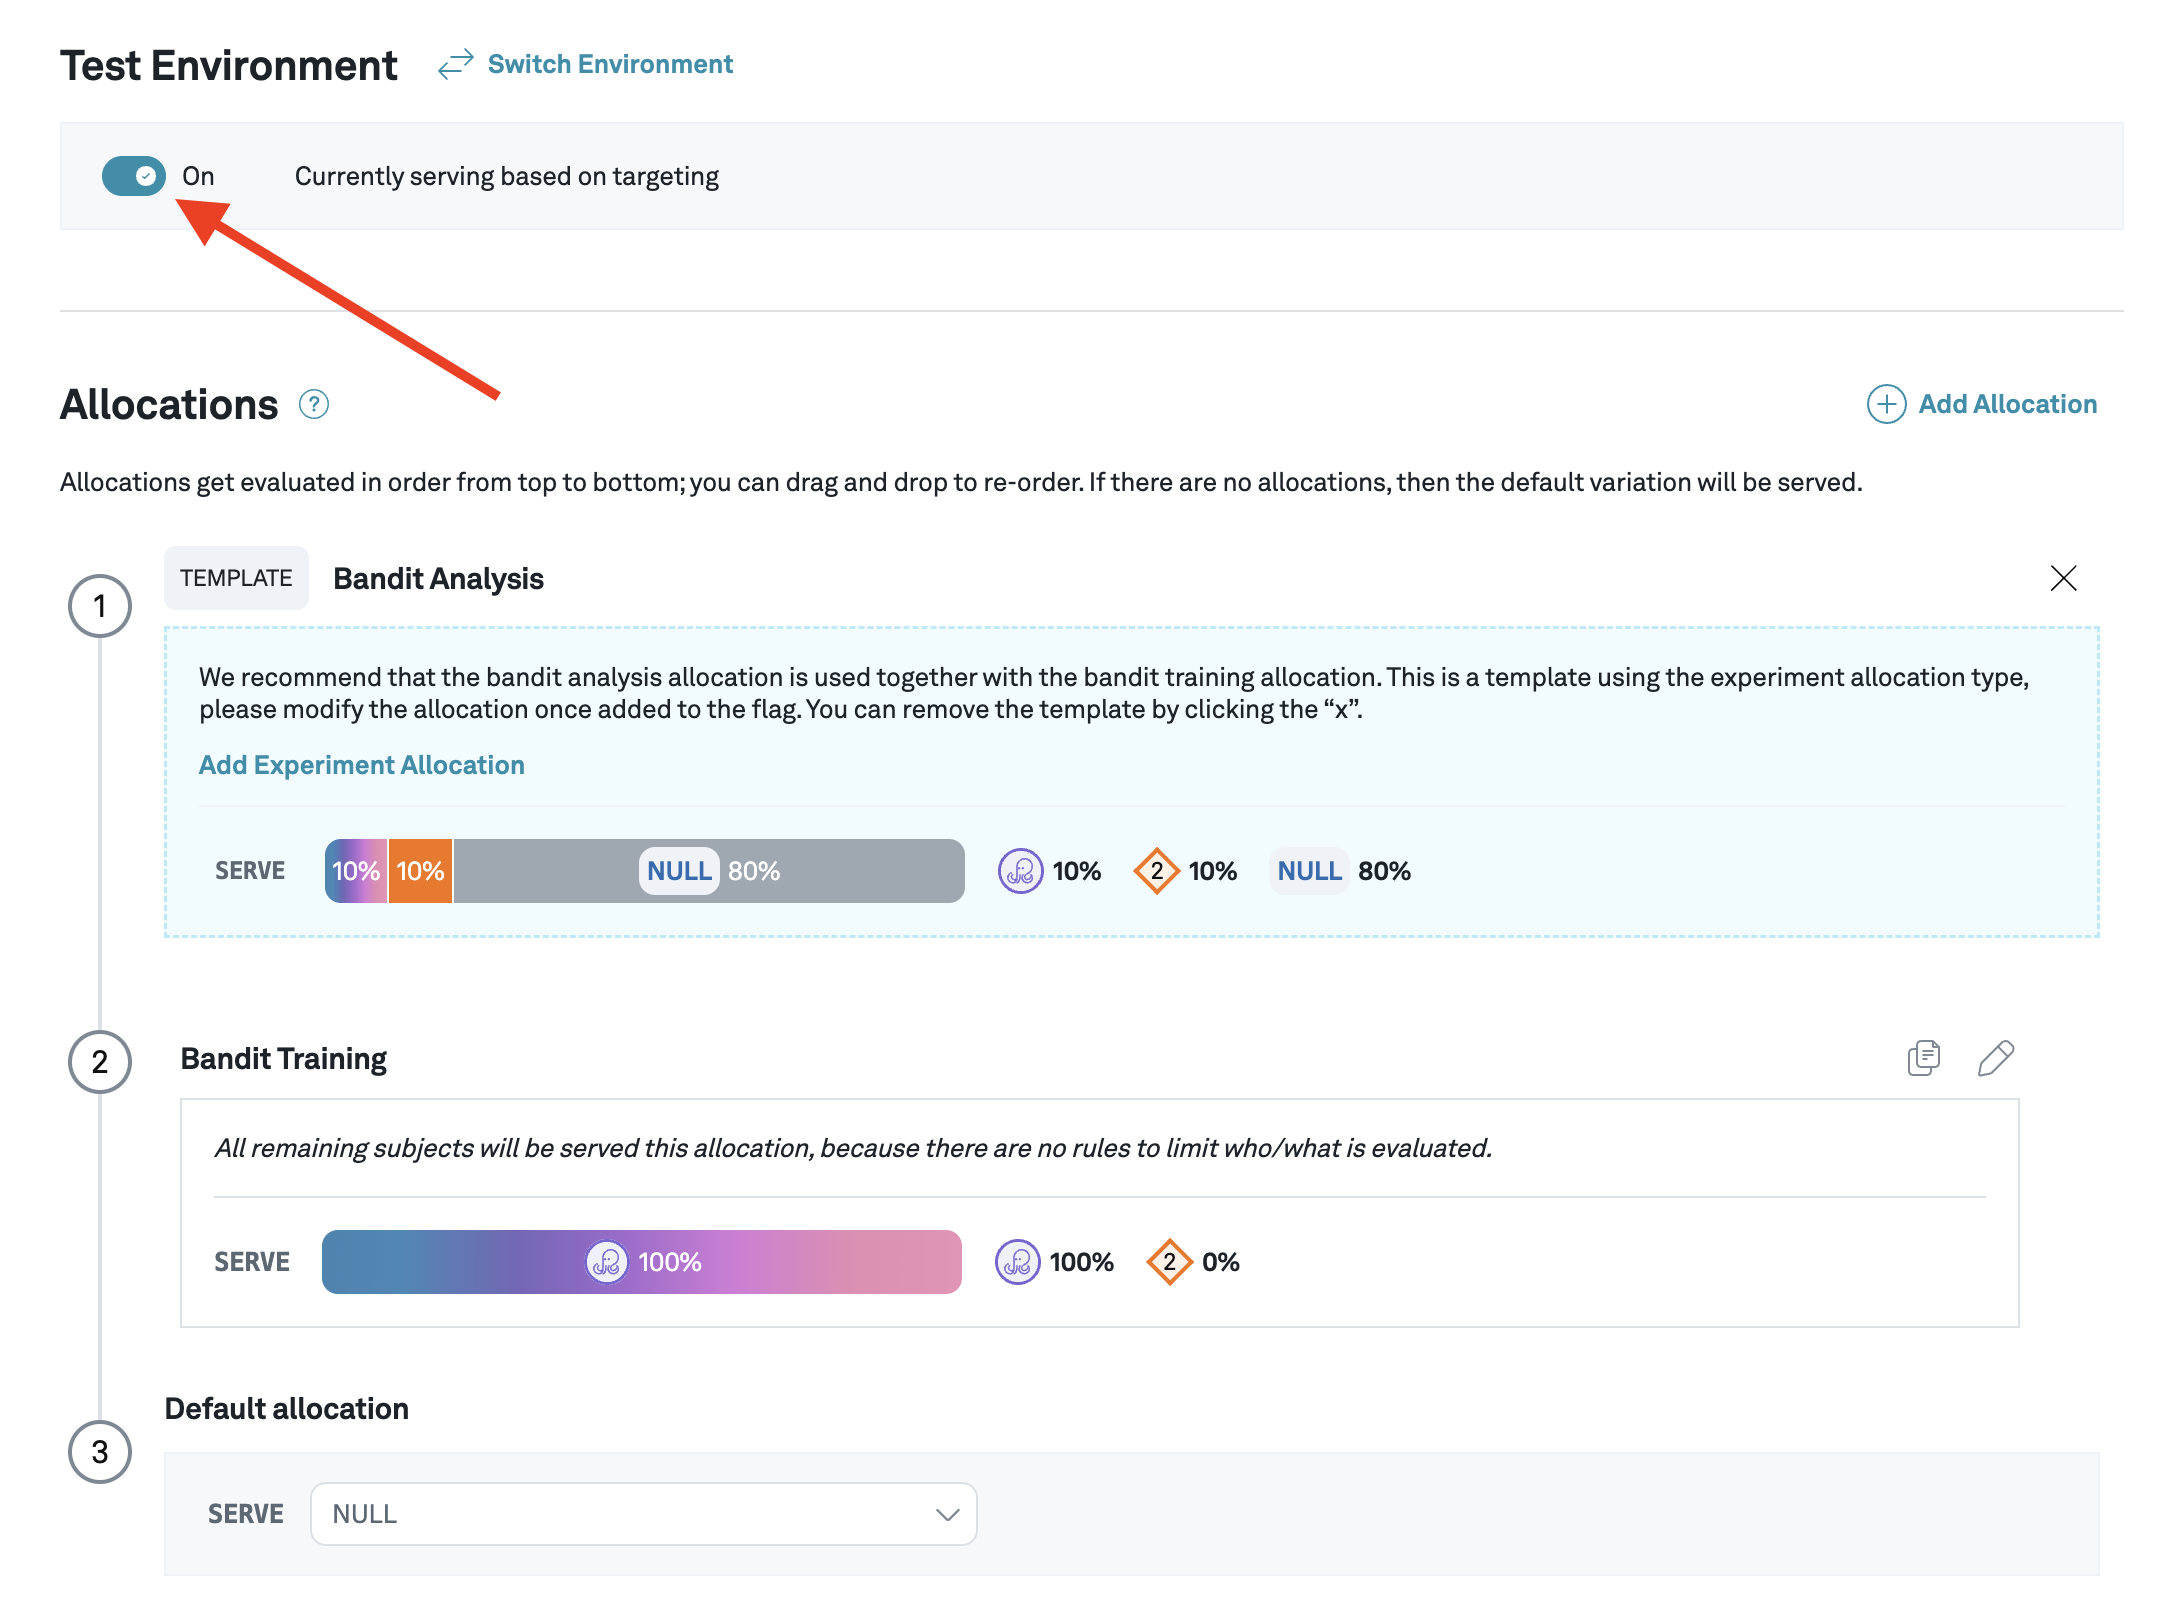
Check that you're in the Test environment
Using the template provided for Bandit Training, click Add Feature Gate Allocation. We are going to serve the Bandit to 100% of traffic in the test environment. Click the Save button to confirm.

8. Turn the Bandit on in Test
To start the Bandit, flip the flag on in the Test environment.
You should now see assignments coming through the Eppo SDK!
9. Deploy to Production
Complete these last steps to deploy your Bandit to Production:
- Create a new SDK key for the production environment from the SDK Keys tab
- In the Test environment, click the
Duplicate allocationbutton next to Bandit Training and choose to copy it to Production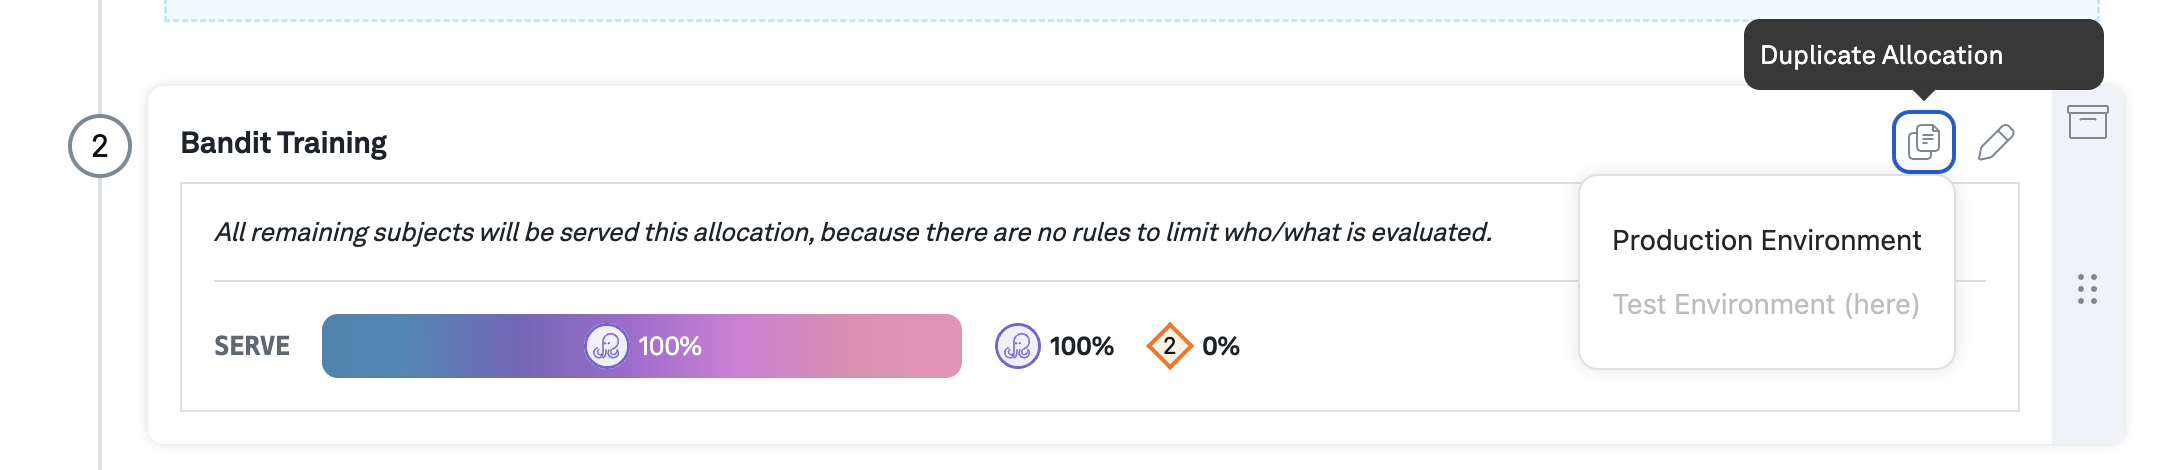
- Switch to the Production environment using the environment switcher
- Using the template provided, click to add an experiment allocation for
Bandit Analysis. This will allow you to measure the impact of your Bandit on a small percentage of traffic.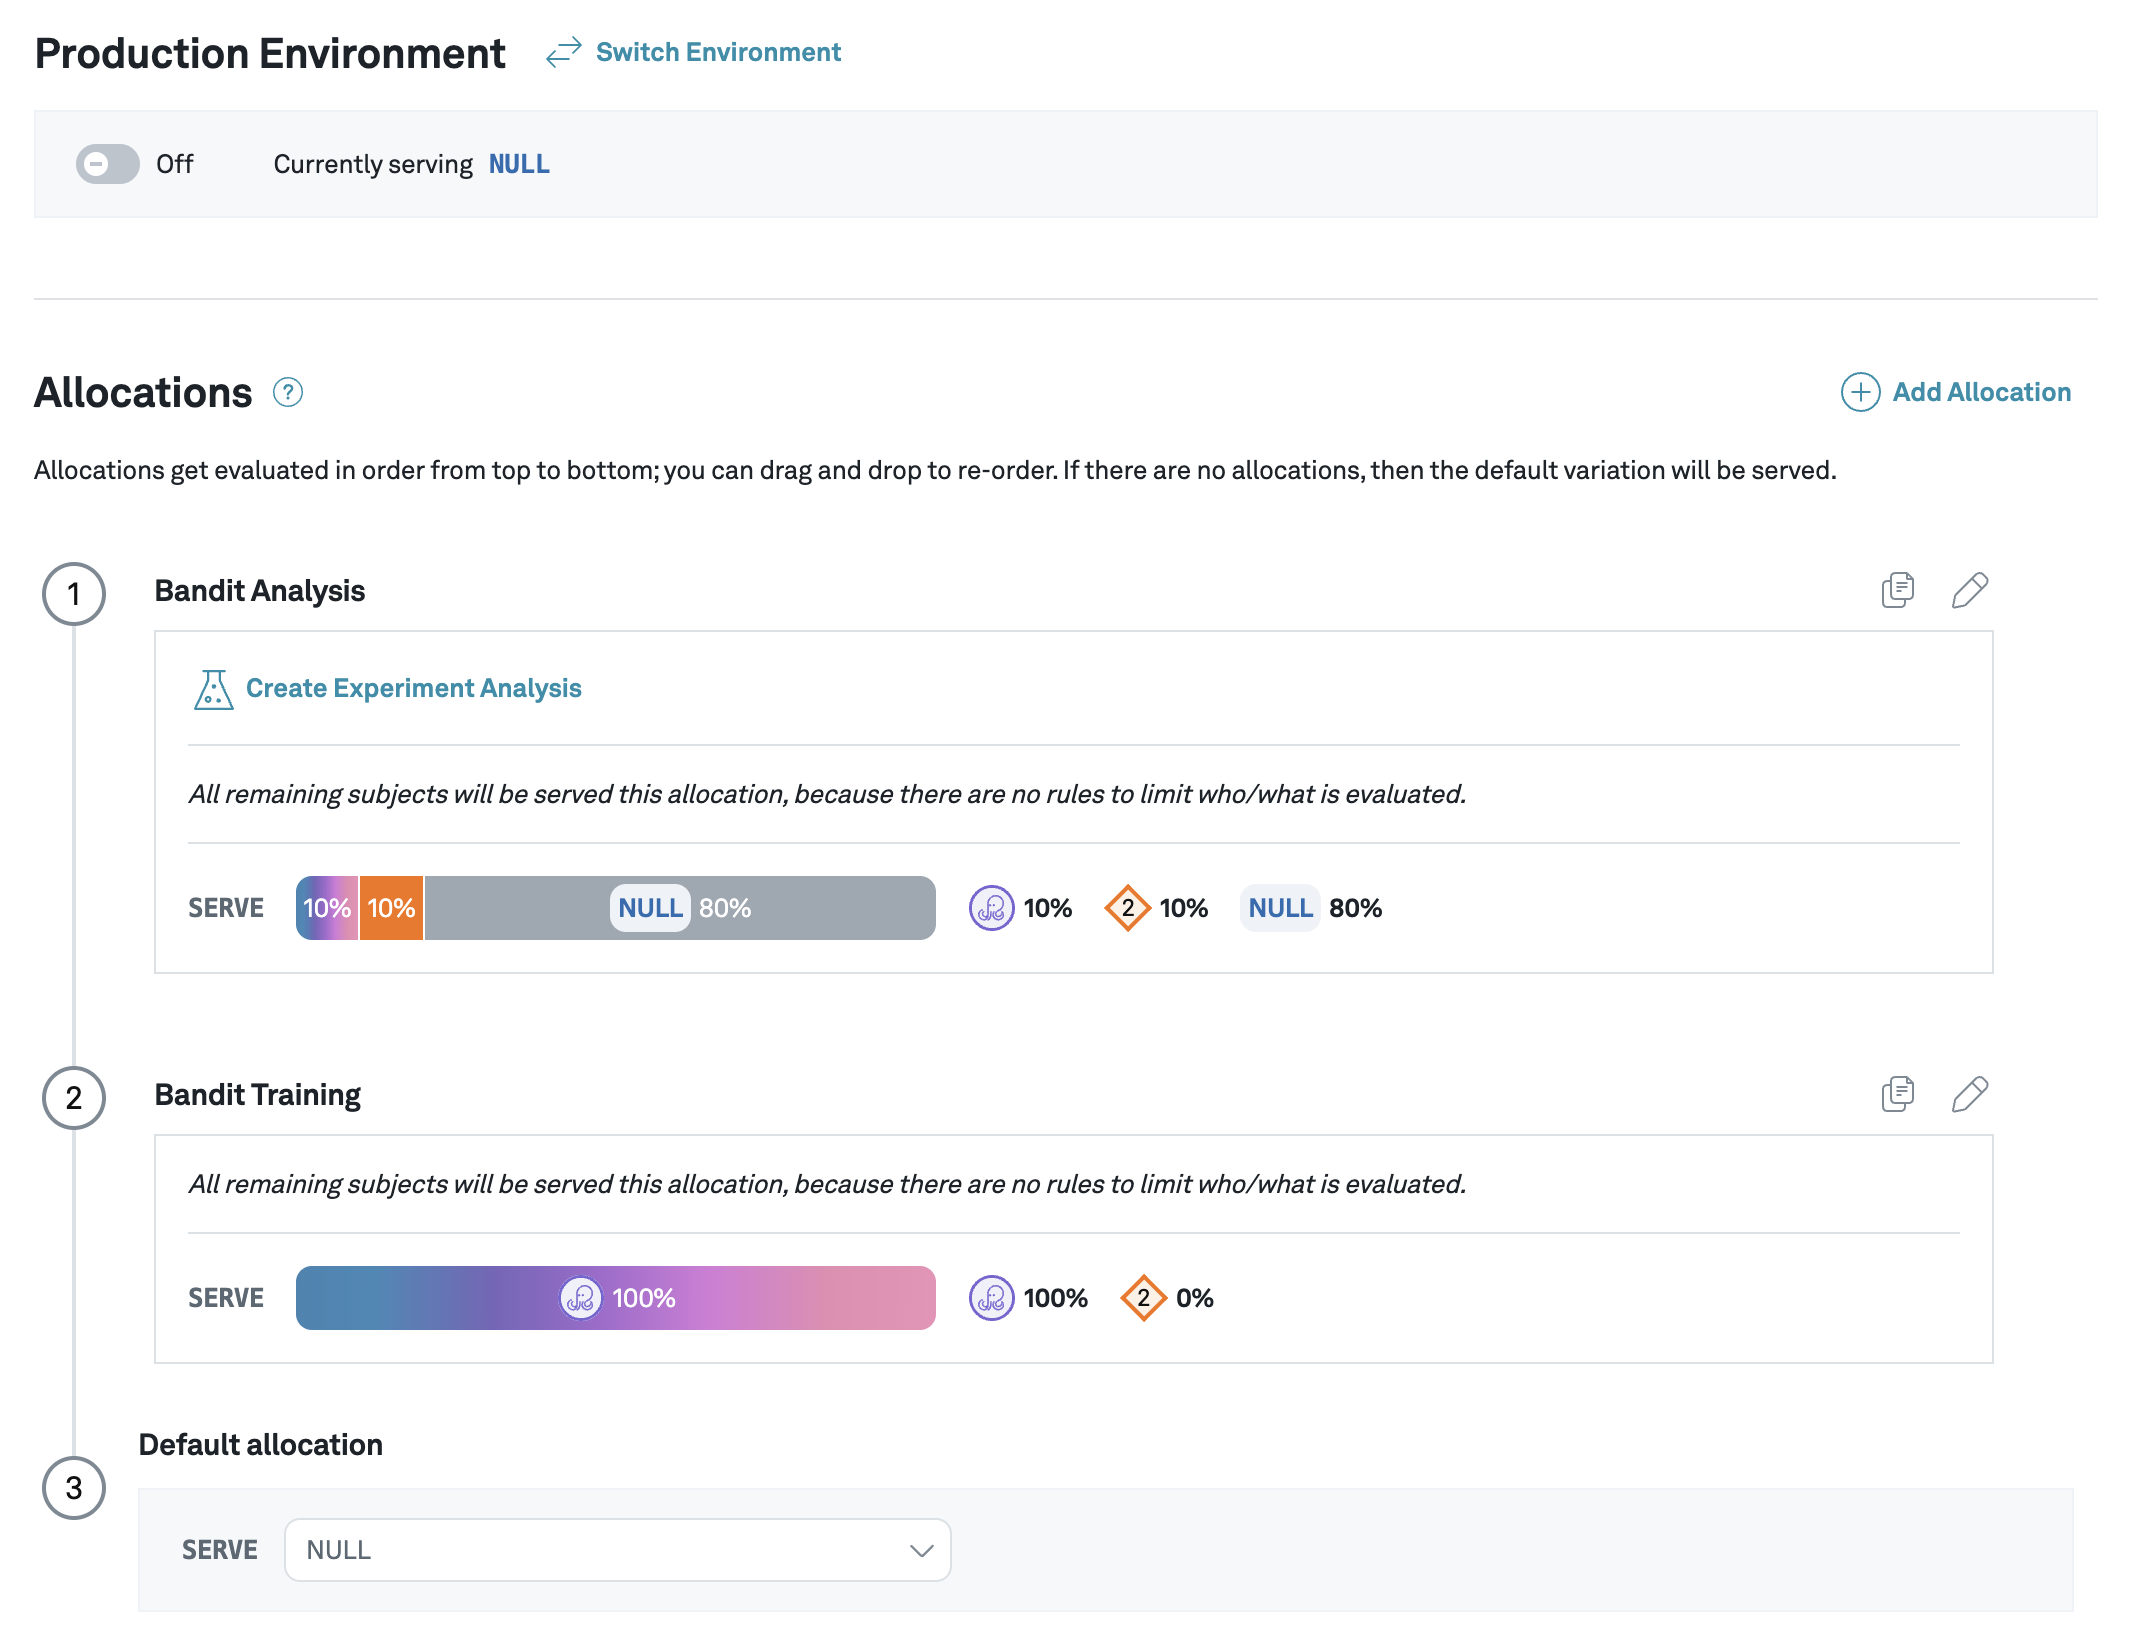
- Toggle the flag on in Production
Congrats on running your first Bandit! As a next step, you can connect your flag to an Experiment Analysis so you can measure the impact your bandit is having on your product. See the experiment quickstart guide for more.