Running your first experiment
This quickstart guide walks through running your first experiment with Eppo. Running experiments is a natural use case for feature flags and accordingly, Eppo tightly couples experiment assignment with feature flagging.
At the end of this guide, you'll be able to:
- Test a new feature in your staging environment
- Test the new feature on a production test account
- Launch a canary test
- Monitor canary test data
- Ramp an experiment to the full target audience
Prerequisites
To run an experiment with Eppo, you'll need the following:
- An existing feature flag capturing the variations you want to test. If you have not already created a flag, we recommend you start with the feature flag quick start guide.
- A method for logging events to your data warehouse. Eppo never captures any user-level data. Instead, you'll provide an interface for your existing event logging system. This simplifies security and cookie consent considerations associated with working with a vendor.
- A data warehouse service account connected to your Eppo workspace. For details on setting this up, see the connecting your warehouse section.
Go-Live Preparation
Connecting an event logger
Adding an event logger is a one-time setup. If your company is already running experiments with Eppo, it's likely that the assignmentLogger method below is already defined.
All of Eppo's SDKs include an option to add a logging callback function when initializing the SDK. This function is expected to simply take an Eppo-managed Assignment object as an input and write it to your data warehouse. For instance, if you track events using Segment in Javascript, the logging function might look like this:
import { IAssignmentLogger } from "@eppo/js-client-sdk";
import { AnalyticsBrowser } from "@segment/analytics-next";

const analytics = AnalyticsBrowser.load({ writeKey: "<SEGMENT_WRITE_KEY>" });

const assignmentLogger: IAssignmentLogger = {
  logAssignment(assignment) {
    analytics.track({
      userId: assignment.subject,
      event: "Eppo Randomized Assignment",
      type: "track",
      properties: { ...assignment },
    });
  },
};

await init({
  apiKey: "<SDK_KEY>",
  assignmentLogger,
});
This assignment event has all of the information that Eppo's analytic platform needs to understand who was enrolled into the experiment, when that assignment happened, and why they saw a specific variation.
The assignment event looks something like this:
{
  "base": {
    "featureFlag": "ml-model-version",
    "allocation": "allocation-10061",
    "experiment": "ml-model-version-allocation-10061",
    "variation": "v1.1.0",
    "metaData": {"sdkName": "python", "sdkVersion": "4.0.1", "coreVersion": "4.0.0"}
    },
  "subject": "f54ba5f3-90bb-4cdf-bf56-ca0335ede92c",
  "subjectAttributes": {},
  "timestamp": "2024-10-11T03:24:12.093538Z"
}
Here are some more examples in common languages. For a full list of SDKs, and for more detailed information on event logging, see the SDKs page.
- Javascript
- Node
- Python
- iOS
import { IAssignmentLogger, init } from "@eppo/js-client-sdk";

const assignmentLogger: IAssignmentLogger = {
  logAssignment(assignment) {
    // TODO: log assignment event to warehouse
  }
};

await init({
  apiKey: "<SDK_KEY>",
  assignmentLogger
});
The JavaScript SDK is intended for use in browser applications. For server-side applications, use the Node SDK.
import { IAssignmentLogger, init } from "@eppo/node-server-sdk";

const assignmentLogger: IAssignmentLogger = {
  logAssignment(assignment) {
    // TODO: log assignment event to warehouse
  }
};

await init({
  apiKey: "<SDK_KEY>",
  assignmentLogger
});
import eppo_client
from eppo_client.config import Config, AssignmentLogger

class MyAssignmentLogger(AssignmentLogger):
    def log_assignment(self, assignment):
        # TODO: log assignment event to warehouse

client_config = Config(
    api_key="<SDK-KEY>",
    assignment_logger=MyAssignmentLogger()
)
func myAssignmentLogger(assignment: Assignment) {
    // TODO: log assignment event to warehouse
}

eppoClient = try await EppoClient.initialize(
    sdkKey: "sdk-key",
    assignmentLogger: myAssignmentLogger
)
Now that you've attached a logging function to the Eppo SDK, you can start preparing to launch the experiment. There are two typical phases before launching a live experiment:
- Testing your new feature in a lower environment (QA, staging, etc.)
- Testing the experience on a production test account
QA in a test environment
Eppo supports unlimited environments. In each environment, a flag can be on or off and have its own targeting logic.
In the feature flagging quickstart, you created an SDK key for the Test environment. If this key is in your pre-production environment, you can test the flag by simplying enabling it in the Eppo UI. To do this, make sure you're in the Test environment (left panel) and that Default Value is set to your new variant, then simply enable the flag:
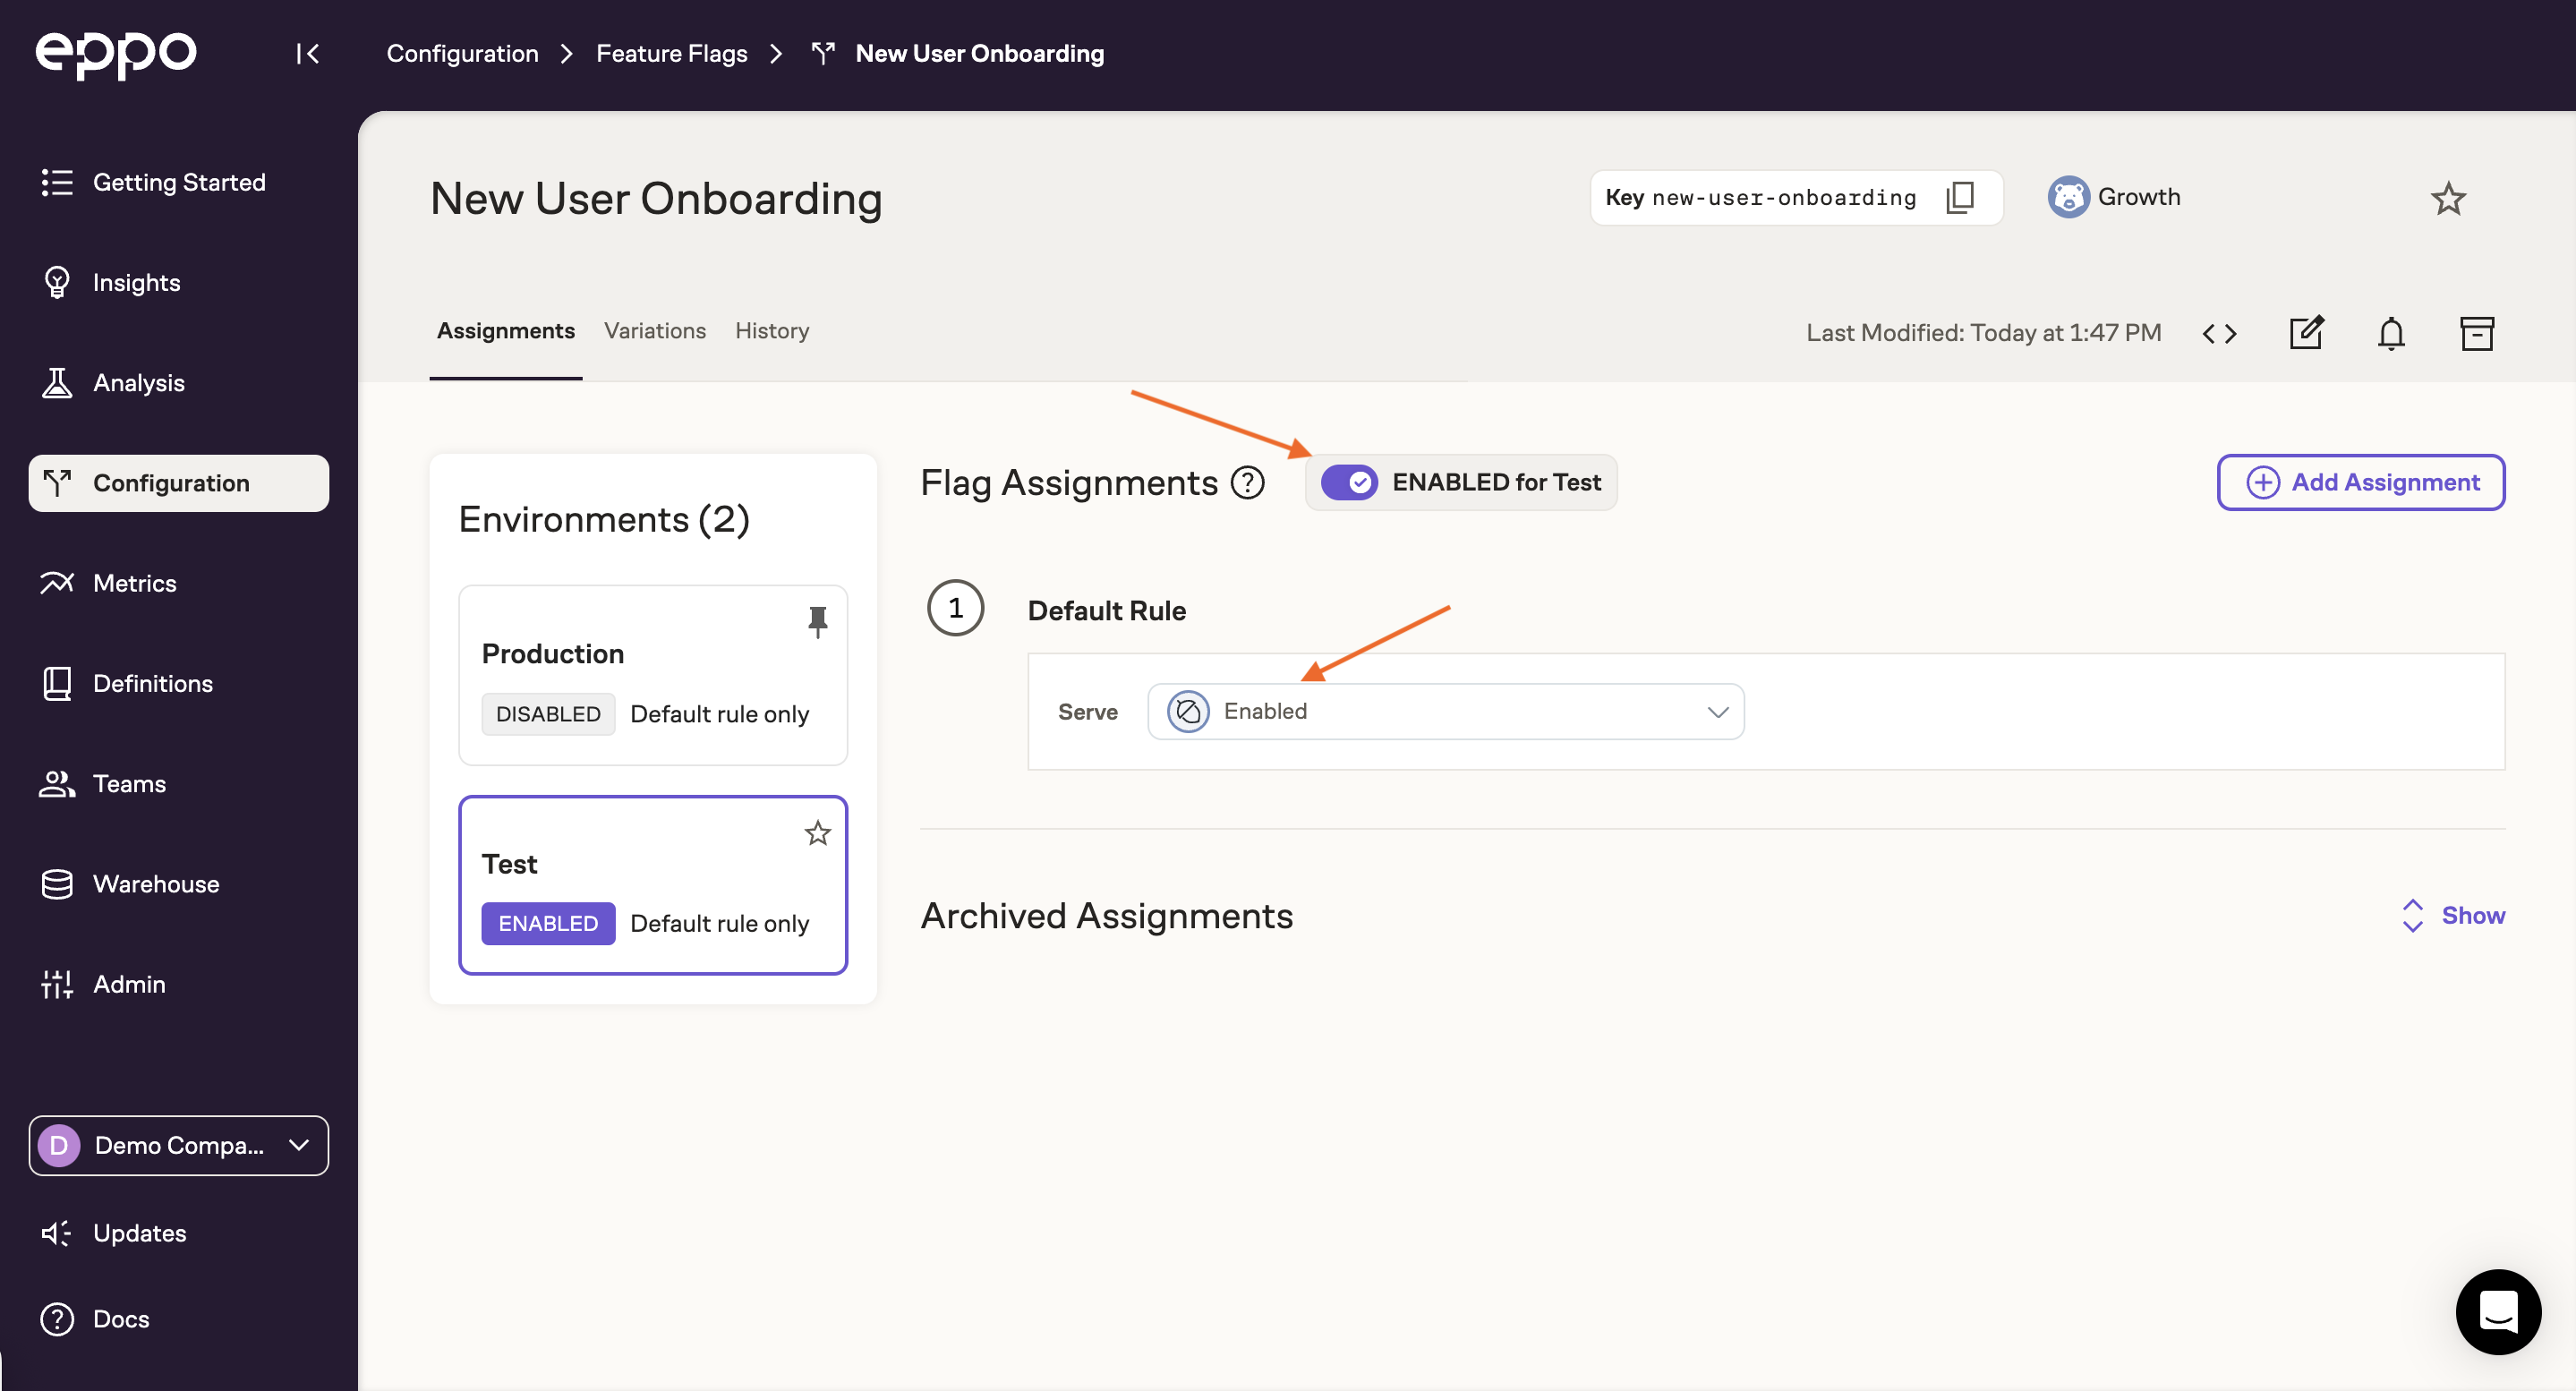
The Eppo SDK should now be returning the new variant in your pre-prod environment.
QA in production
This step is useful for experimenting on in-product features. If you're using Eppo to run Machine Learning or other backend experiments, you may want to skip to the next step.
Once you've verified that the flag is working in your pre-prod environment, you can enable the flag in production. As long as there are no Assignments created in the production environment, your code will be "dark" and not impact any users (i.e., everyone will continue to see the default experience).
Before launching to real users, it's a good idea to test the experience on a production test account. To do this, deploy the new feature and Eppo's SDK to production using a production SDK key (created on the same page that we created the Test environment SDK key).
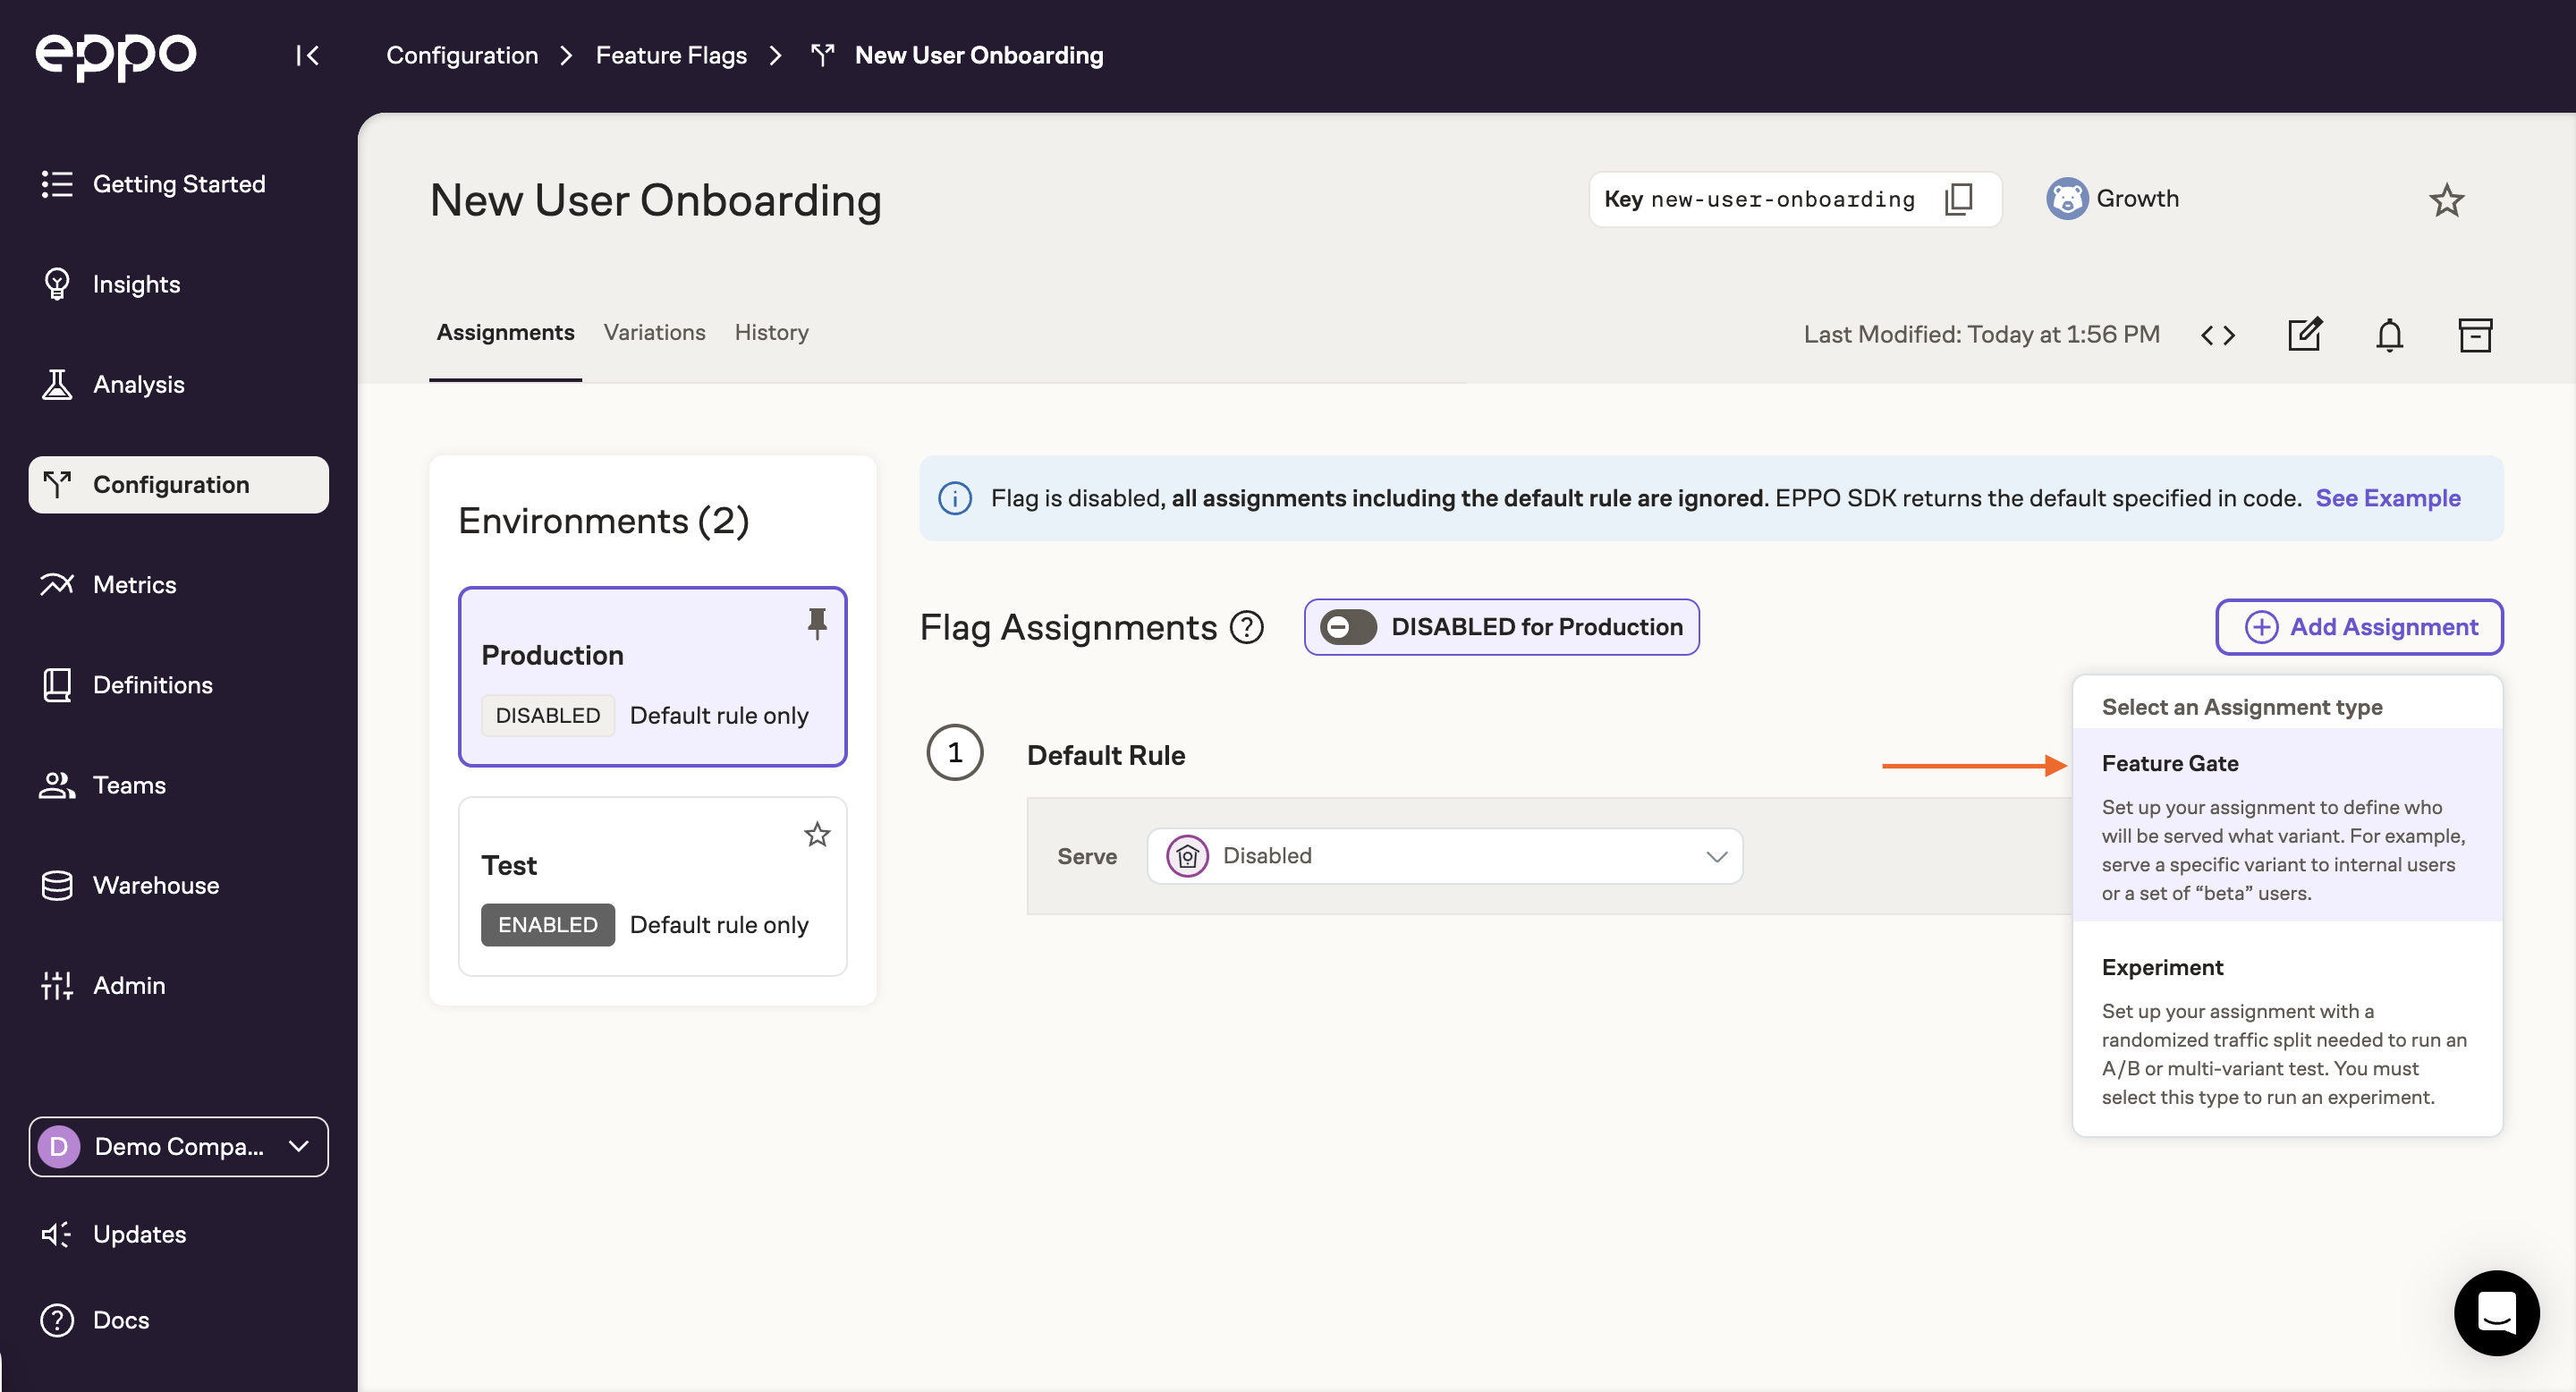
To assign the new variant to your test account, first add a Feature Gate assignment to the production environment:
Next, add a rule that specifies how you will identify the test account. Typically this is via a user property like user_id:
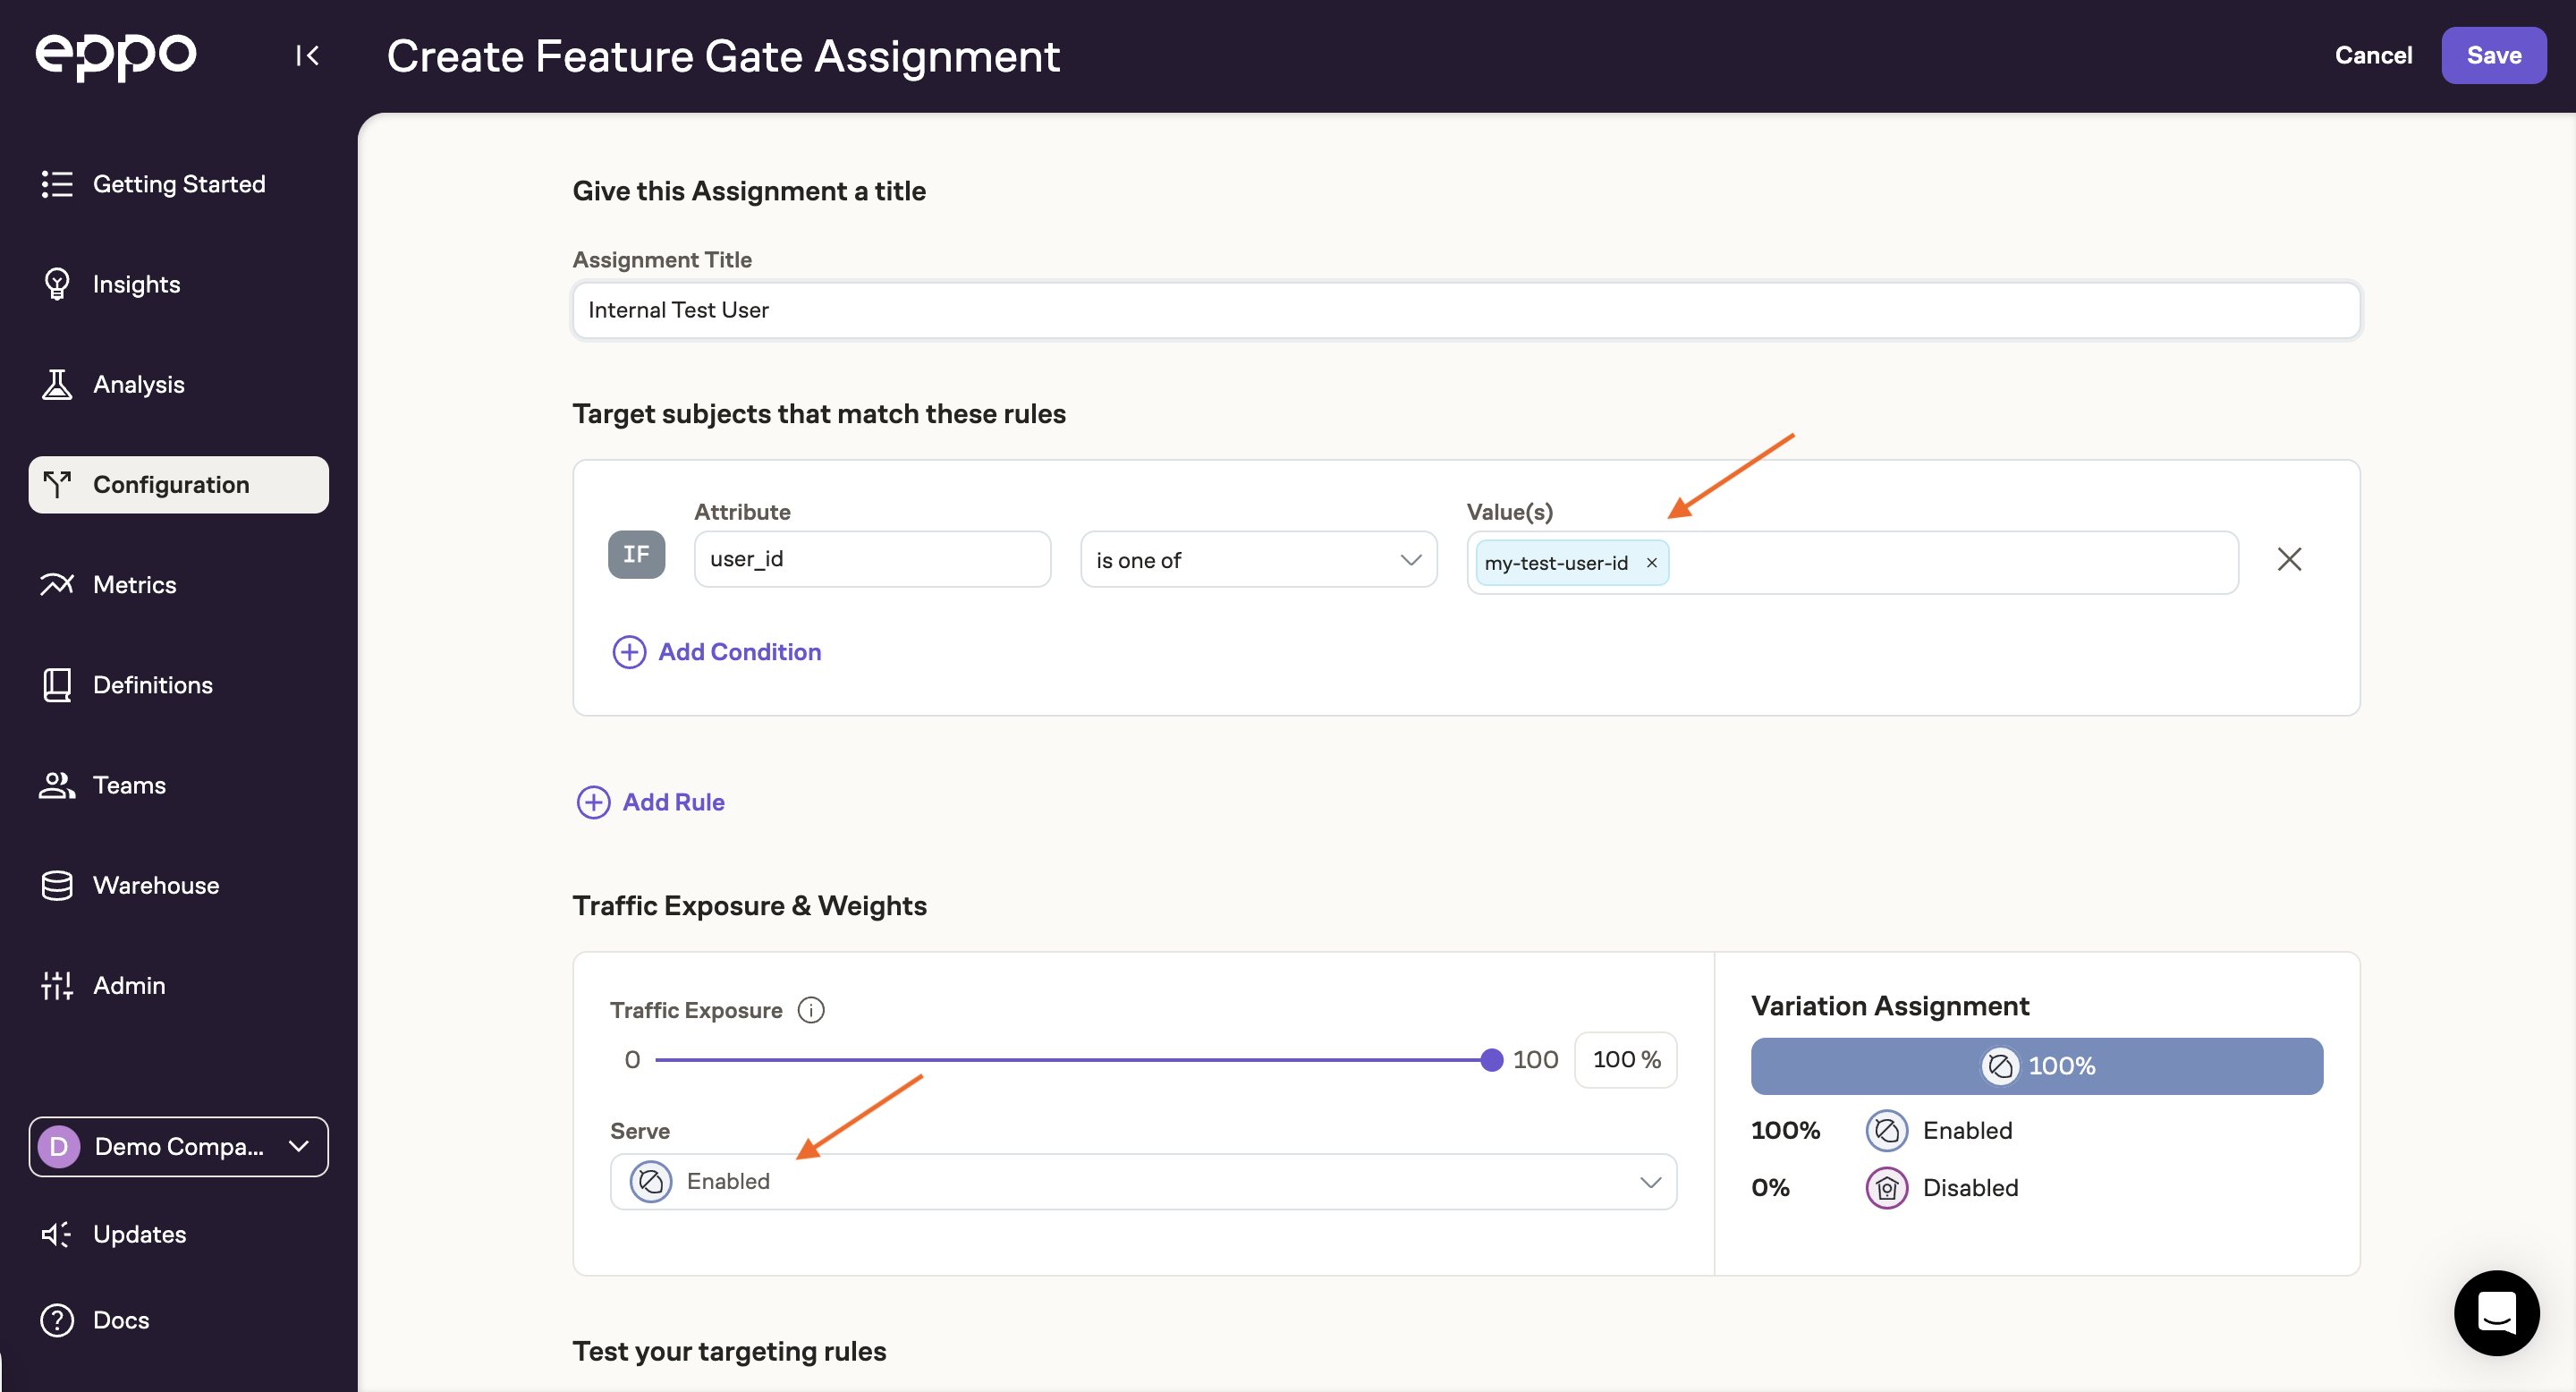
To target based on user properties, you'll need to pass in those properties as part of the subjectAttributes argument when calling getBooleanAssignment. For instance:
eppoClient.getBooleanAssignment(
  "new-user-onboarding",
  user.id,
  { user_id: user.id },
  false
);
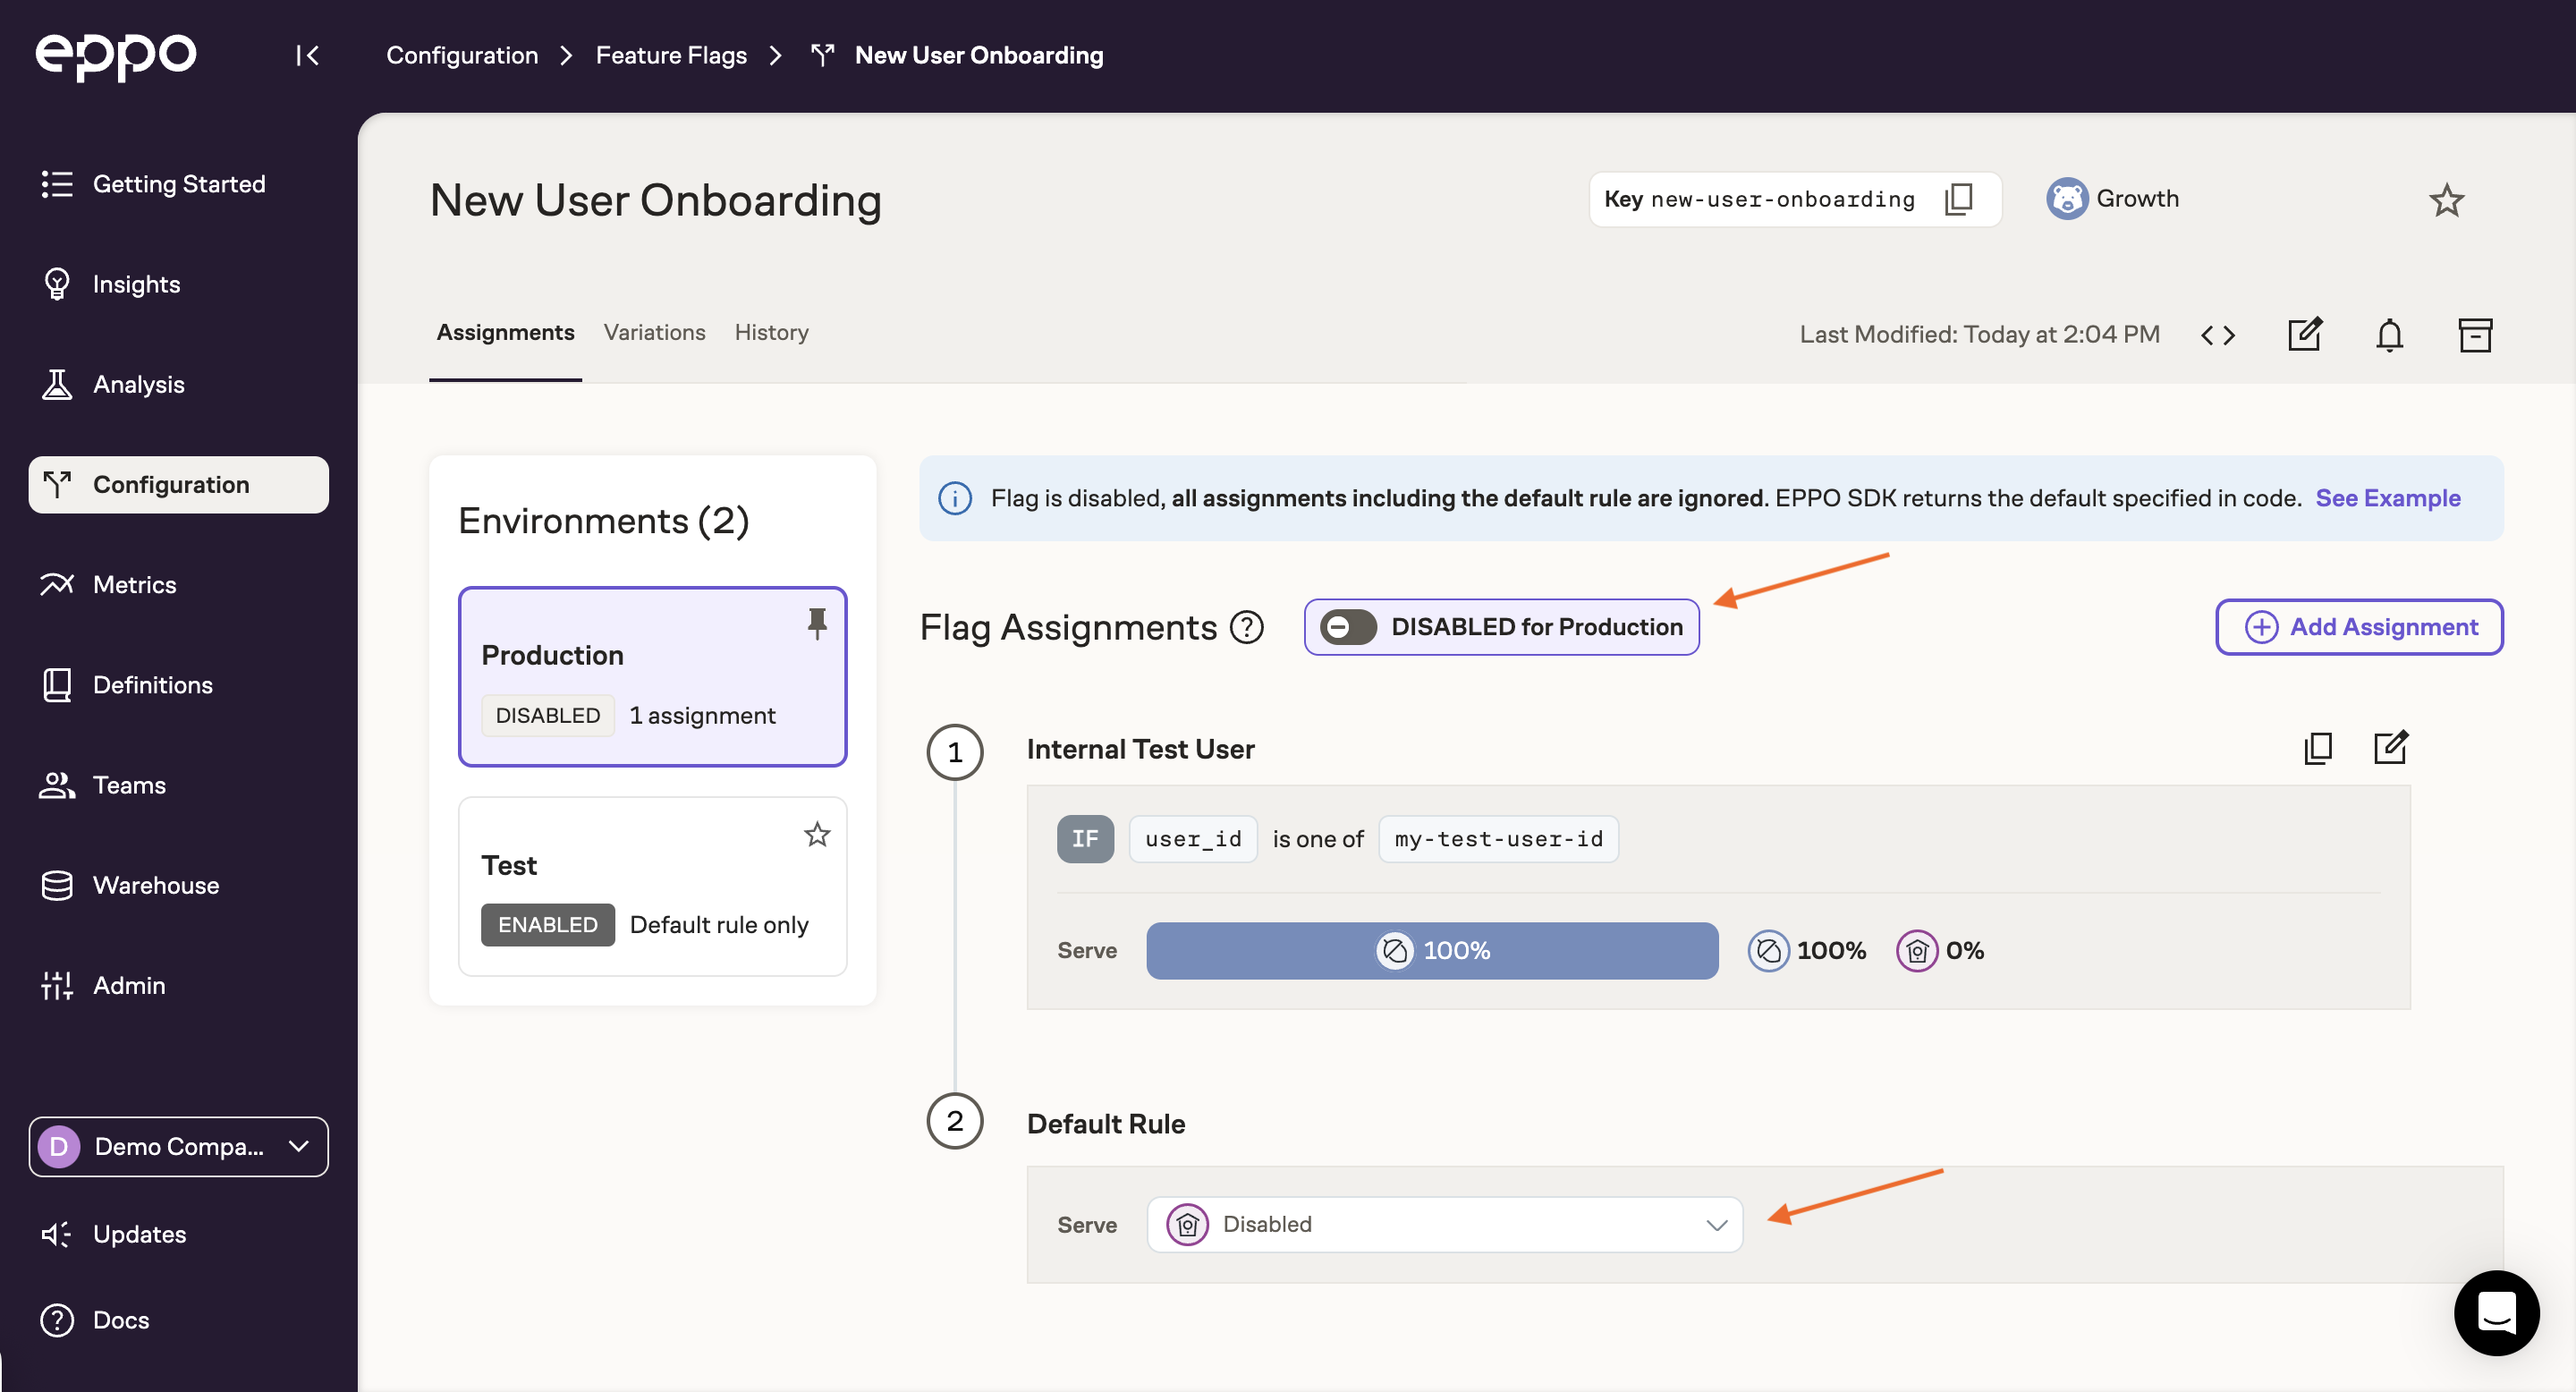
After double checking that the default value in production is "Disabled", you can flip the flag on in production! Only your test user will see the new experience.
Connecting Eppo to warehouse logs
This step is a one-time setup. If your team is already running experiments with Eppo, there is likely already an Assignment SQL Definition created in your workspace.
At this point, the SDK should be seeing traffic and using the provided logging function to track assignments in your warehouse. The last step in setting up the experiment is to point Eppo at where these logs are stored. Note that this is only required for setting up your first experiment. Any subsequent experiments will write to the same table and not require any manual mapping of logs back into Eppo.
To connect assignment logs, navigate the Definitions section and select Create Definition SQL.
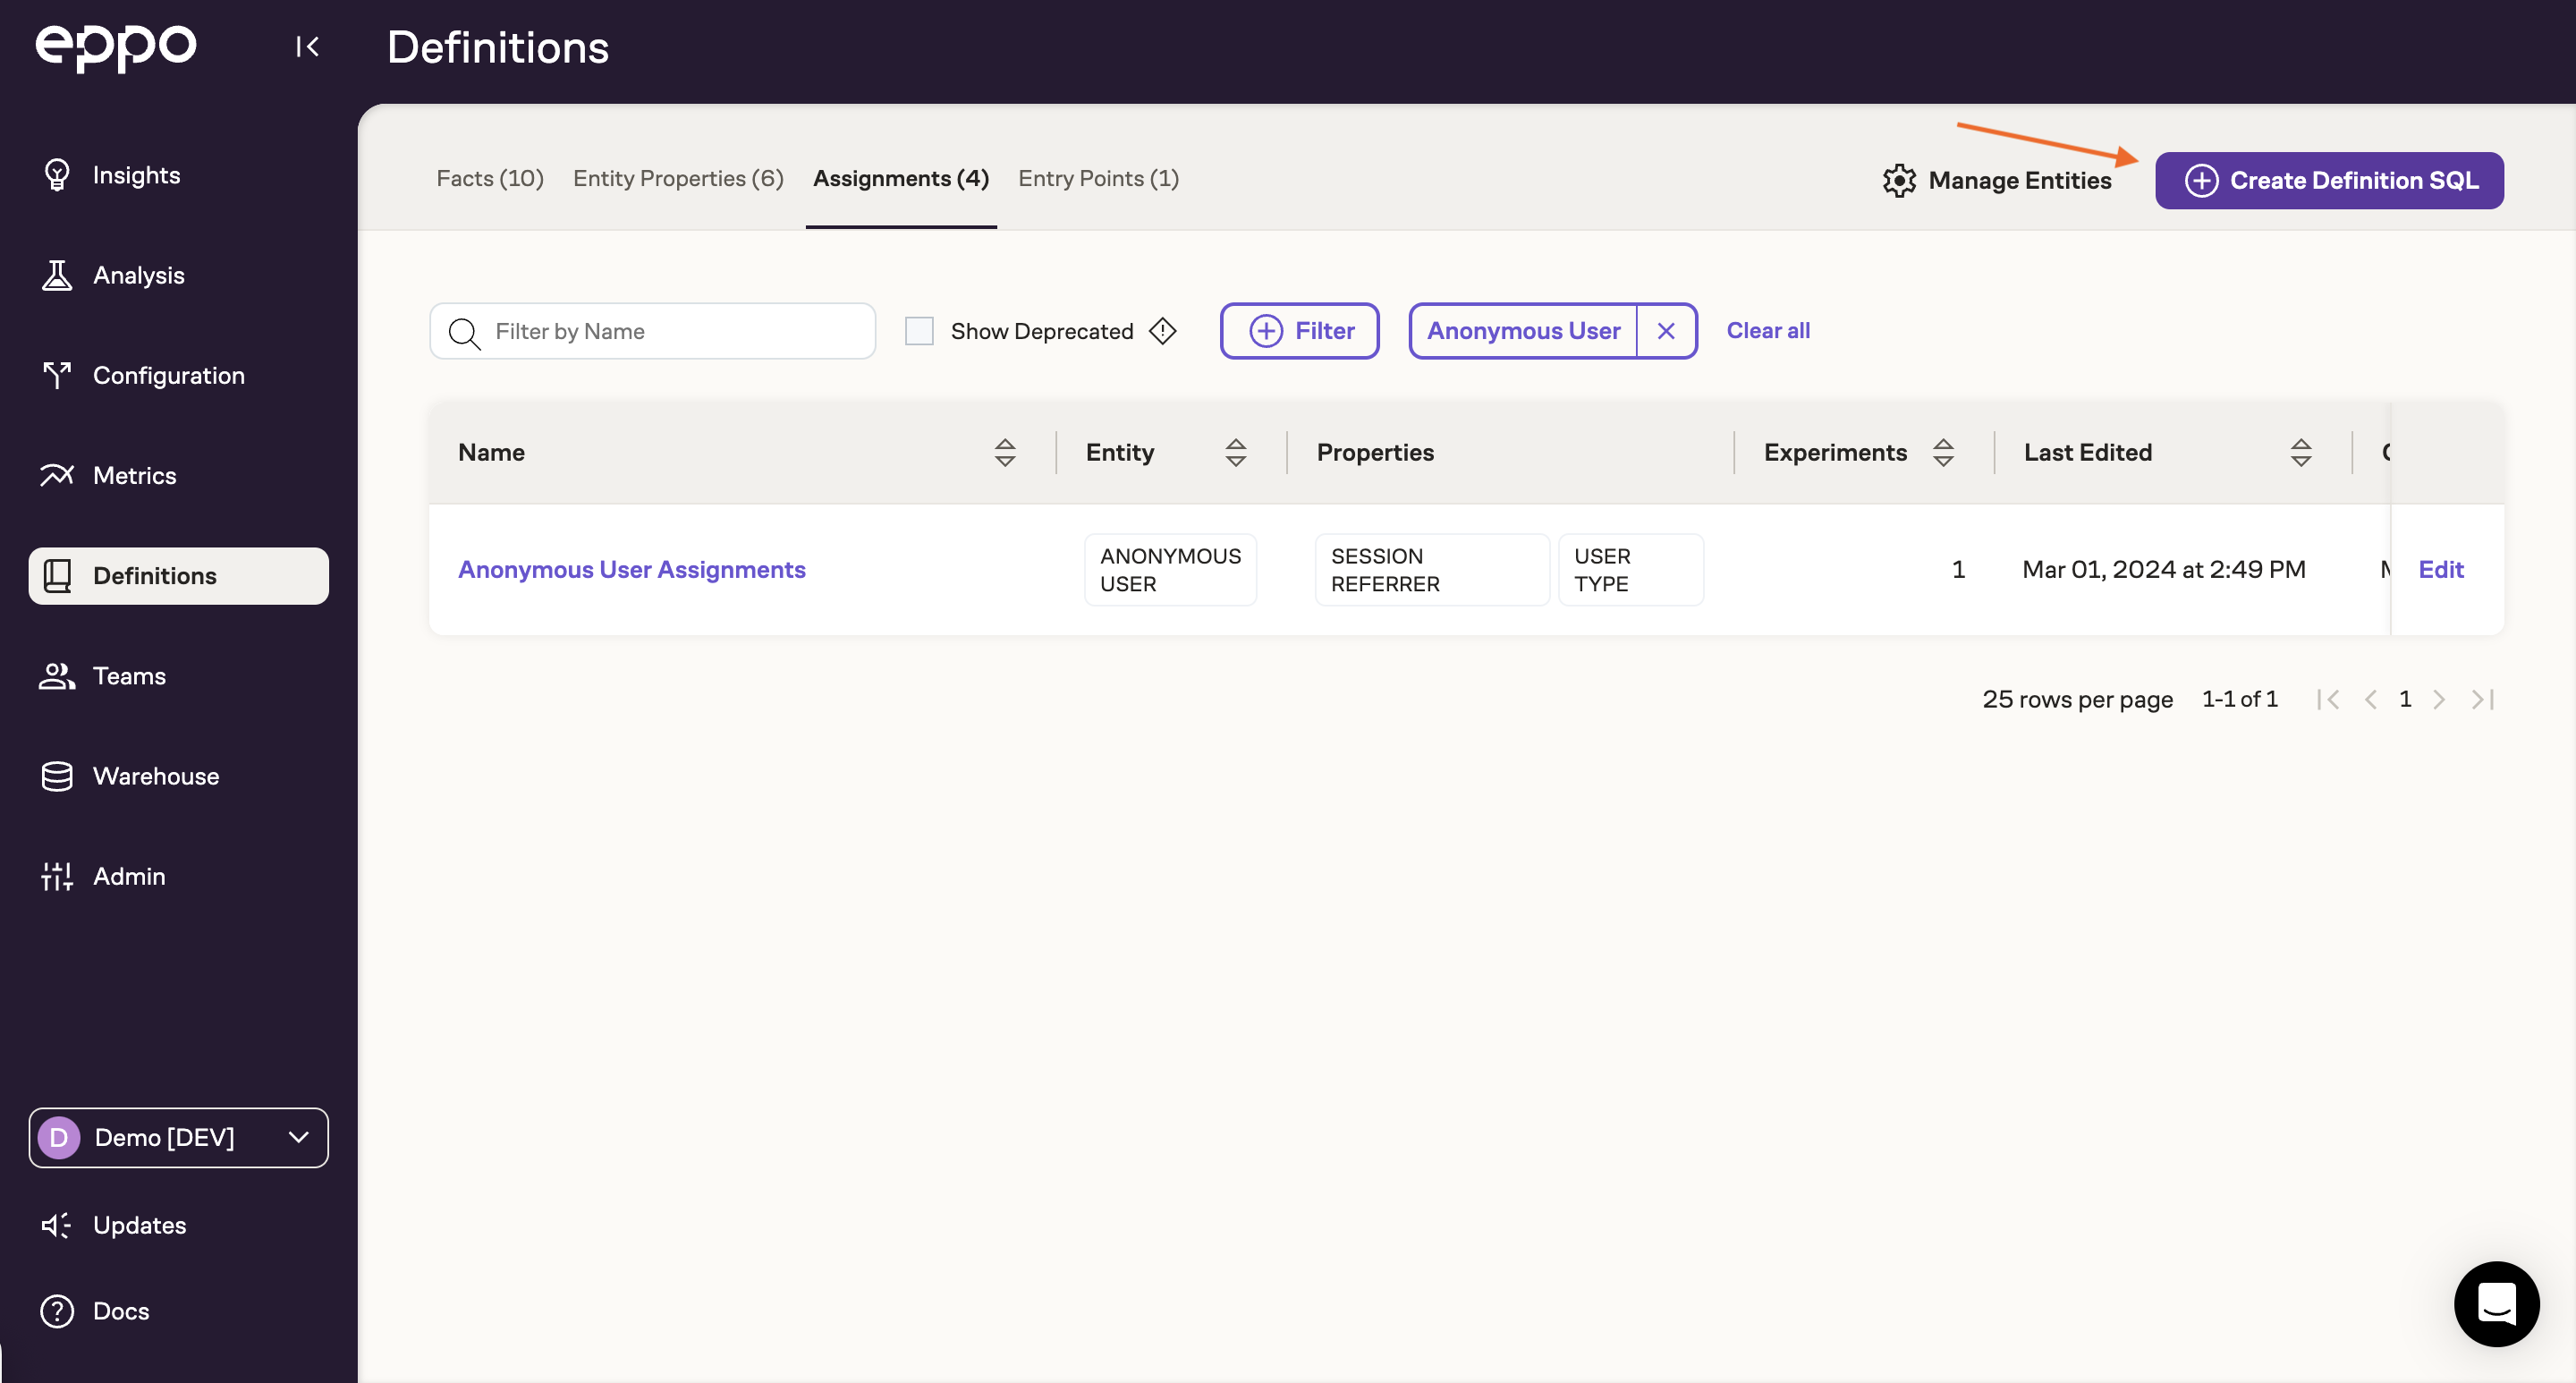
This will take you to a SQL editor where you can write a warehouse query to load the assignment events written by your event logging system. Once you've written and tested the SQL, map the warehouse columns to Eppo's data model using the right panel.
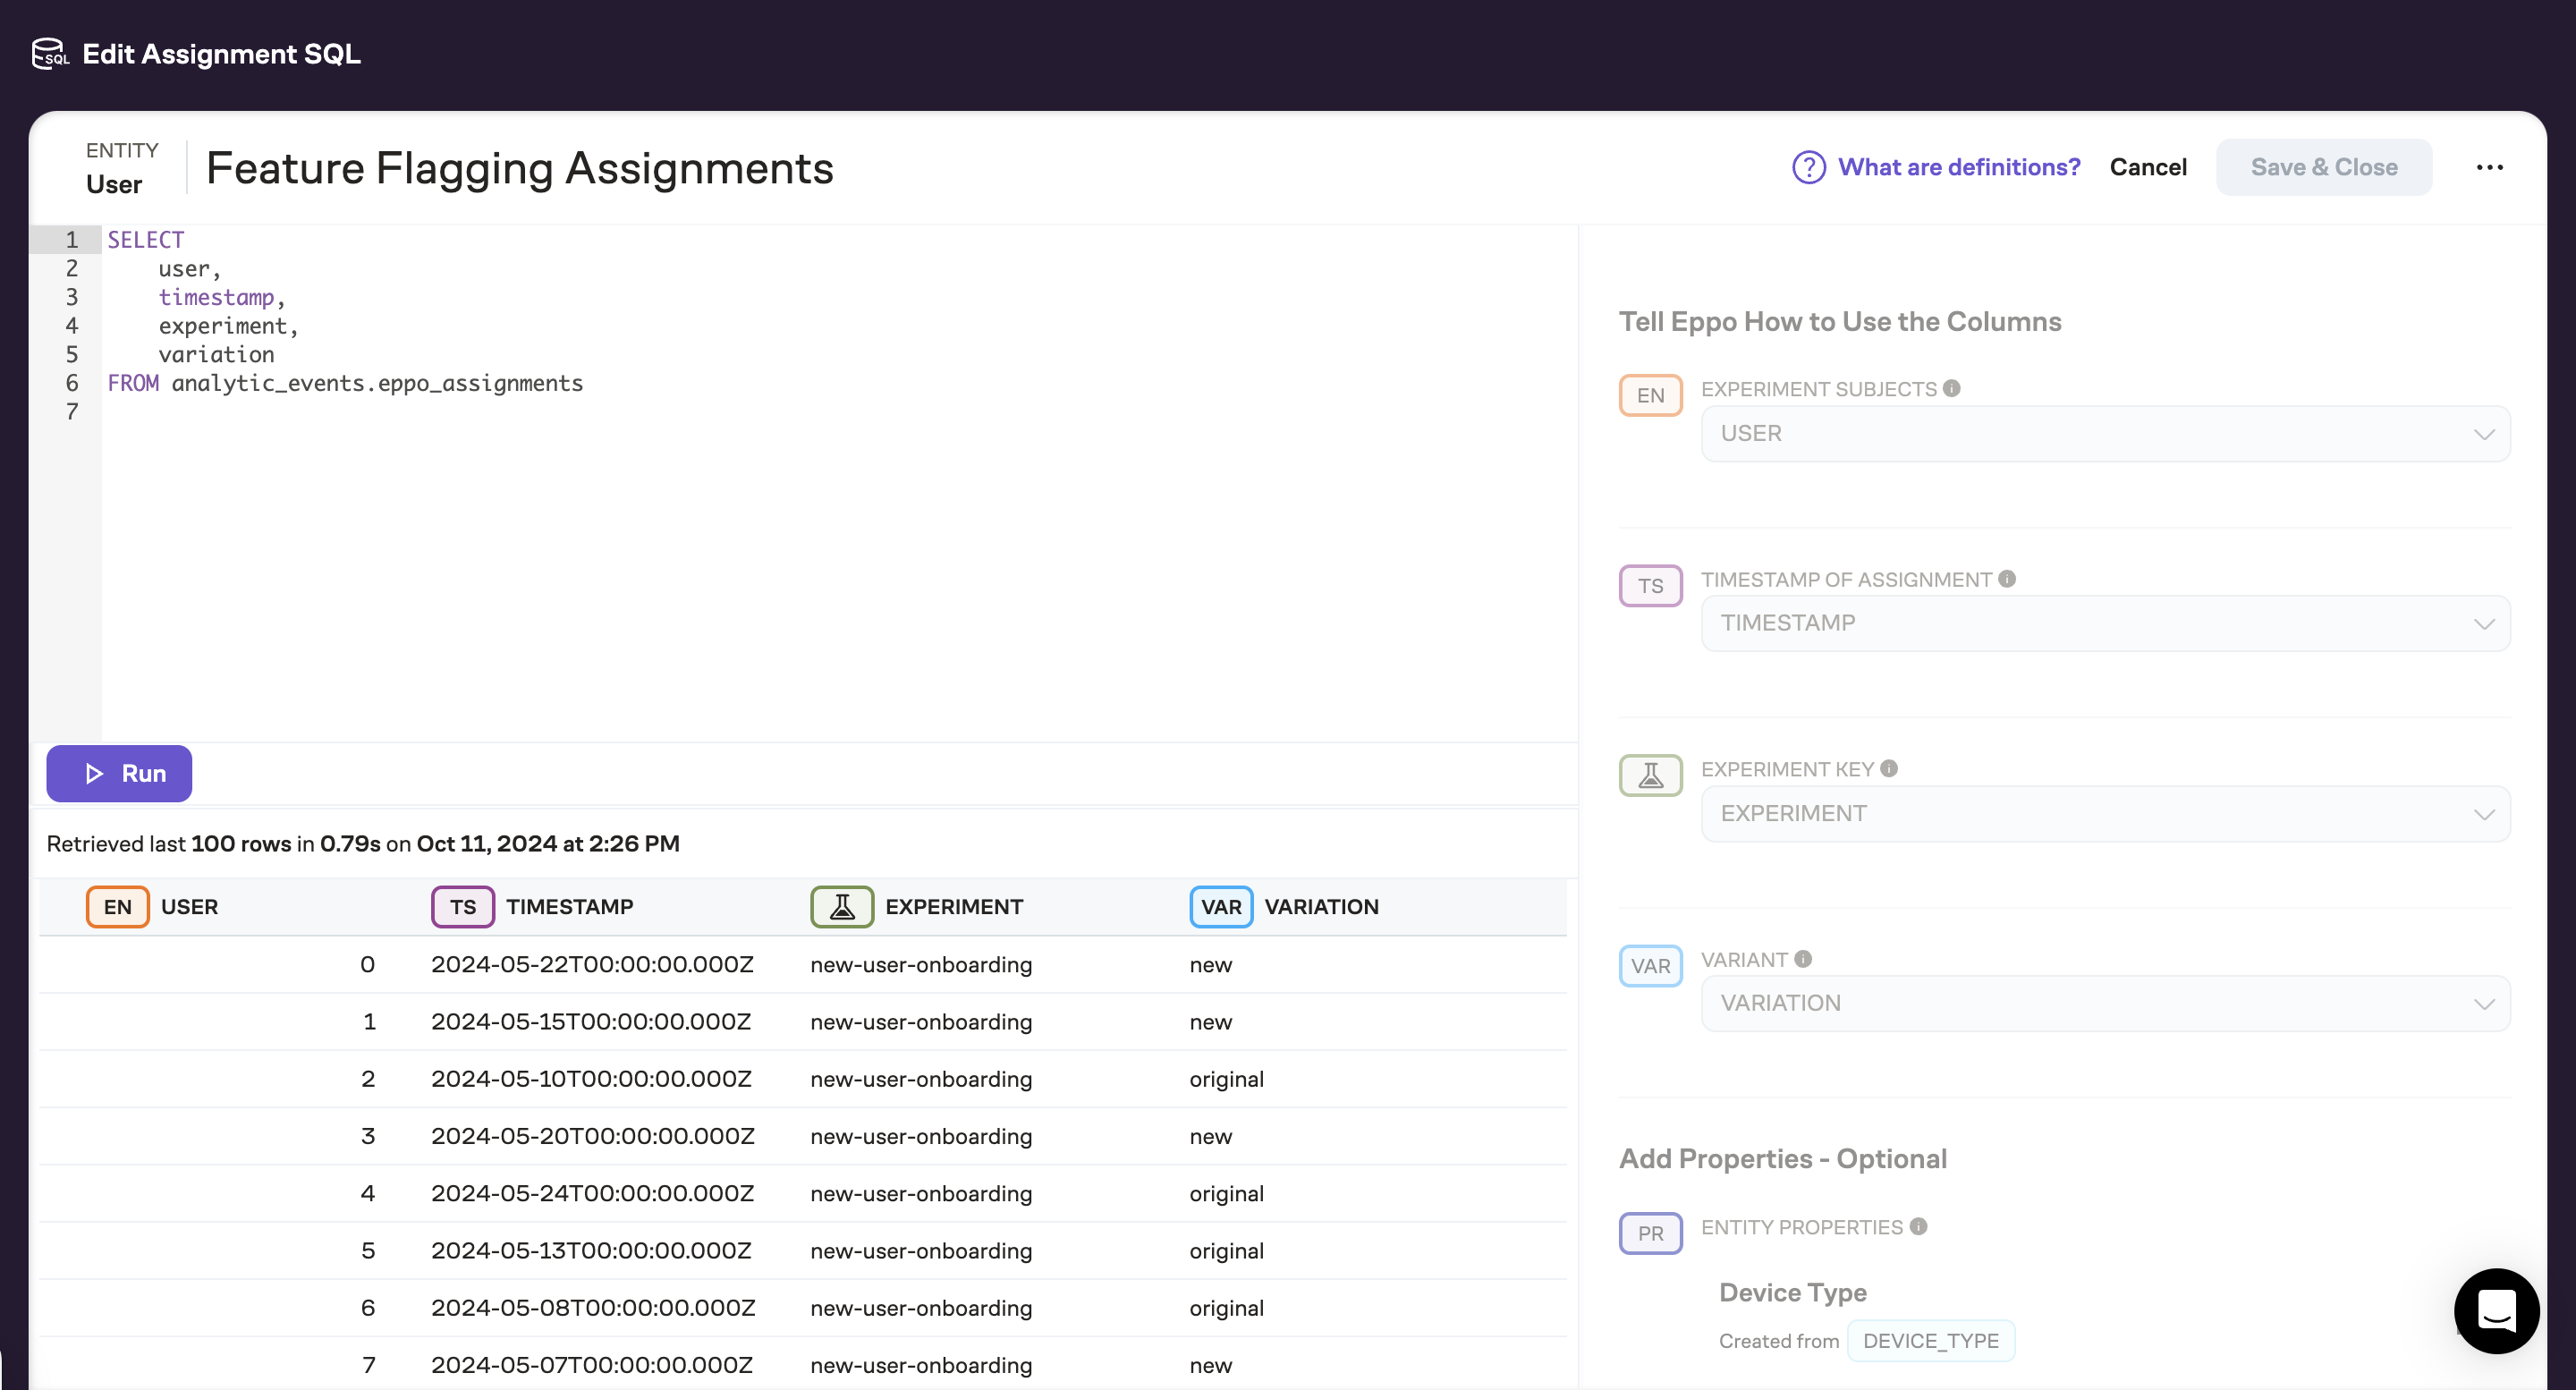
You can read more about Assignment SQL Definitions here.
It's common for test and production environments to write to different warehouse tables. That said, Eppo will track which environment a specific assignment event comes from (tracked in the allocation ID), so there will not be any issues if both environments write to the same table.
Canary testing
Now that a logger has been connected, and Eppo has been configured to read from the correct warehouse table, you can launch a canary test to a small population of users.
Launching the canary test
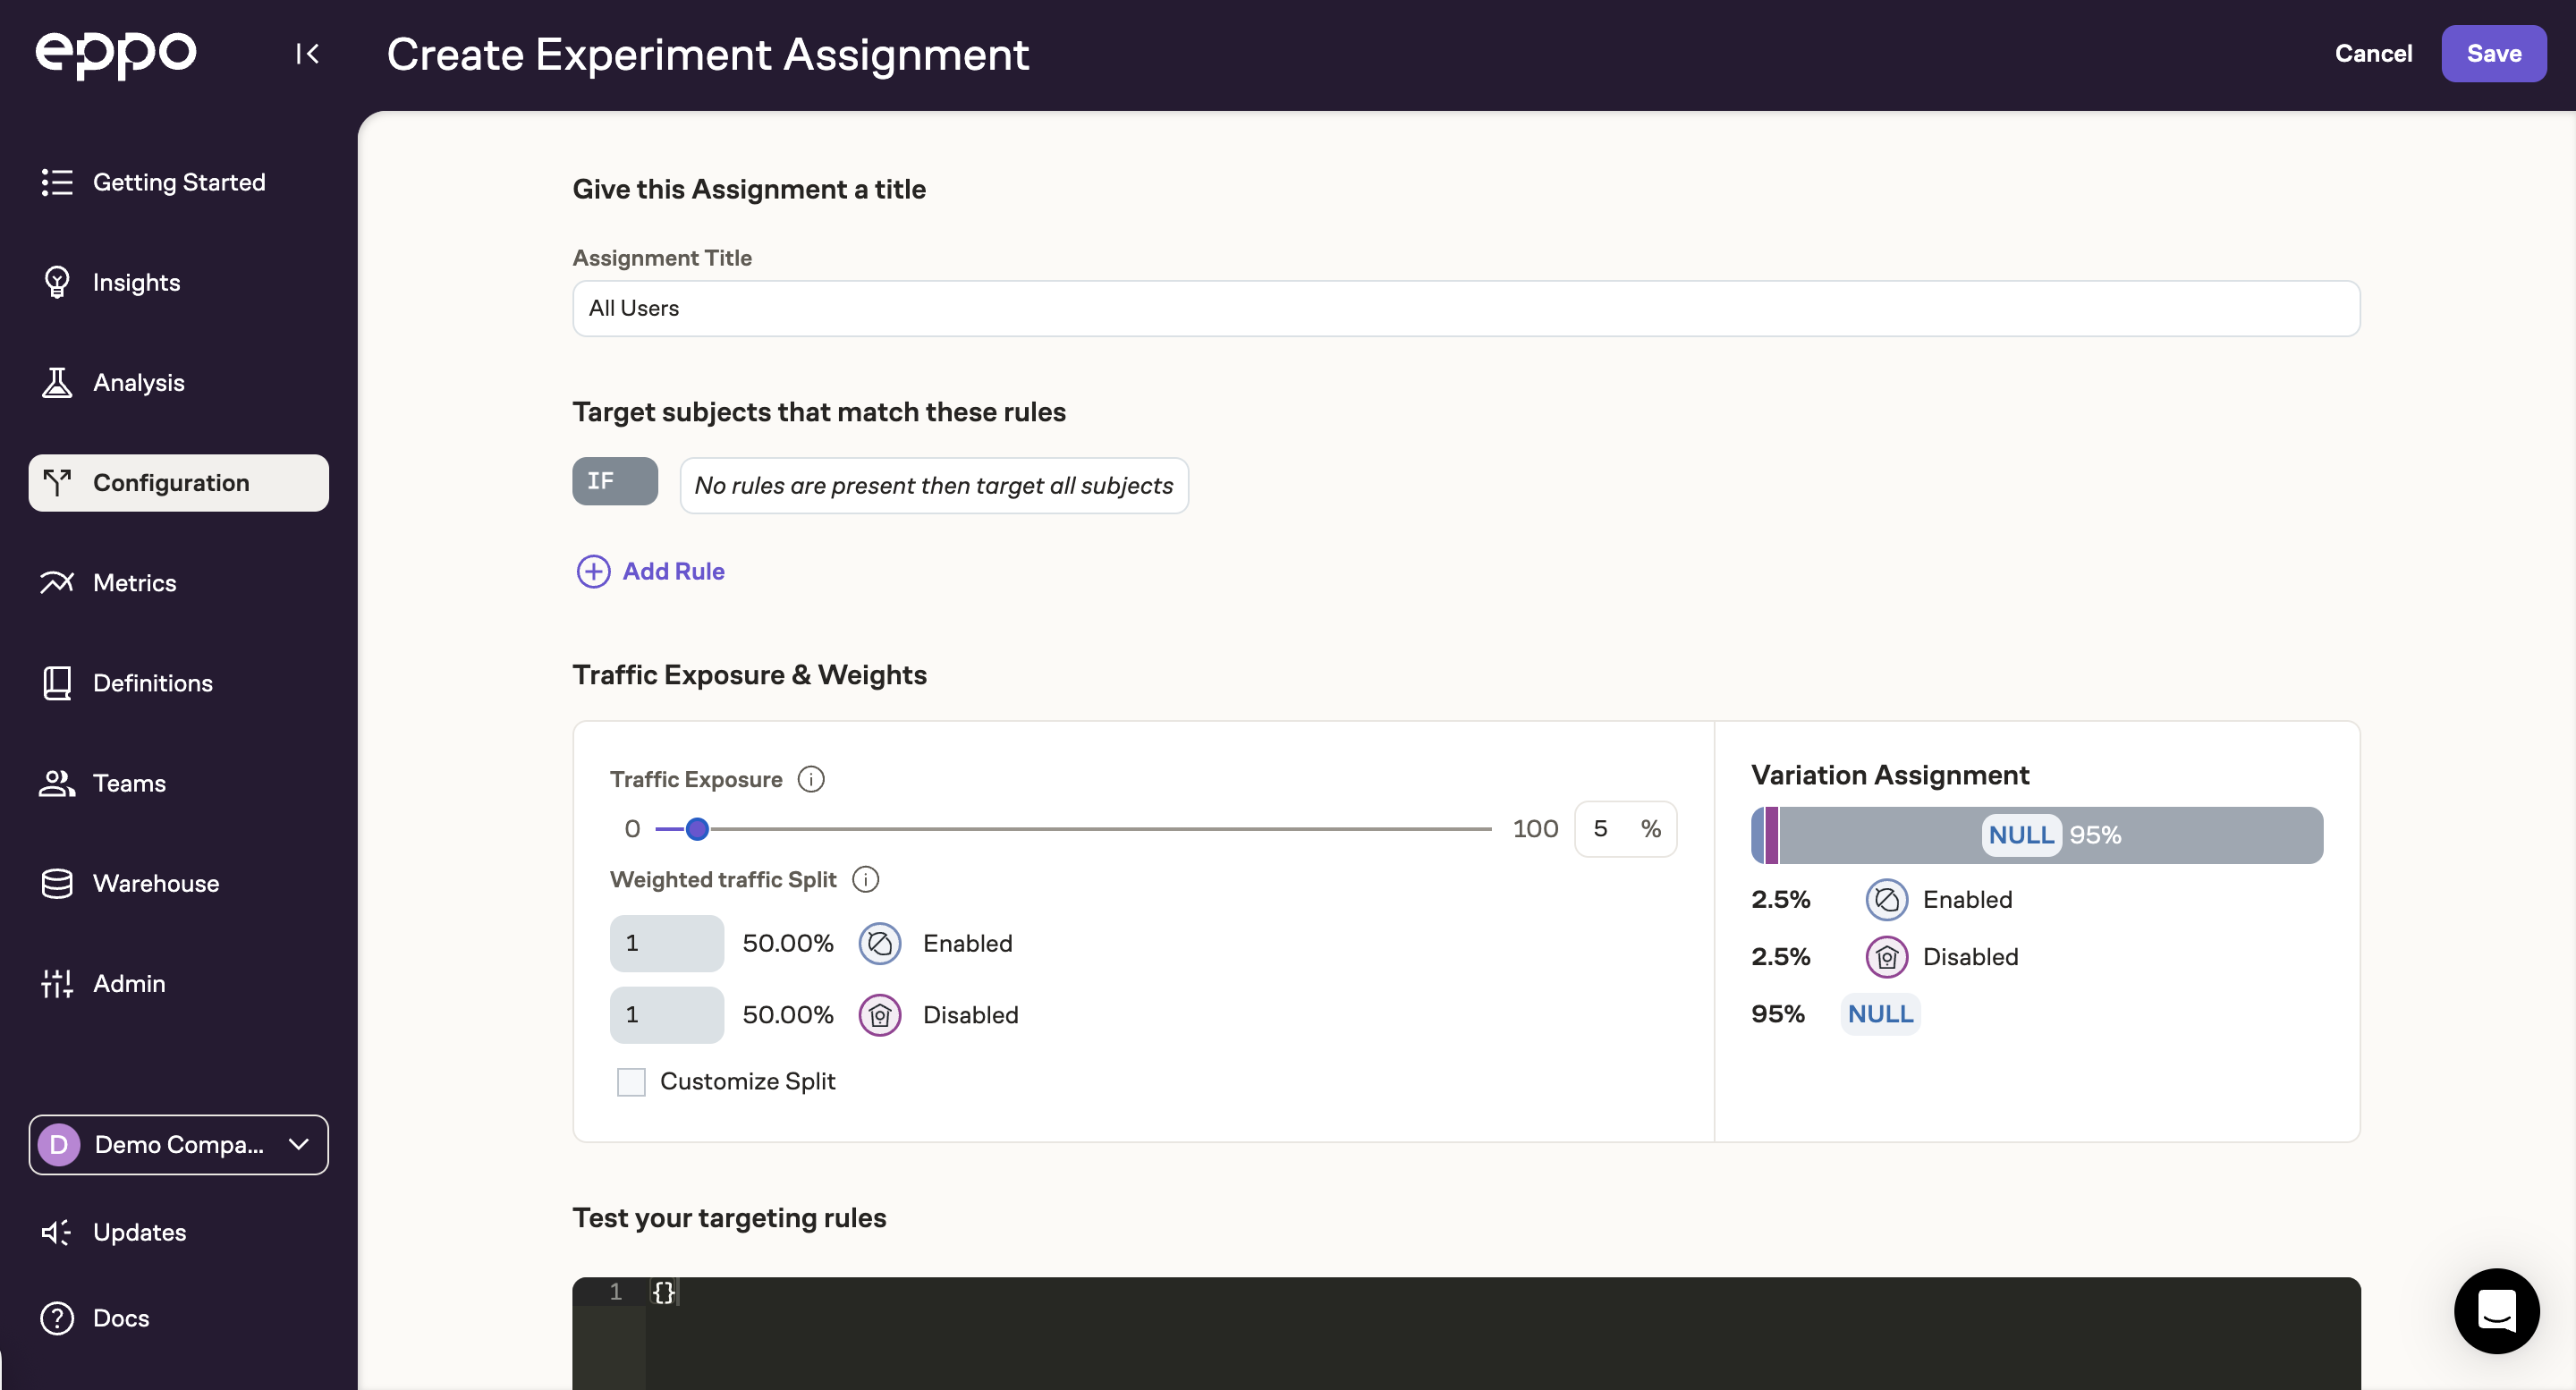
To start, add a new assignment to your flag in the production environment by clicking Add Allocation >> Experiment.
Experiment assignments are similar to feature gate assignments, but allow multiple variations to be randomized against each other. This is done by hashing the subject key (e.g., user ID) with a unique salt per experiment. If the same user passes through the experiment multiple times, the Eppo SDK guarantees that they will be assigned to the same variation, even across different SDKs.
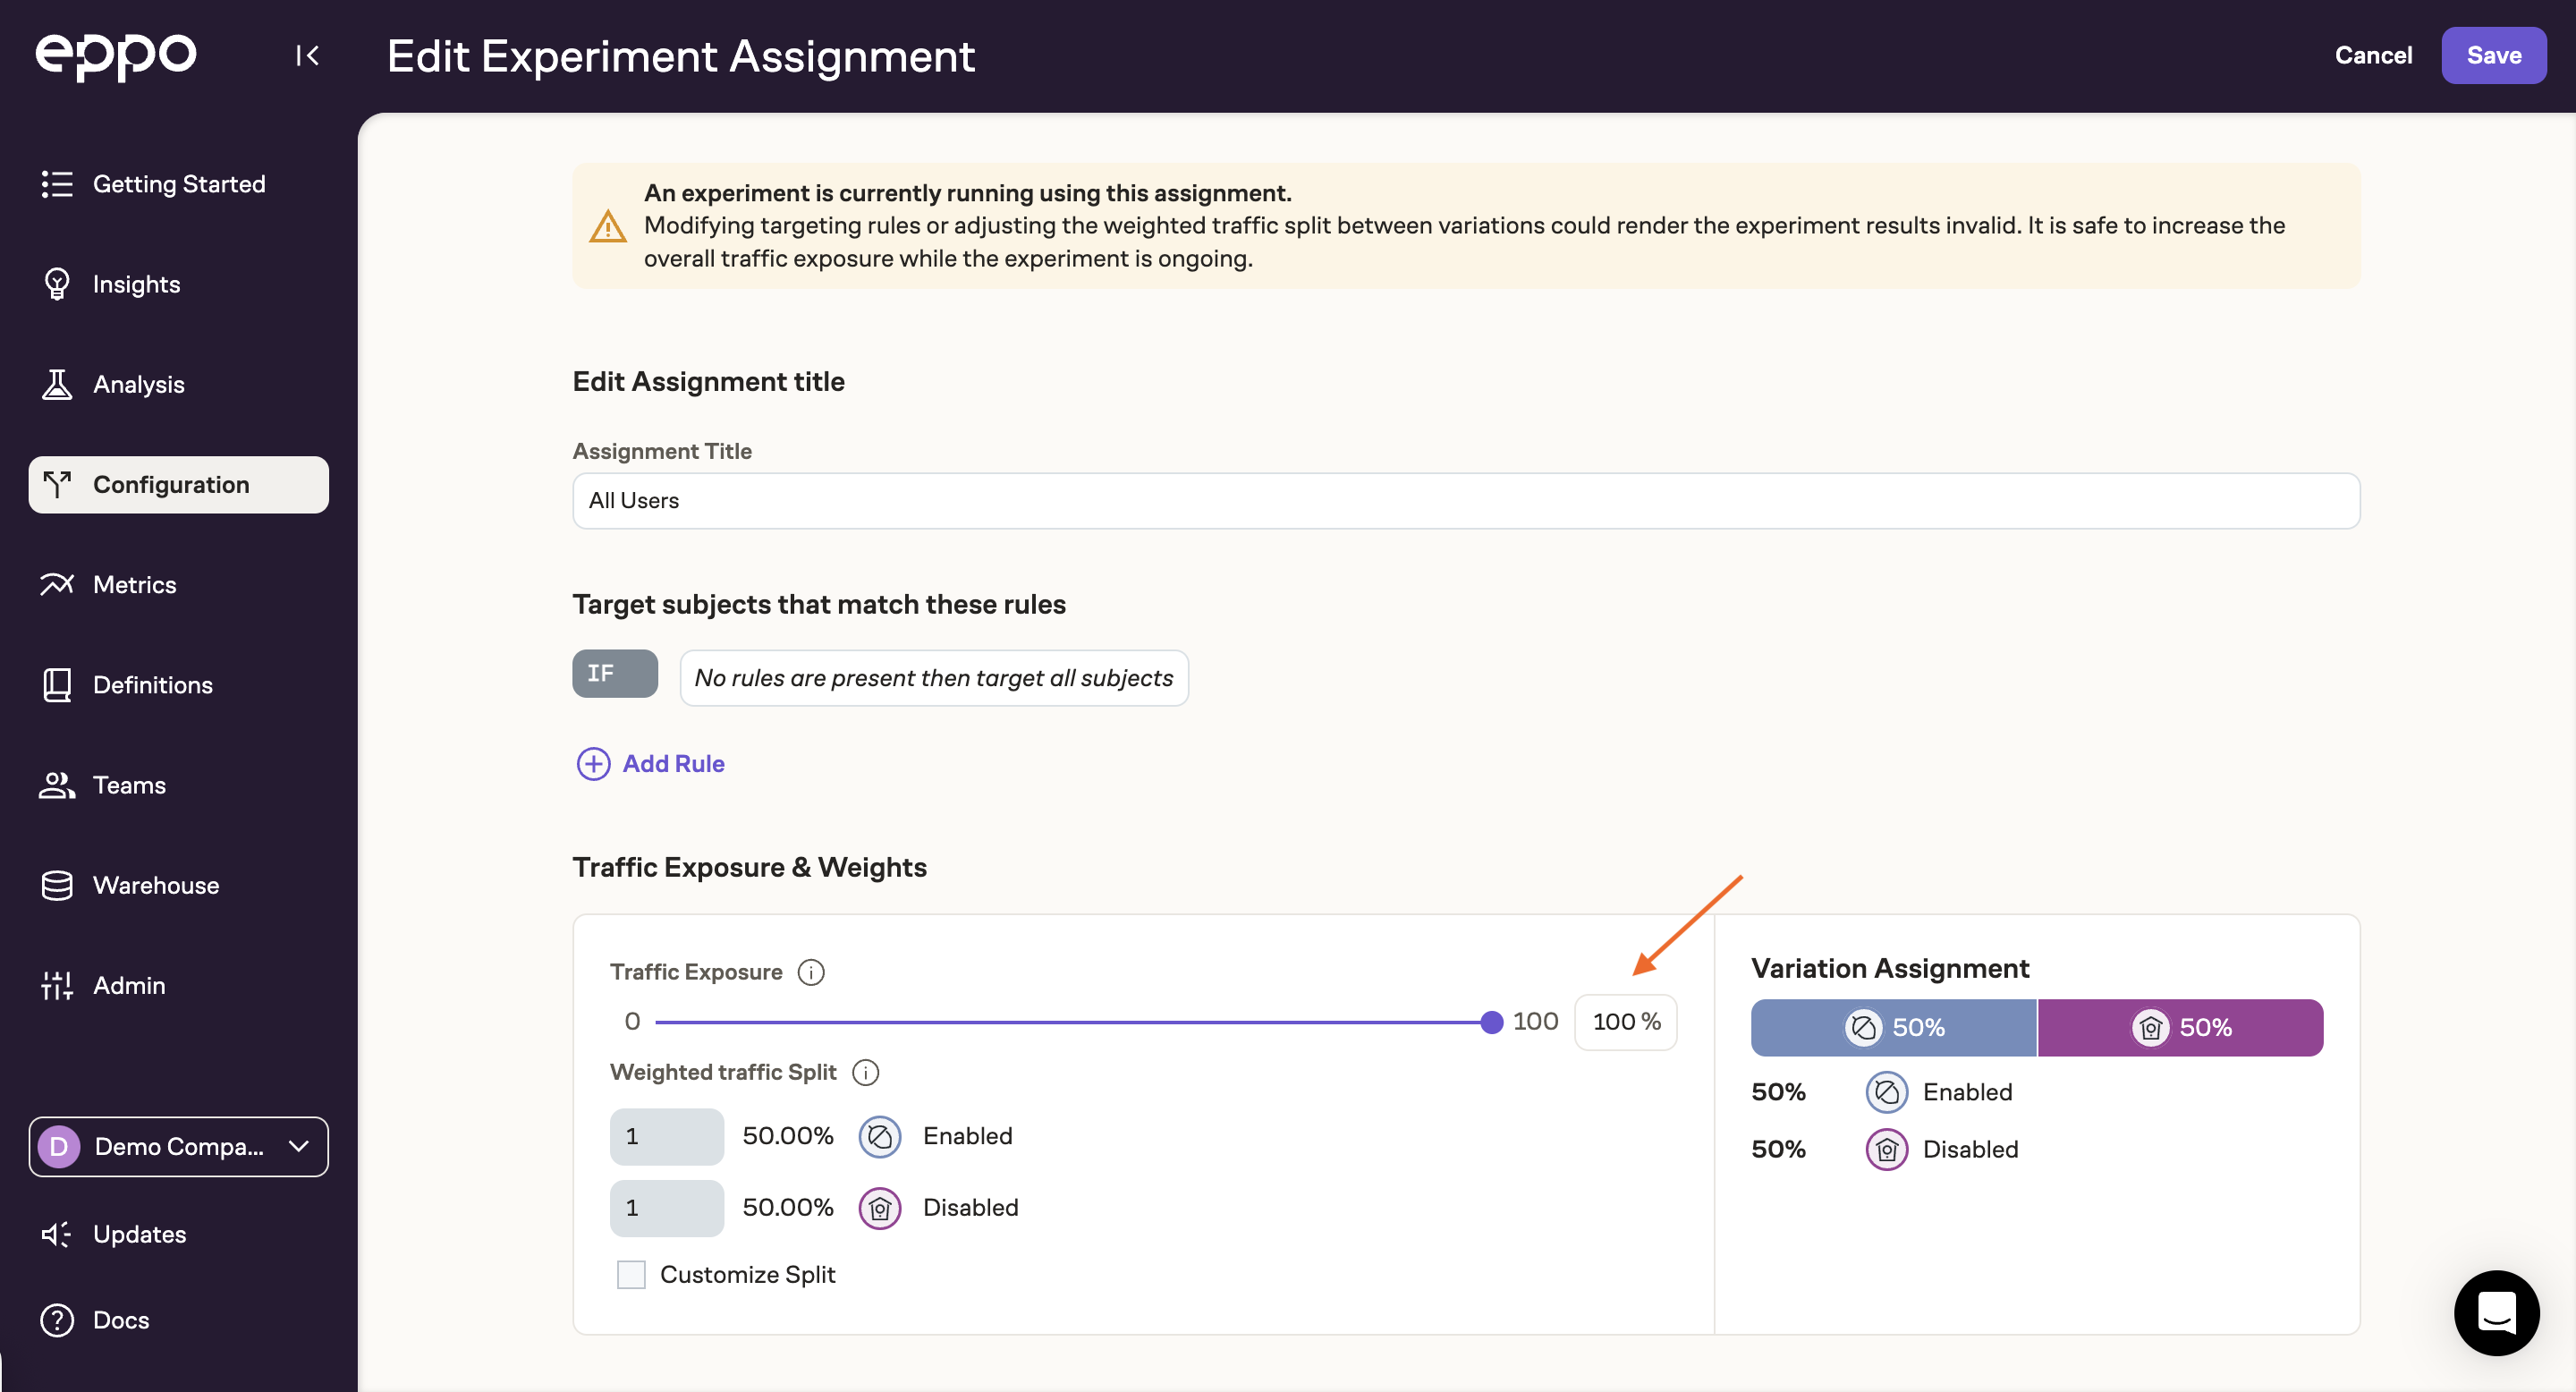
Instead of enrolling all of your users into the experiment, you'll likely want to start with only a random subset of your users. To achieve this, set the Traffic Allocation to something small, say 5%:
You can also add targeting rules to this allocation if you'd like to target a specific segment of your user base.
Tracking the canary test
As users are enrolled into the experiment you can start tracking assignment volume and early metrics by clicking on Create Experiment Analysis:
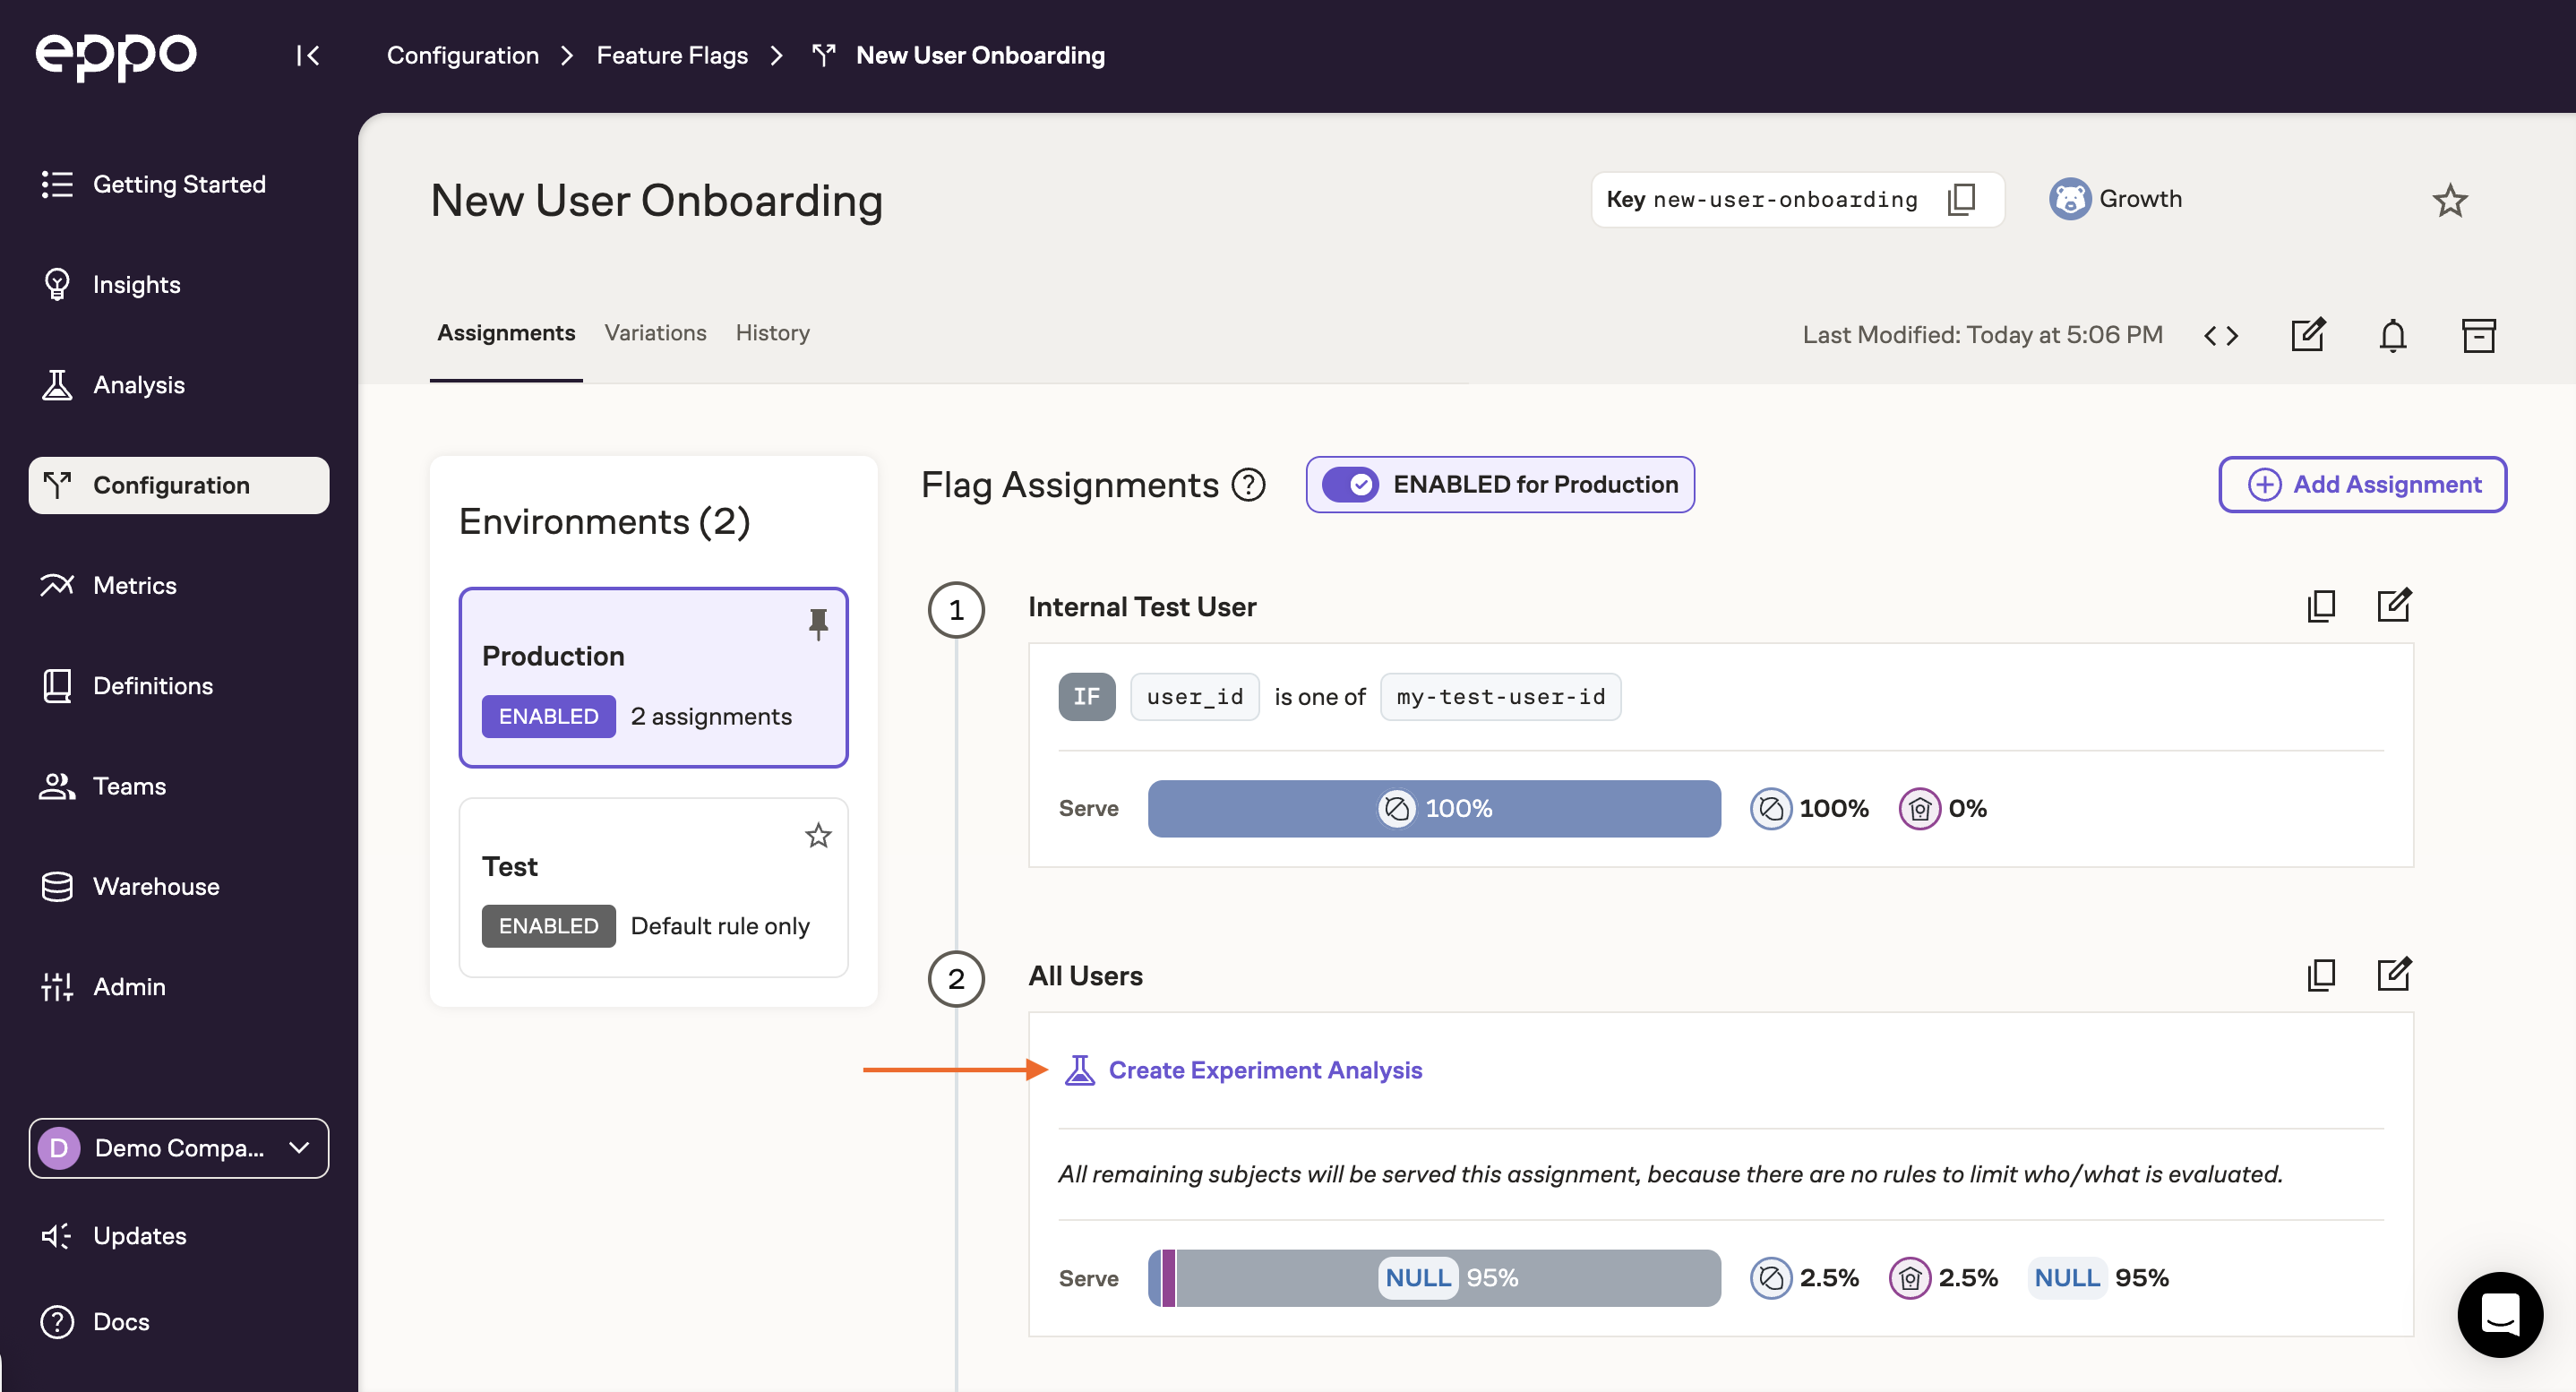
Once you've specified the entity on which the experiment was run (typically user), select the assignment SQL you created above and click Next. This will take you to a configuration page where you can modify analysis timeframes, which variants to include, and the experiment's primary metric. All of these settings have pre-populated defaults, but you can modify them at any time. Once you're happy with the configuration, click Save Changes.
You'll then see an experiment analysis page with your primary metric as well as any company default metrics. You can add any additional metrics you'd like to track by clicking the + icon in the top right of the scorecard.
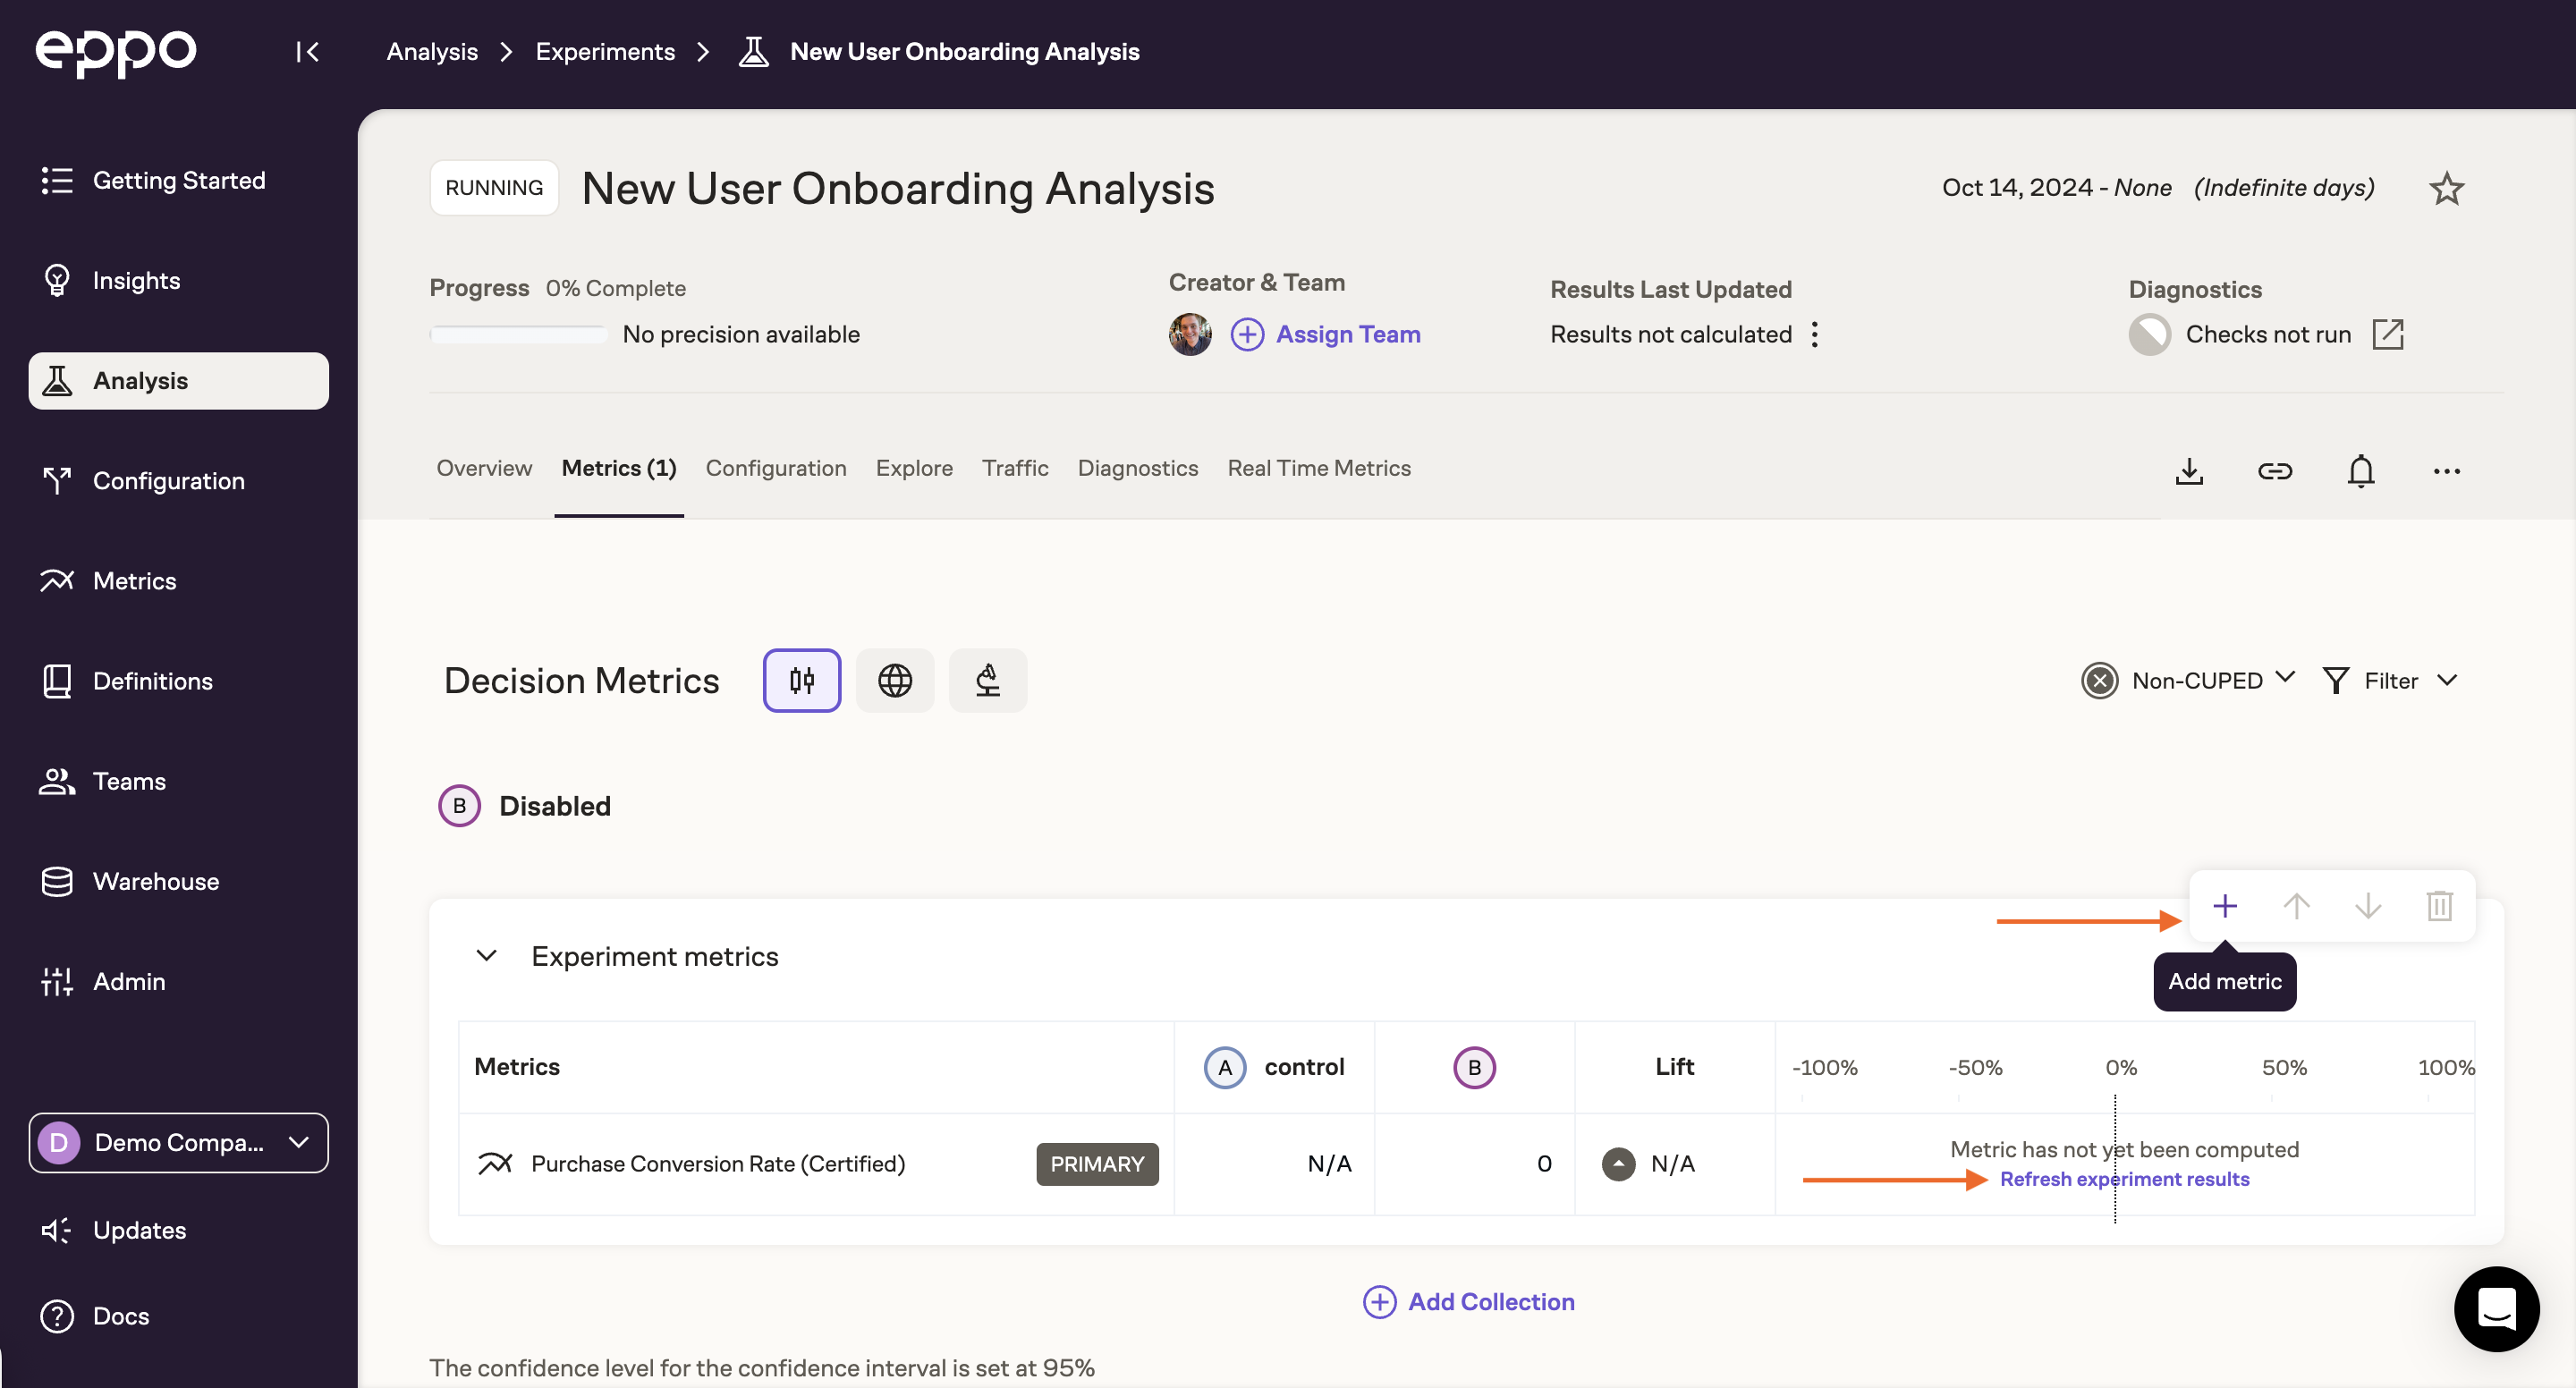
Once you've added all of the metrics of interest, click Refresh Experiment Results. This will trigger a data pipeline that may take a few moments to complete. Once complete, you'll see lift estimates for each metric along with the associated confidence intervals. These confidence intervals will likely be quite wide as we've only exposed a small amount of traffic, but they will become more precise as more subjects are enrolled into the experiment.
Launching the test��
Once you've collected sufficient data from the canary test, you'll want to ramp up the experiment to the full target audience. To do this, simply update the Traffic Allocaton slider on the experiment assignment we created earlier:
Congratulations! Your first experiment is now live in production and collecting data on the full target audience! Moving forward, results will update daily and you can subscribe to email or Slack notifications for early results or diagnostic warnings. You can also dive deeper into results with Explores and coordinate key takeaways and next steps with Experiment Reports.