Python
Eppo's Python SDK can be used for both feature flagging and experiment assignment:
Getting Started
Installation
To start, install the SDK with PIP:
pip install eppo-server-sdk
Usage
Begin by initializing a singleton instance of Eppo's client with an SDK key from the Eppo interface. Once initialized, the client can be used to make assignments anywhere in your app. Initialization should happen when your application starts up to generate a singleton client instance, once per application lifecycle:
Initialize once
import eppo_client
from eppo_client.config import Config, AssignmentLogger

client_config = Config(api_key="<SDK-KEY-FROM-DASHBOARD>")
eppo_client.init(client_config)
Assign anywhere
import eppo_client

client = eppo_client.get_instance()
user = get_current_user()

variation = eppoClient.get_boolean_assignment(
    'show-new-feature',
    user.id,
    { 'country': user.country },
    False
)
After initialization, the SDK begins polling Eppo’s CDN at regular intervals to retrieve the most recent experiment configurations (variation values, traffic allocation, etc.). You can customize initialization and polling preferences by passing in additional initialization options. Note that polling happens independently of assignment calls and is non blocking.
The SDK stores these configurations in memory so that assignments thereafter are effectively instant. For more information, see the architecture overview page.
The SDK's initialization is asynchronous to not block other parts of the server spin up process. If you are using Eppo's SDK in a script and prefer a synchronous method, please see the waiting for configuration section below.
Connecting an event logger
Eppo is architected so that raw user data never leaves your system. As part of that, instead of pushing subject-level exposure events to Eppo's servers, Eppo's SDKs integrate with your existing logging system. This is done with a logging callback function defined at SDK initialization.
client_config = Config(
    api_key="<SDK-KEY>",
    assignment_logger=MyAssignmentLogger()
)
This logger takes an analytic event created by Eppo, assignment, and writes in to a table in the data warehouse (Snowflake, Databricks, BigQuery, or Redshift). You can read more on the Event Logging page.
The code below illustrates an example implementation of a logging callback using Segment. You can provide any logging function, the only requirement is that the SDK receives a log_assignment function that writes the Eppo-managed assignment event to your data warehouse.
Here we define an implementation of the Eppo AssignmentLogger class containing a single function named log_assignment:
from eppo_client.assignment_logger import AssignmentLogger
import analytics

# Connect to Segment.
analytics.write_key = "<SEGMENT_WRITE_KEY>"

class SegmentAssignmentLogger(AssignmentLogger):
    def log_assignment(self, assignment):
        analytics.track(
            assignment["subject"],
            "Eppo Randomization Assignment",
            assignment
        )
You can configure Eppo's SDK to avoid firing duplicate assignment events by providing an optional cache. To learn more, see the deduplication section below.
Getting variations
Now that the SDK is initialized and connected to your event logger, you can check what variant a specific subject (typically user) should see by calling the get_<Type>_Assignment functions. Each time this function is called, the SDK will invoke the provided logging function to record the assignment.
For example, for a string-valued flag, use get_string_assignment:
variation = eppoClient.get_string_assignment(
    'show-new-feature', # flag_key
    user.id, # subject_key
    { 'country': user.country }, # subject_attributes
    'control' # default_value
)
Note that Eppo uses a unified API for feature gates, experiments, and mutually exclusive layers. This makes it easy to turn a flag into an experiment or vice versa without having to do a code release.
The get_string_assignment function takes four inputs to assign a variation:
flag_key- The key for the flag you are evaluating. This key is available on the feature flag detail page (see below).subject_key- A unique identifier for the subject being experimented on (e.g., user), typically represented by a UUID. This key is used to deterministically assign subjects to variants.subject_attributes- A map of metadata about the subject used for targeting. If targeting is not needed, pass in an empty object.default_value- The value that will be returned if no allocation matches the subject, if the flag is not enabled, ifget_string_assignmentis invoked before the SDK has finished initializing, or if the SDK was not able to retrieve the flag configuration. Its type must match theget_<Type>_assignmentcall.
Typed assignments
Every Eppo flag has a return type that is set on creation in the dashboard. Once a flag is created, assignments in code should be made using the corresponding typed function:
get_boolean_assignment(...)
get_numeric_assignment(...)
get_integer_assignment(...)
get_string_assignment(...)
get_json_assignment(...)
Each function has the same signature, but returns the type in the function name. The only exception is default_value, which should be the same type as the flag. For boolean flags for instance, you should use get_boolean_assignment, which has the following signature:
get_boolean_assignment(
    flag_key: str,
    subject_key: str,
    subject_attributes: Dict[str, Any],
    default_value: bool
) -> bool:
To read more about when to use which flag type, see the flag types page.
Contextual Bandits
To leverage Eppo's contextual bandits using the Python SDK, there are two additional steps over regular feature flags:
- Add a bandit action logger to the assignment logger
- Querying the bandit for an action
We have a simple end-to-end example in the Python SDK repository.
Logging bandit actions
In order for the bandit to learn an optimized policy, we need to capture and log the bandit actions. This requires adding a bandit action logging callback to the AssignmentLogger class
class MyLogger(AssignmentLogger):
    def log_assignment(self, assignment):
        ...

    def log_bandit_action(self, bandit_action):
        # implement me
We automatically log the following data:
| Field | Description | Example |
|---|---|---|
timestamp (Date) | The time when the action is taken in UTC | 2024-03-22T14:26:55.000Z |
flagKey (String) | The key of the feature flag corresponding to the bandit | "bandit-test-allocation-4" |
banditKey (String) | The key (unique identifier) of the bandit | "ad-bandit-1" |
subject (String) | An identifier of the subject or user assigned to the experiment variation | "ed6f85019080" |
action (String) | The action assigned by the bandit | "promo-20%-off" |
subjectNumericAttributes (Dict[str, float]) | Metadata about numeric attributes of the subject. Dictionary of the name of attributes their numeric values | {"age": 30} |
subjectCategoricalAttributes (Dict[str, str]) | Metadata about non-numeric attributes of the subject. Dictionary of the name of attributes their string values | {"loyalty_tier": "gold"} |
actionNumericAttributes (Dict[str, float]) | Metadata about numeric attributes of the assigned action. Dictionary of the name of attributes their numeric values | {"brandAffinity": 0.1} |
actionCategoricalAttributes (Dict[str, str]) | Metadata about non-numeric attributes of the assigned action. Map of the name of attributes their string values | {"previouslyPurchased": false} |
actionProbability (Double) | The weight between 0 and 1 the bandit valued the assigned action | 0.25 |
modelVersion (String) | Unique identifier for the version (iteration) of the bandit parameters used to determine the action probability | "v123" |
Querying the bandit for an action
To query the bandit for an action, you can use the get_bandit_action function. This function takes the following parameters:
flag_key(str): The key of the feature flag corresponding to the banditsubject_key(str): The key of the subject or user assigned to the experiment variationsubject_attributes(Attributes): The context of the subjectactions(Dict[str, Attributes]): A dictionary that maps available actions to their attributesdefault(str): The default variation to return if the bandit cannot be queried
The following code queries the bandit for an action:
import eppo_client.bandit

client = eppo_client.get_instance()
bandit_result = client.get_bandit_action(
    "shoe-bandit",
    name,
    eppo_client.bandit.Attributes(
        numeric_attributes={"age": age}, categorical_attributes={"country": country}
    ),
    {
        "nike": Attributes(
            numeric_attributes={"brand_affinity": 2.3},
            categorical_attributes={"previouslyPurchased": true},
        ),
        "adidas": Attributes(
            numeric_attributes={"brand_affinity": 0.2},
            categorical_attributes={"previouslyPurchased": false},
        ),
    },
    "control",
)
Subject Context
The subject context contains contextual information about the subject that is independent of bandit actions. For example, the subject's age or country.
The subject context has type Attributes which has two fields:
numeric_attributes(Dict[str, float]): A dictionary of numeric attributes (such as "age")categorical_attributes(Dict[str, str]): A dictionary of categorical attributes (such as "country")
The categerical_attributes are also used for targeting rules for the feature flag similar to how subject_attributes are used for that with regular feature flags.
Action Contexts
Next, supply a dictionary with actions and their attributes: actions: Dict[str, Attributes].
If the user is assigned to the bandit, the bandit selects one of the actions supplied here,
and all actions supplied are considered to be valid; if an action should not be shown to a user, do not include it in this dictionary.
The action attributes are similar to the subject_attributes but hold action specific information.
Note that we can use Attrubutes.empty() to create an empty attribute context.
Note that relevant action contexts are subject-action interactions. For example, there could be a "brand-affinity" model that computes brand affinities of users to brands, and scores of that model can be added to the action context to provide additional context for the bandit.
Result
The bandit_result is an instance of BanditResult, which has two fields:
variation(str): The variation that was assigned to the subjectaction(Optional[str]): The action that was assigned to the subject
The variation returns the feature flag variation, this can be the bandit itself, or the "status quo" variation if the user is not assigned to the bandit.
If we are unable to generate a variation, for example when the flag is turned off, then the default variation is returned.
In both of those cases, the action is None, and you should use the status-quo algorithm to select an action.
When action is not None, the bandit has selected that action to be shown to the user.
Status quo algorithm
In order to accurately measure the performance of the bandit, we need to compare it to the status quo algorithm using an experiment.
This status quo algorithm could be a complicated algorithm to that selects an action according to a different model, or a simple baseline such as selecting a fixed or random action.
When you create an analysis allocation for the bandit and the action in BanditResult is None, implement the desired status quo algorithm based on the variation value.
Advanced Options
Initialization options
The init function accepts the following fields in the configuration argument:
| Option | Type | Description | Default |
|---|---|---|---|
assignment_logger | AssignmentLogger | A callback that sends each assignment to your data warehouse. Required only for experiment analysis. See example below. | None |
is_graceful_mode | bool | When true, gracefully handles all exceptions within the assignment function and returns the default value. | True |
poll_interval_seconds | Optional[int] | The interval in seconds at which the SDK polls for configuration updates. If set to None, polling is disabled. | 300 |
poll_jitter_seconds | int | The jitter in seconds to add to the poll interval. | 30 |
initial_configuration | Optional[Configuration] | If set, the client will use this configuration until it fetches a fresh one. | None |
For instance, to poll for changes any minutes, specify poll_interval_seconds as an additional argument to the configuration:
client_config = Config(
    api_key=API_KEY,
    assignment_logger=AssignmentLogger(),
    poll_interval_seconds=60
)

eppo_client.init(client_config)
Exporting configurations
In some situations you may want to fetch flag configurations server side and then use those configurations to initialize a client side SDK without making any additional network calls. Eppo supports this through offline initialization.
To start, you can export flag configurations from the Python SDK by using the client.get_configuration() function. From there, you can send them to your front-end client as a part of your routine initialization. This configuration can then be used to initialize one of Eppo's client side SDKs without having to do any additional network calls to Eppo's CDN.
Deduplicating logs
The SDK may see many duplicate assignments in a short period of time, and if you have configured a logging function, they will be transmitted to your downstream event store. This increases the cost of storage as well as warehouse costs during experiment analysis.
To mitigate this, a caching assignment logger is optionally available with configurable cache behavior.
The caching can be configured individually for assignment logs and bandit action logs using AssignmentCacheLogger.
AssignmentCacheLogger optionally accepts two caches. We recommend using cachetools but any subclass of MutableMapping works.
import cachetools
from eppo_client.assignment_logger import AssignmentLogger, AssignmentCacheLogger


class MyLogger(AssignmentLogger):
    # implement your logger
    pass


client_config = Config(
    api_key="<SDK-KEY-FROM-DASHBOARD>",
    assignment_logger=AssignmentCacheLogger(
        MyLogger(),
        # cache 1024 least recently used assignments
        assignment_cache=cachetools.LRUCache(maxsize=1024),
        # cache bandit assignment for no longer than 10 minutes
        bandit_cache=cachetools.TTLCache(maxsize=2048, ttl=600),
    ),
)
Waiting for configuration
Starting in version v.4.0.0, the SDK has a new method to wait for the configuration to be fetched, client.wait_for_initialization(). This method parks the current Python thread until the client fetches the configuration. It releases Global Interpreter Lock (GIL) while it waits, so it does not block other Python threads.
This is particularly useful for scripting use cases when subsequent calls to Eppo's client will happen immediately after the client starts initializing.
Usage in serverless environments
The default periodic polling setup is suitable for most cases but may not be efficient in short-lived serverless environments like Cloud Functions or Lambdas, where a new configuration is fetched on every function call.
Starting with v3.7.0, Python SDK exposes an advanced API to allow manual control over configuration.
To disable default polling behavior, set poll_interval_seconds to None when initializing the client.
import eppo_client
from eppo_client import Config, ApplicationLogger

eppo_client.init(
    Config(api_key="<api-key>", application_logger=..., poll_interval_seconds=None)
)
Configuration class represents Eppo configuration that defines how the SDK evaluates feature flags.
It can be initialized from the CDN response bytes (https://fscdn.eppo.cloud/api/flag-config/v1/config).
As a user, you have full control over how this response is retrieved and stored.
from eppo_client import Configuration

configuration = Configuration(flags_configuration=b"...bytes...")
The response format is subject to change, so you should treat the response as opaque bytes—do not parse, inspect, or modify it in any way.
Once you create the configuration object, configure the client like this:
eppo_client.get_instance().set_configuration(configuration)
Upon setting the configuration, the client is initialized and will start serving assignments based on the provided configuration. You can update the configuration anytime and it will be overwritten atomically.
You can also provide an initial configuration during client initialization:
eppo_client.init(
    Config(
        api_key="<api-key>",
        application_logger=...,
        poll_interval_seconds=None,
        initial_configuration=configuration,
    )
)
Examples
In this section, we will go through a few examples of how to use Eppo's Python SDK in two common situations: batch processing and real-time applications.
Usage in a batch process
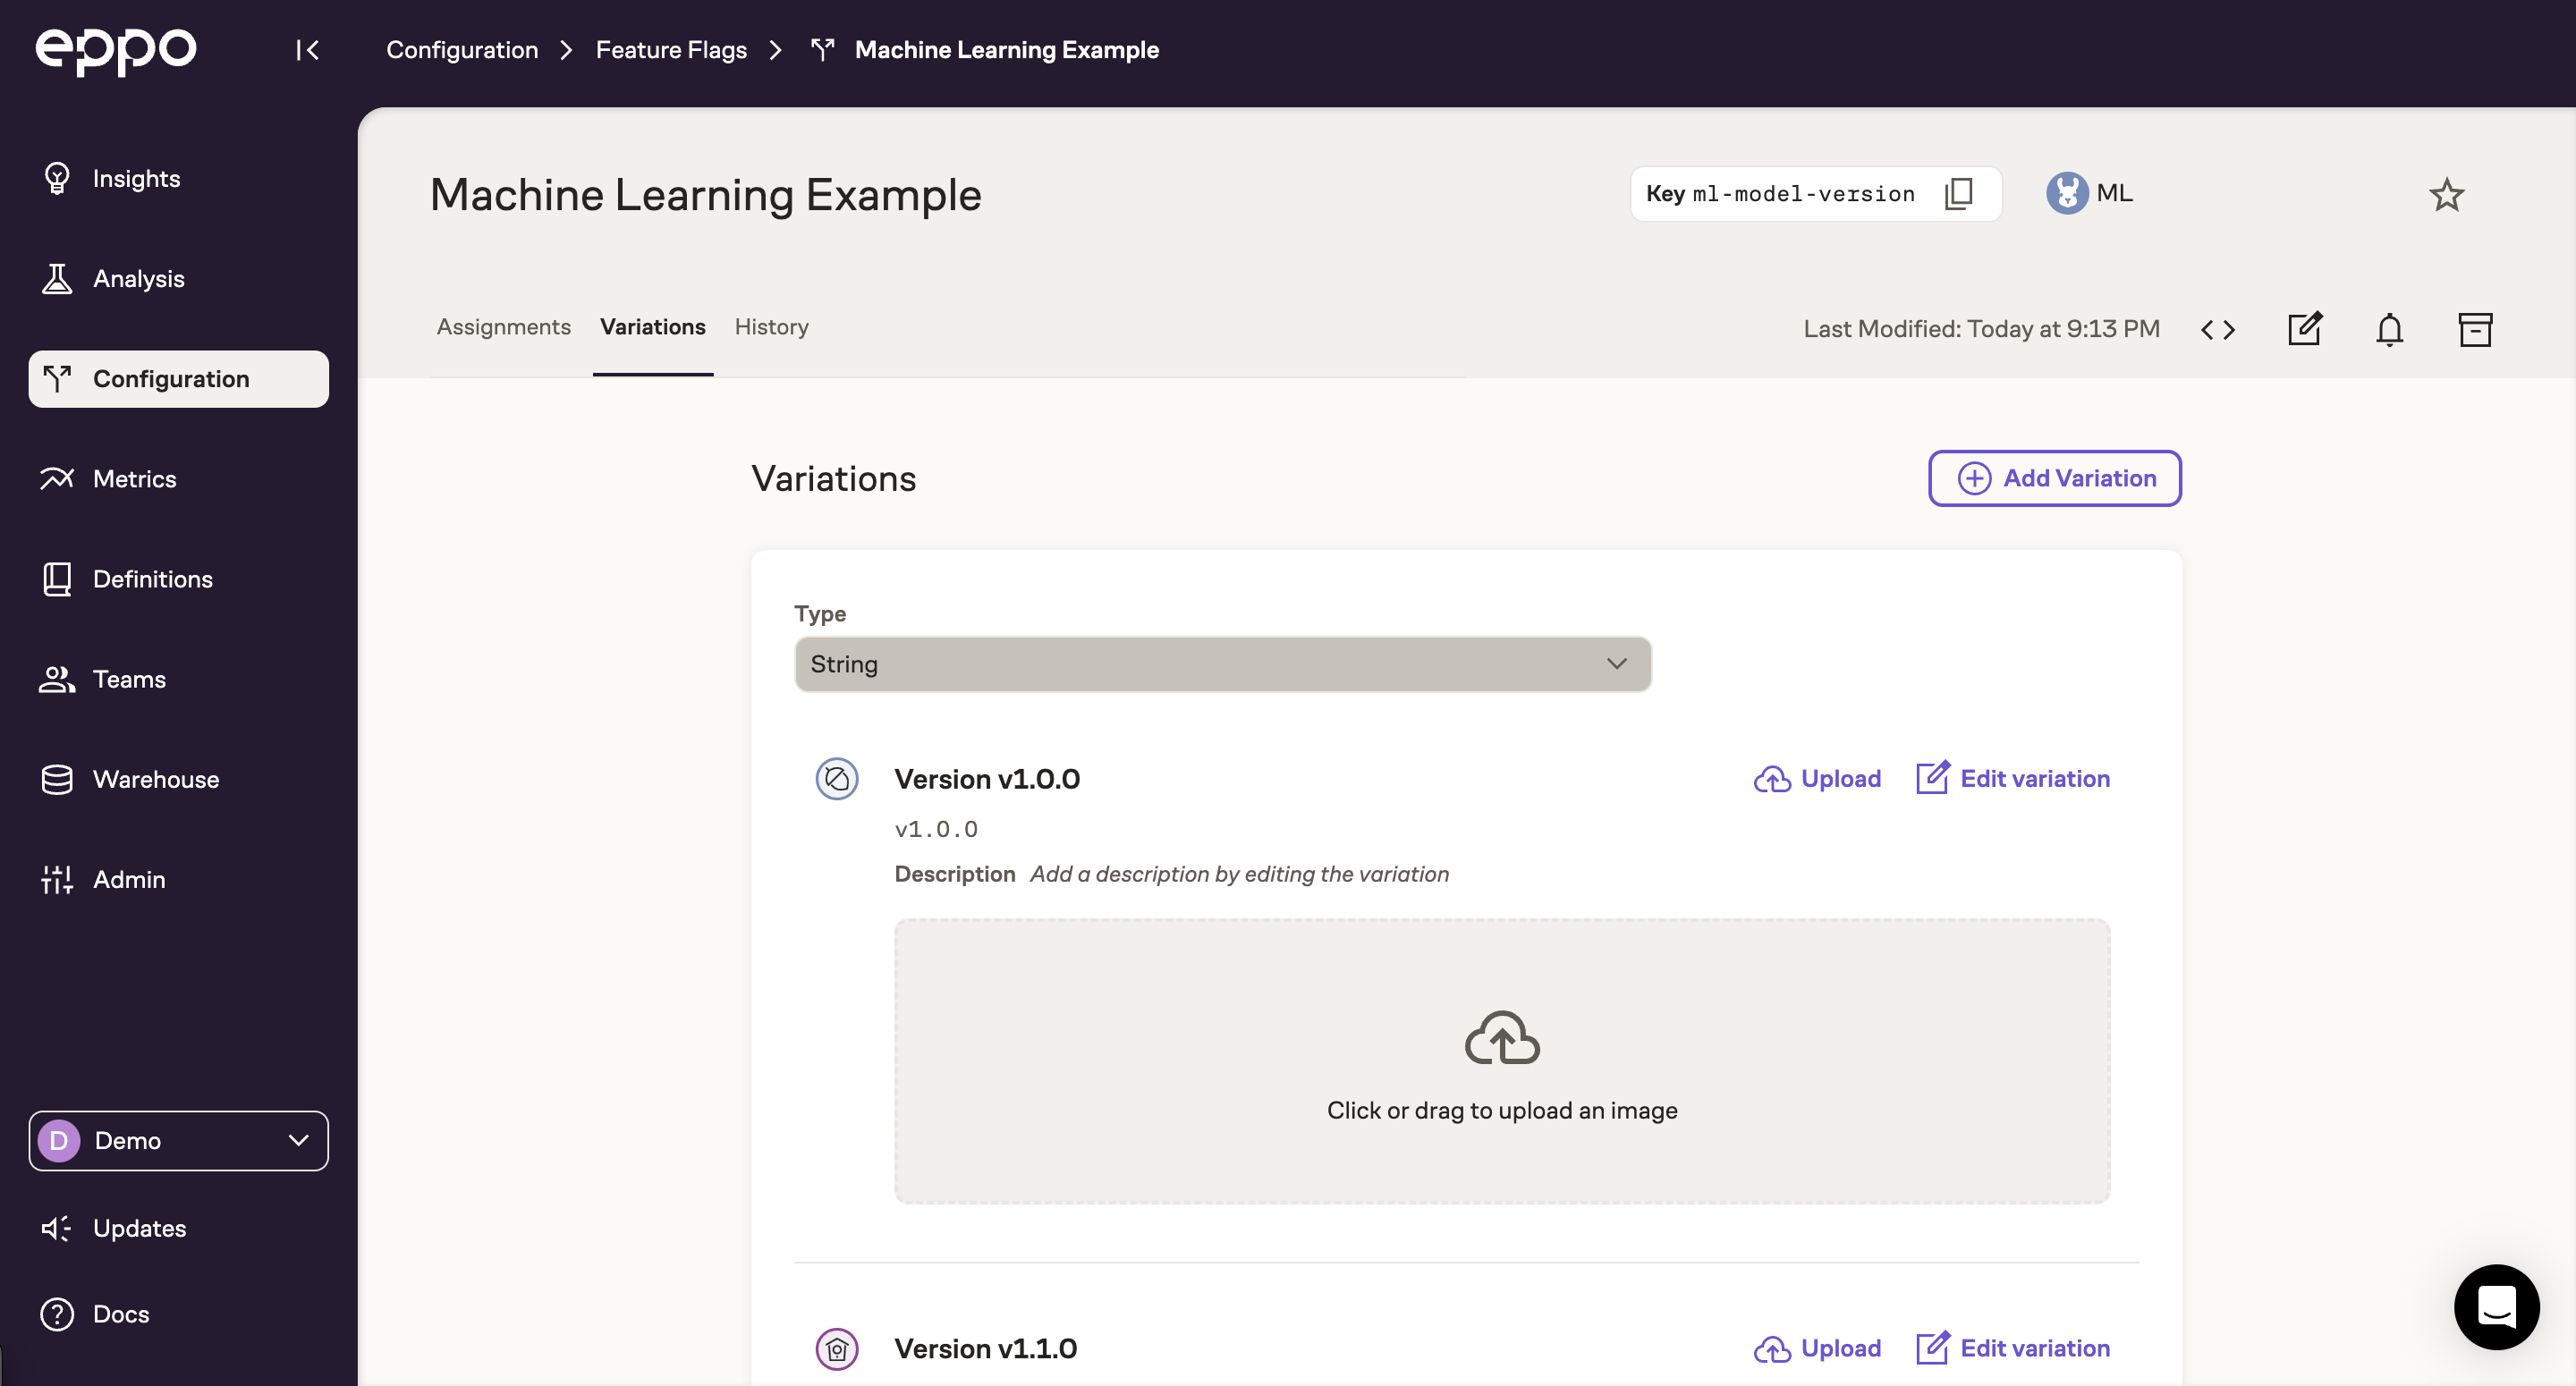
As a basic example, imagine using Eppo's SDK to randomize users in a batch machine learning evaluation script. Further, imagine we're testing an upgrade from model version v1.0.0 to v1.1.0. First we'd create a feature flag called ml-model-version with two variations: v1.0.0 and v1.1.0. The Eppo UI should look like something like this:
If you have not set up an experiment in Eppo's UI before, please see the experiment quickstart guide.
To keep the example simple, let's not worry about logging assignments to a warehouse and instead just write them to a local file using Python's built-in logging package.
Your ML model evaluation script might then look something like this:
import logging
import os
from uuid import uuid4
import eppo_client
from eppo_client.config import Config, AssignmentLogger

logging.basicConfig(
    filename='eppo_assignments.csv',
    level=logging.INFO,
    format=f'%(message)s'
)


class LocalAssignmentLogger(AssignmentLogger):
    def log_assignment(self, assignment):
        logging.info(assignment)

# initialize the Eppo client
client_config = Config(
    api_key=os.getenv("EPPO_API_KEY"),
    assignment_logger=LocalAssignmentLogger()
)
eppo_client.init(client_config)

# get an instance and wait for initialization to complete
client = eppo_client.get_instance()
client.wait_for_initialization()

for _ in range(10):
    # create random user ids for demonstration purposes
    user_id = str(uuid4())

    model_version = client.get_string_assignment(
        "ml-model-version",
        user_id,
        {},
        "v1.0.0"
    )

    # TODO: Evaluate the appropriate model version for the user

    print(f"{user_id}: {model_version}")
Note that since the get_string_assignment call is deterministic, the same user_id will always produce the same variation. That is, if this script runs at a regular cadence, you don't need to worry about users switching between variations.
After running this, you can inspect the logs in the eppo_assignments.csv file:
{'base': {'featureFlag': 'ml-model-version', 'allocation': 'allocation-10061', 'experiment': 'ml-model-version-allocation-10061', 'variation': 'v1.1.0', 'metaData': {'sdkName': 'python', 'sdkVersion': '4.0.1', 'coreVersion': '4.0.0'}}, 'subject': 'f54ba5f3-90bb-4cdf-bf56-ca0335ede92c', 'subjectAttributes': {}, 'timestamp': '2024-10-11T03:24:12.093538Z'}
{'base': {'featureFlag': 'ml-model-version', 'allocation': 'allocation-10061', 'experiment': 'ml-model-version-allocation-10061', 'variation': 'v1.0.0', 'metaData': {'sdkName': 'python', 'sdkVersion': '4.0.1', 'coreVersion': '4.0.0'}}, 'subject': '3ccfcb7c-1b5d-4d3b-8513-198ef97c20d0', 'subjectAttributes': {}, 'timestamp': '2024-10-11T03:24:12.094055Z'}
{'base': {'featureFlag': 'ml-model-version', 'allocation': 'allocation-10061', 'experiment': 'ml-model-version-allocation-10061', 'variation': 'v1.0.0', 'metaData': {'sdkName': 'python', 'sdkVersion': '4.0.1', 'coreVersion': '4.0.0'}}, 'subject': '7d4d81be-e7e5-42b5-b096-79b2dd25a0a1', 'subjectAttributes': {}, 'timestamp': '2024-10-11T03:24:12.094164Z'}
{'base': {'featureFlag': 'ml-model-version', 'allocation': 'allocation-10061', 'experiment': 'ml-model-version-allocation-10061', 'variation': 'v1.1.0', 'metaData': {'sdkName': 'python', 'sdkVersion': '4.0.1', 'coreVersion': '4.0.0'}}, 'subject': '71435619-b1e5-446c-aabe-18c28c7a96af', 'subjectAttributes': {}, 'timestamp': '2024-10-11T03:24:12.094246Z'}
{'base': {'featureFlag': 'ml-model-version', 'allocation': 'allocation-10061', 'experiment': 'ml-model-version-allocation-10061', 'variation': 'v1.0.0', 'metaData': {'sdkName': 'python', 'sdkVersion': '4.0.1', 'coreVersion': '4.0.0'}}, 'subject': '10ae9617-7e06-459a-a699-a464e6a9dbb9', 'subjectAttributes': {}, 'timestamp': '2024-10-11T03:24:12.094321Z'}
{'base': {'featureFlag': 'ml-model-version', 'allocation': 'allocation-10061', 'experiment': 'ml-model-version-allocation-10061', 'variation': 'v1.0.0', 'metaData': {'sdkName': 'python', 'sdkVersion': '4.0.1', 'coreVersion': '4.0.0'}}, 'subject': 'f2f4b2ed-9fdd-4150-af88-27ef17470d45', 'subjectAttributes': {}, 'timestamp': '2024-10-11T03:24:12.094394Z'}
{'base': {'featureFlag': 'ml-model-version', 'allocation': 'allocation-10061', 'experiment': 'ml-model-version-allocation-10061', 'variation': 'v1.0.0', 'metaData': {'sdkName': 'python', 'sdkVersion': '4.0.1', 'coreVersion': '4.0.0'}}, 'subject': '169d2066-8861-4230-9fce-809a1bb2a3cc', 'subjectAttributes': {}, 'timestamp': '2024-10-11T03:24:12.094463Z'}
{'base': {'featureFlag': 'ml-model-version', 'allocation': 'allocation-10061', 'experiment': 'ml-model-version-allocation-10061', 'variation': 'v1.0.0', 'metaData': {'sdkName': 'python', 'sdkVersion': '4.0.1', 'coreVersion': '4.0.0'}}, 'subject': '359ff058-c8ad-4d35-8559-44c8ad0c235f', 'subjectAttributes': {}, 'timestamp': '2024-10-11T03:24:12.094530Z'}
{'base': {'featureFlag': 'ml-model-version', 'allocation': 'allocation-10061', 'experiment': 'ml-model-version-allocation-10061', 'variation': 'v1.0.0', 'metaData': {'sdkName': 'python', 'sdkVersion': '4.0.1', 'coreVersion': '4.0.0'}}, 'subject': 'b13ac779-e639-4367-8afb-7942f789ec12', 'subjectAttributes': {}, 'timestamp': '2024-10-11T03:24:12.094595Z'}
{'base': {'featureFlag': 'ml-model-version', 'allocation': 'allocation-10061', 'experiment': 'ml-model-version-allocation-10061', 'variation': 'v1.1.0', 'metaData': {'sdkName': 'python', 'sdkVersion': '4.0.1', 'coreVersion': '4.0.0'}}, 'subject': 'a0bc2b98-bfc2-4740-a3e0-18151ca88dcd', 'subjectAttributes': {}, 'timestamp': '2024-10-11T03:24:12.094660Z'}
In a real-world scenario, you would send these logs to your warehouse of choice. From there, you would create an Assignment SQL Definition and analyze your experiment like any other experiment in Eppo. For more information on analyzing experiments, see our Experiment Analysis Quickstart.
Targeting users in Django
While Eppo's SDK can be used for batch processing as described above, it is most commonly used in live applications to perform assignment in real time.
Let’s say you are running a Django service with the User-Agent package. You can use feature flags to offer a payment method that adapts to the browser (only Safari users should be offered to use Apple Pay), the country (Dutch users can use iDEAL), and loyalty status (members might use their points). You can use a feature flag to configure what is possible in which country, for which users, etc.
To make the decision, you can put the relevant information (country, loyalty_tier, device_type, etc.) in a session_attributes dictionary:
# ...
from ipware import get_client_ip
from django.contrib.gis.utils import GeoIP2
g = GeoIP2()
# ...
if request.method == 'POST':
ip, is_routable = get_client_ip(request)
if is_routable:
country_code = g.city(ip)["country_code"]
else:
country_code = "UNKNOWN"
session_attributes = {
'country_code': country_code,
'loyalty_tier': request.session.loyalty_tier,
'browser_type': request.user_agent.browser.family,
'device_type': request.user_agent.device.family,
}
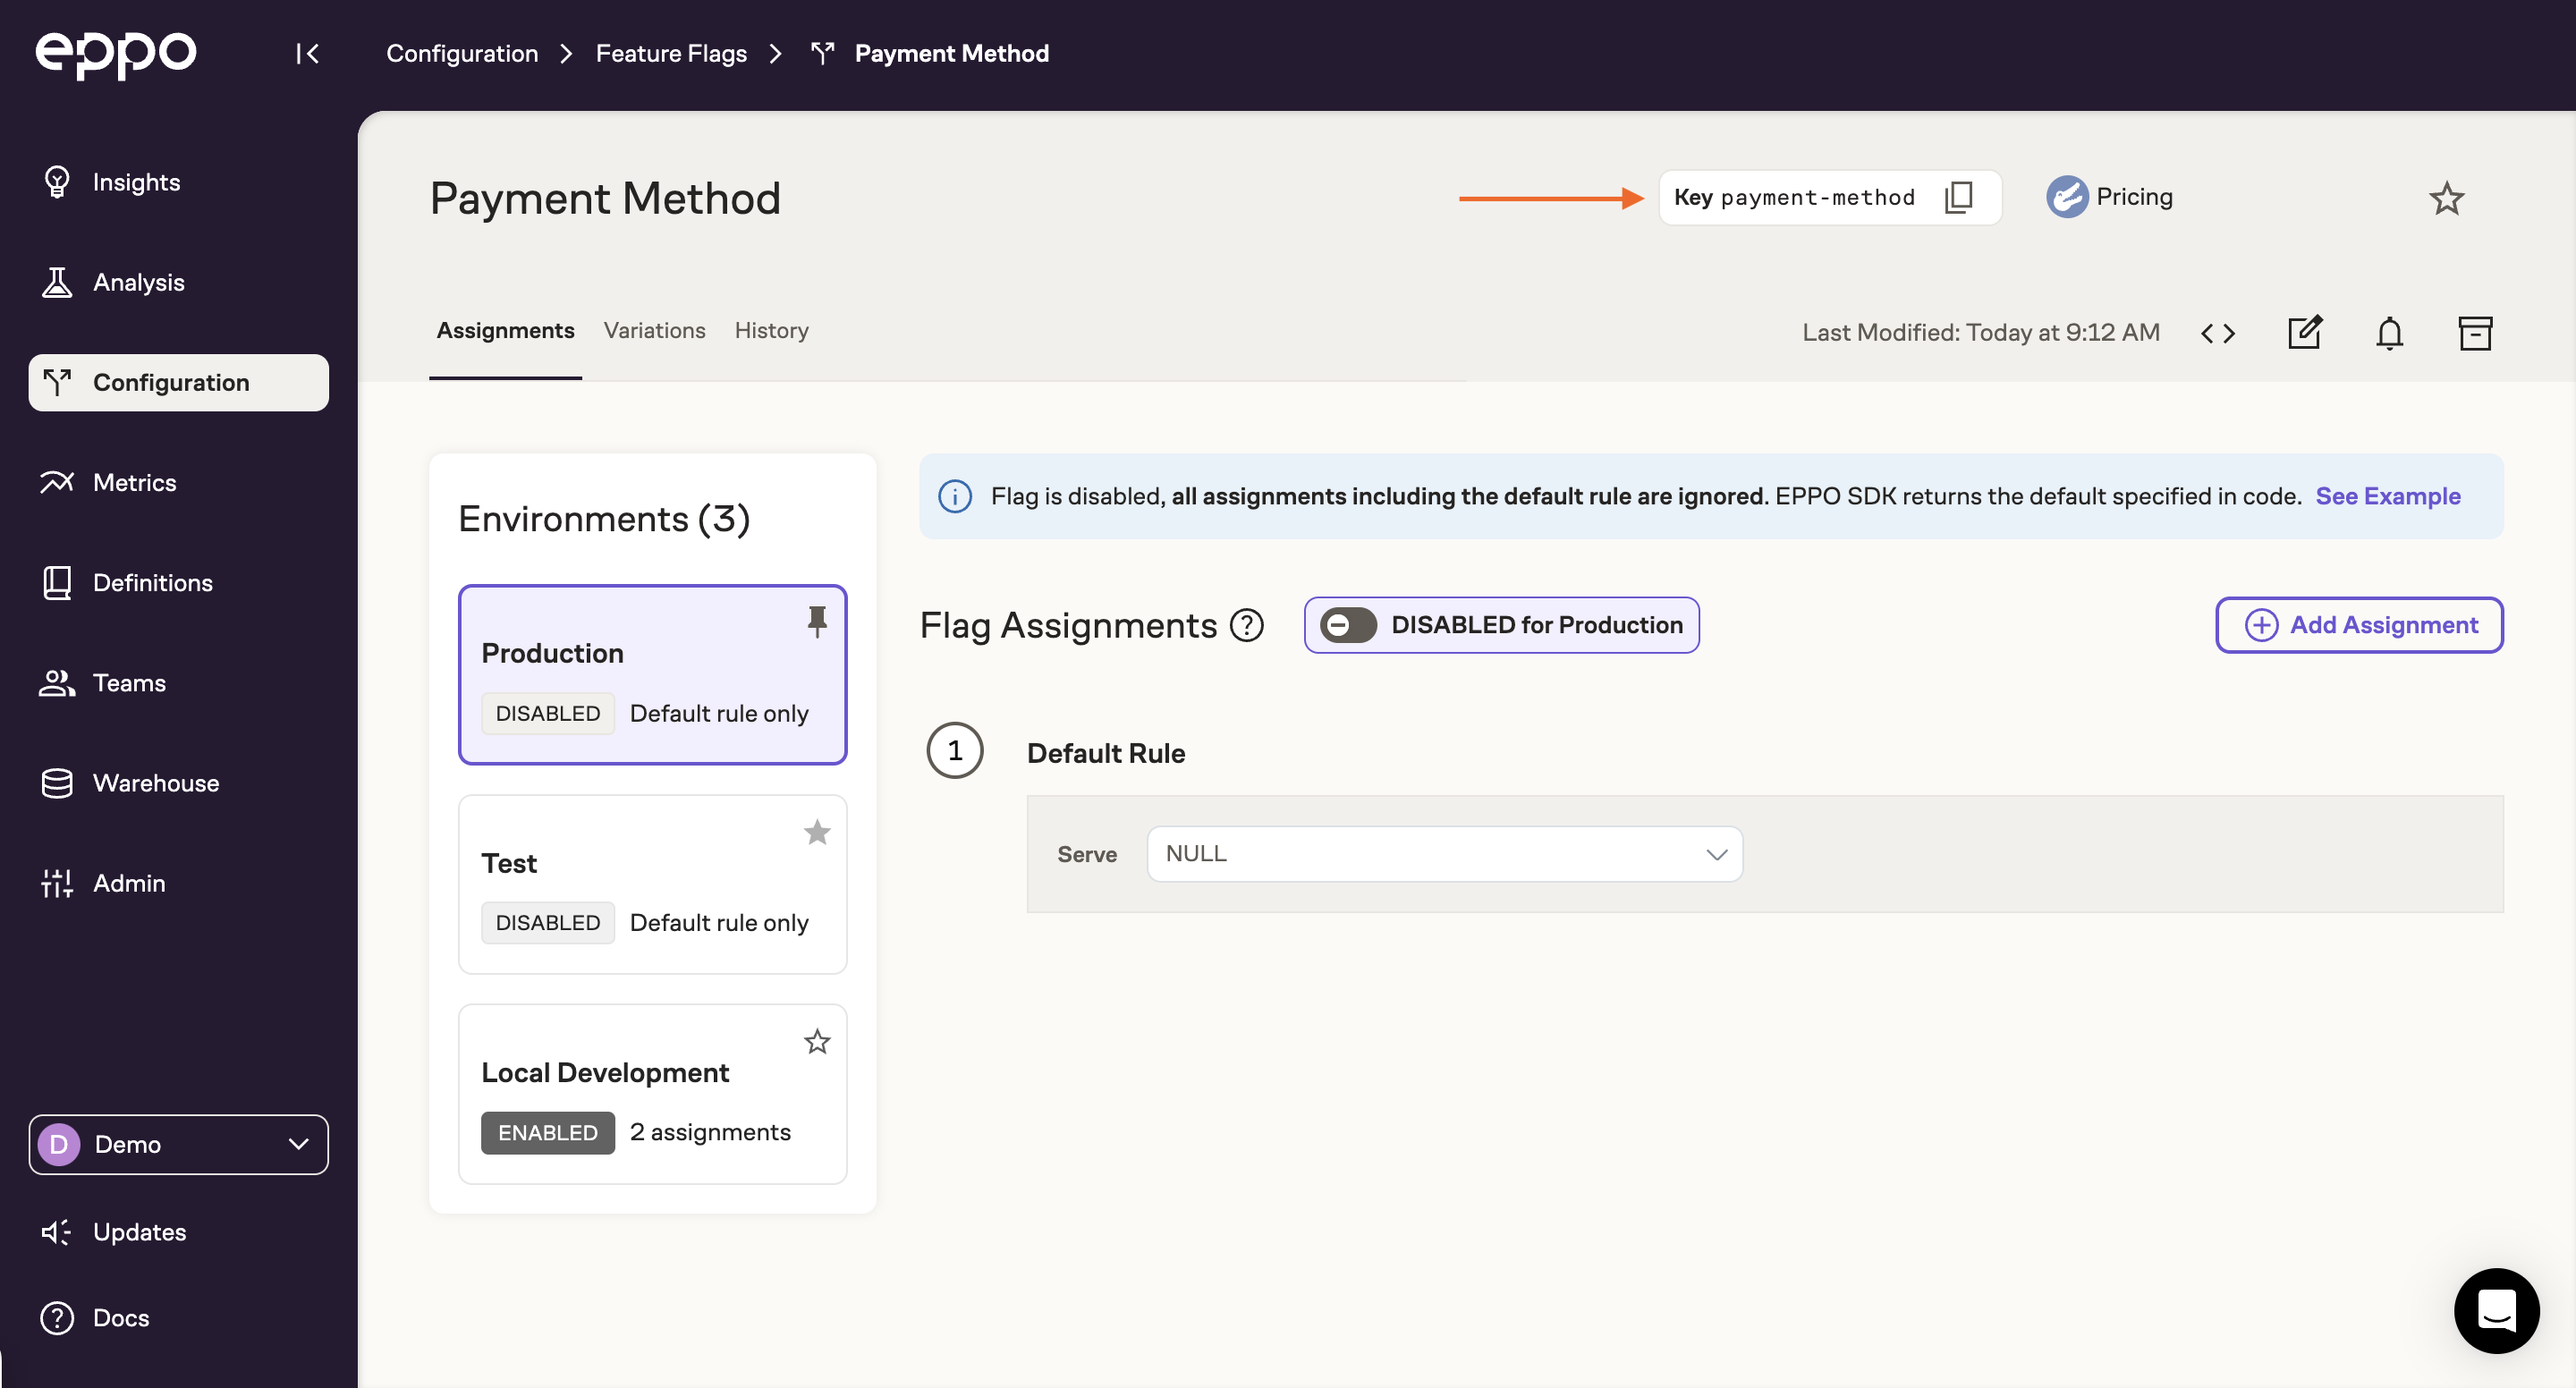
payment_method = client.get_string_assignment(
"payment-method",
request.user.id,
session_attributes,
"default_checkout"
)
if variation == 'apple_pay':
# TODO: Offer Apple Pay
elif variation == 'ideal':
# TODO: Offer iDEAL
else:
# TODO: Offer default checkout
The MATCHES, ONE_OF, and NOT_ONE_OF operators are evaluated on string representations of the subject attributes. To be consistent with other SDKs, note that conversion of subject attributes from floats, booleans, and None is different from the standard Python conversion.
In particular, True and False are converted to the string values "true" and "false". Integer floats are converted to integers before converting to a string. That is, 10.0 becomes "10", whereas 10.1 becomes "10.1". Finally, None is converted to the string null.
Then, in the Eppo UI, your experiment assignment should look something like this:
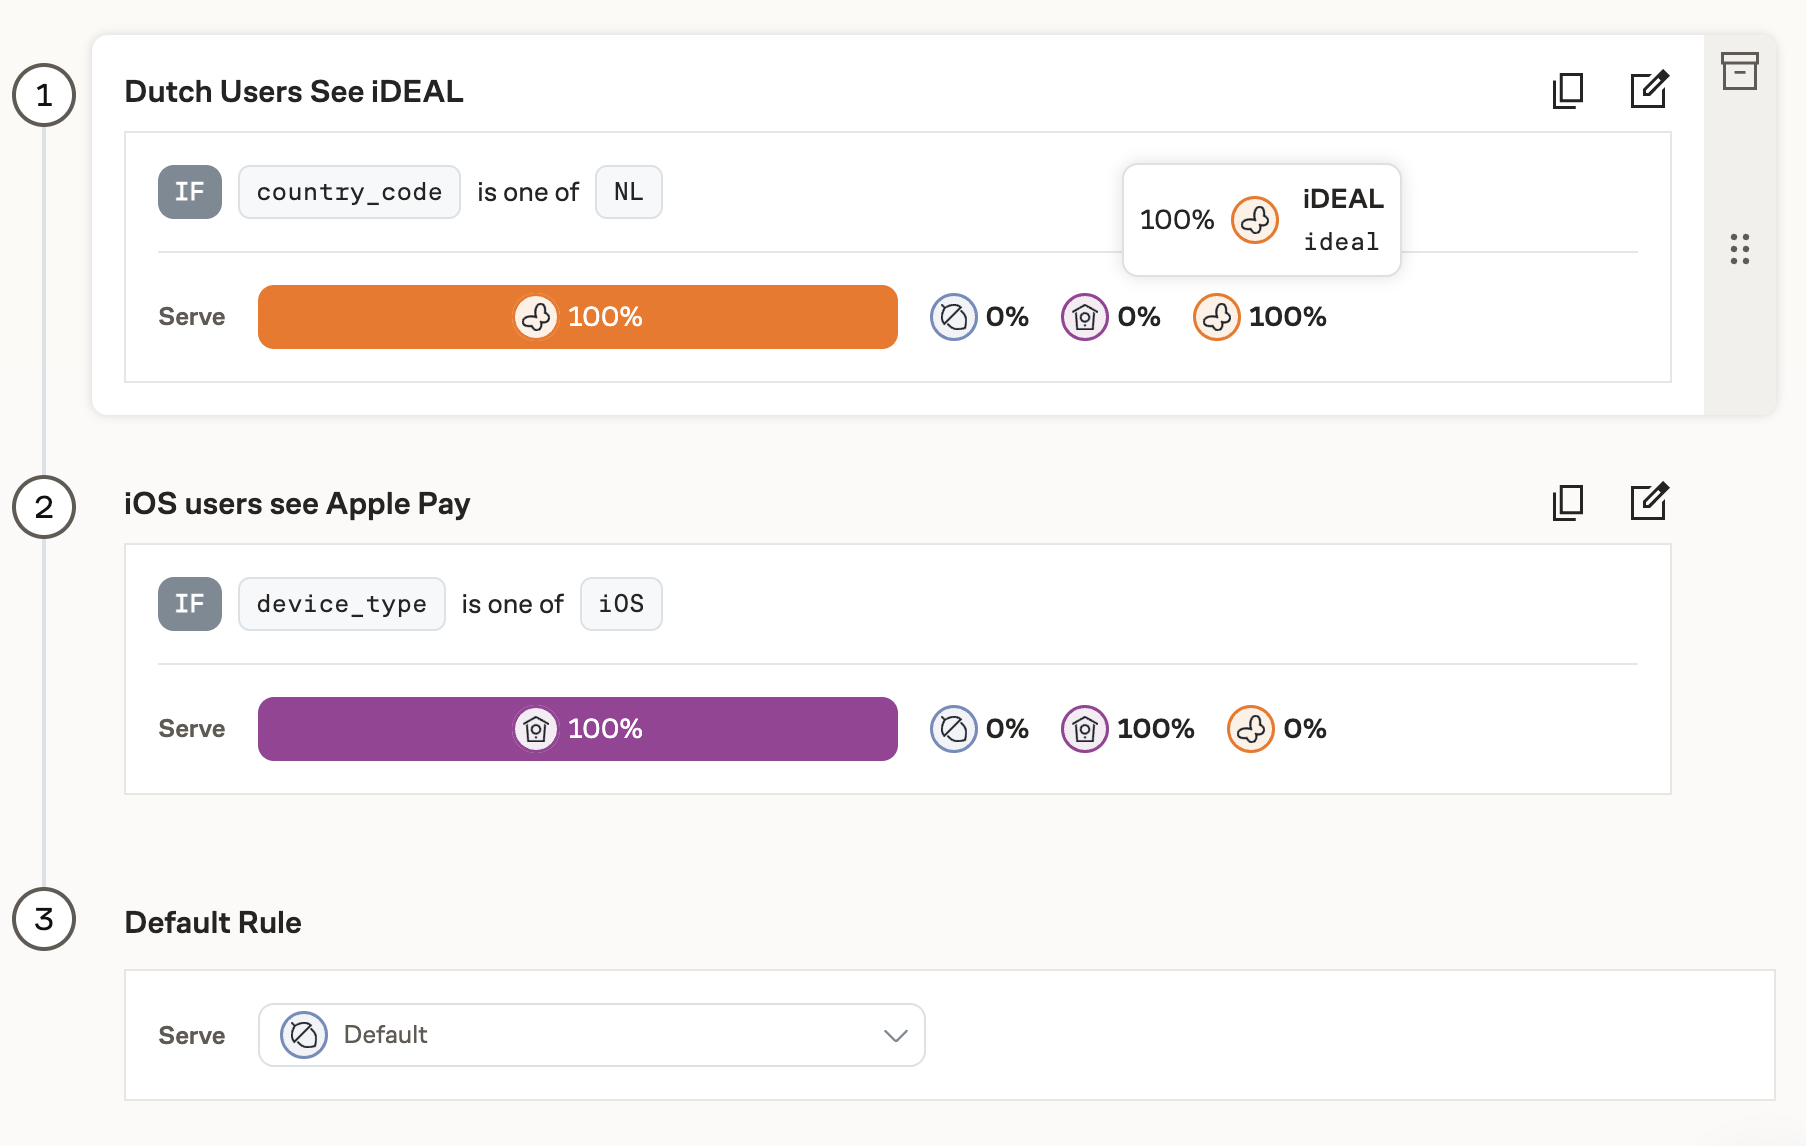
These rules are evaluated from top to bottom. That is, in this example an iOS user in the Netherlands will be put into the first category and see iDEAL, but not Apple Pay. If you instead want to offer such users both options, consider implementing two flags: one for iDEAL, one for Apple Pay.
Our approach is highly flexible: it lets you configure properties that match the relevant entity for your feature flag or experiment. For example, if a user is usually on iOS but they are connecting from a PC browser this time, they probably should not be offered an Apple Pay option, in spite of being labelled an iOS user.
If you create rules based on attributes on a flag or an experiment, those attributes should be passed in on every assignment call.
Appendix
Assignment Logger Schema
The Eppo-managed assignment analytic event has the following schema:
| Field | Description | Example |
|---|---|---|
experiment (string) | An Eppo experiment key | "checkout_type-allocation-1234" |
subject (string) | An identifier of the subject or user assigned to the experiment variation | "60a67ae2-c9d2-4f8a-9be0-3bb4fe0c96ff" |
variation (string) | The experiment variation the subject was assigned to | "fast_checkout" |
timestamp (string) | The time when the subject was assigned to the variation | 2021-06-22T17:35:12.000Z |
subjectAttributes (map) | A free-form map of metadata about the subject. These attributes are only logged if passed to the SDK assignment function | { "country": "US" } |
featureFlag (string) | An Eppo feature flag key | "checkout_type" |
allocation (string) | An Eppo allocation key | "allocation-1234" |