Creating an Experiment Analysis
Experiment analyses in Eppo allow you to measure how new treatments impact subject-level (e.g., user) metrics. This page walks through creating a new experiment analysis.
Creating an experiment analysis
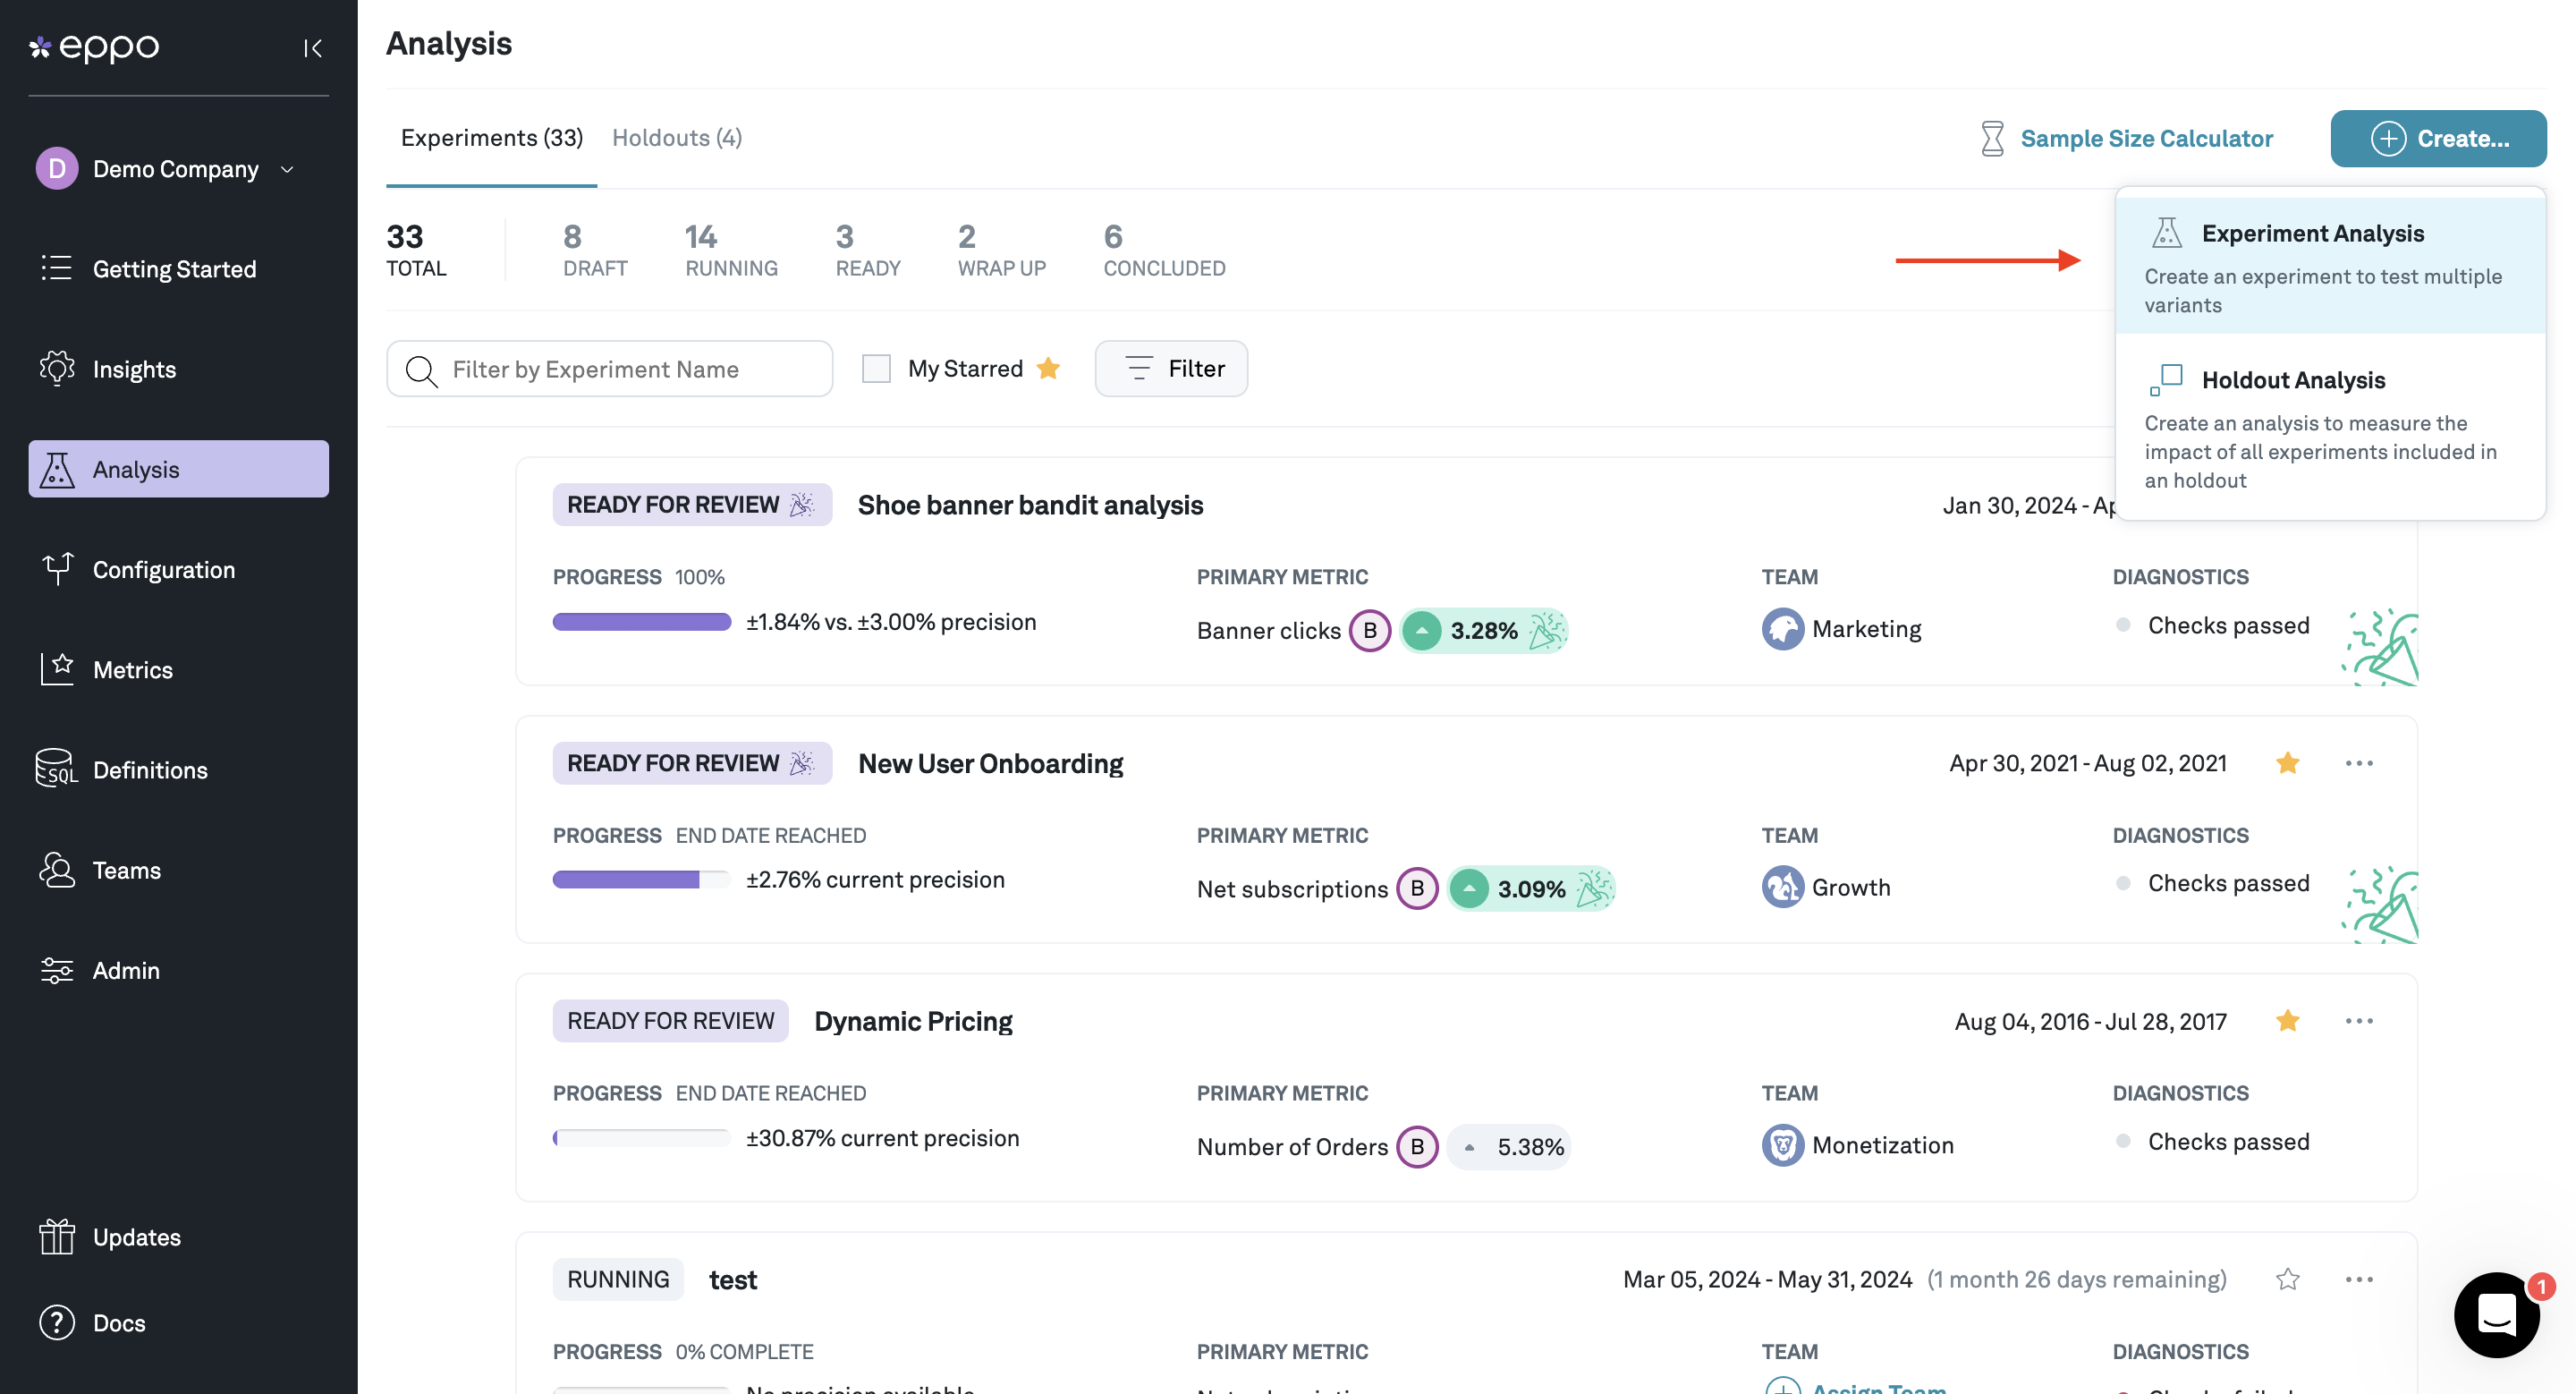
To start, navigate to the Analysis page, click Create, and select Experiment Analysis:
Specifying experiment metadata
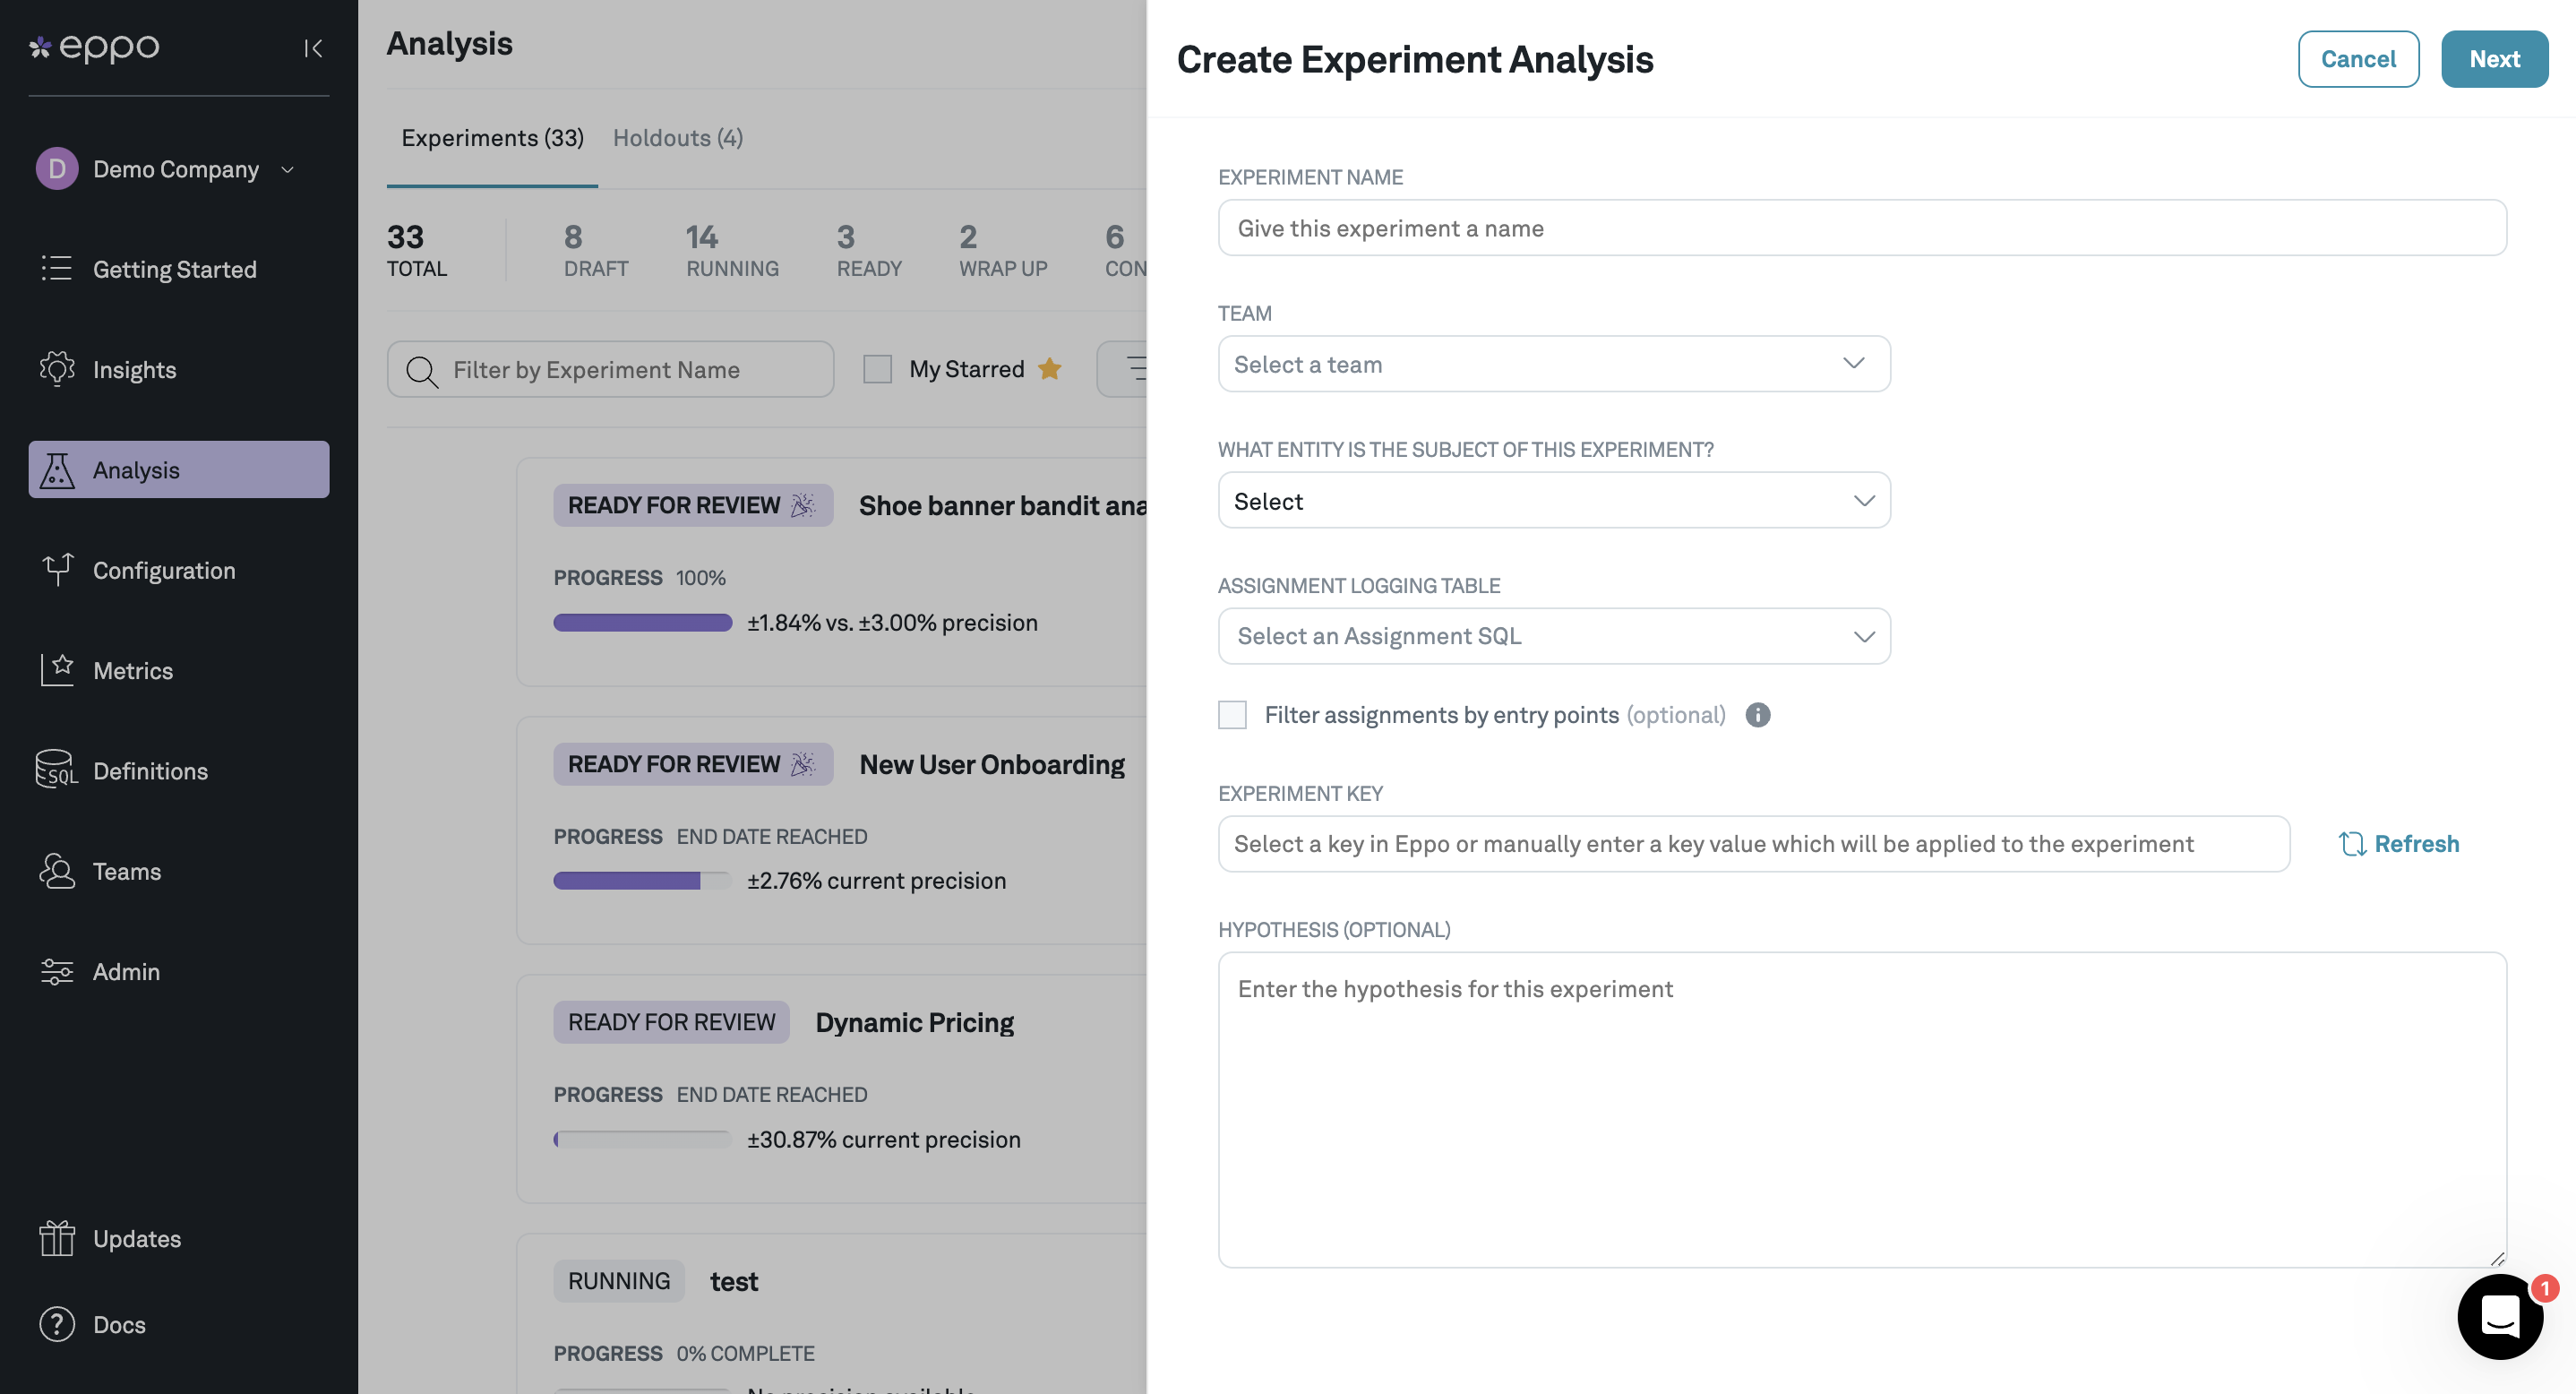
On the side panel, you'll be prompted to enter some information about the experiment:
- A name for the experiment and the Team to which the experiment belongs
- The Entity on which the experiment was randomized (user, device, workspace, etc.)
- Which Assignment Source has assignment logs for the experiment
- An optional entry point on which to filter experiment assignments. This will limit the experiment analysis to subjects (e.g., users) that hit the specified entry point. You can read more about filtering experiment assignments here.
- The experiment key of interest. The drop-down will show flags created in Eppo as well as other experiment keys in the selected Assignment Source. If your experiment key does not show up in the drop-down you can also enter it manually.
- For experiments randomized with Eppo's feature flags, you'll also specify the Allocation you want to analyze (one flag can be used to run multiple experiments)
- A hypothesis for the experiment. You can also add this later when creating an experiment report
Configuring the experiment analysis
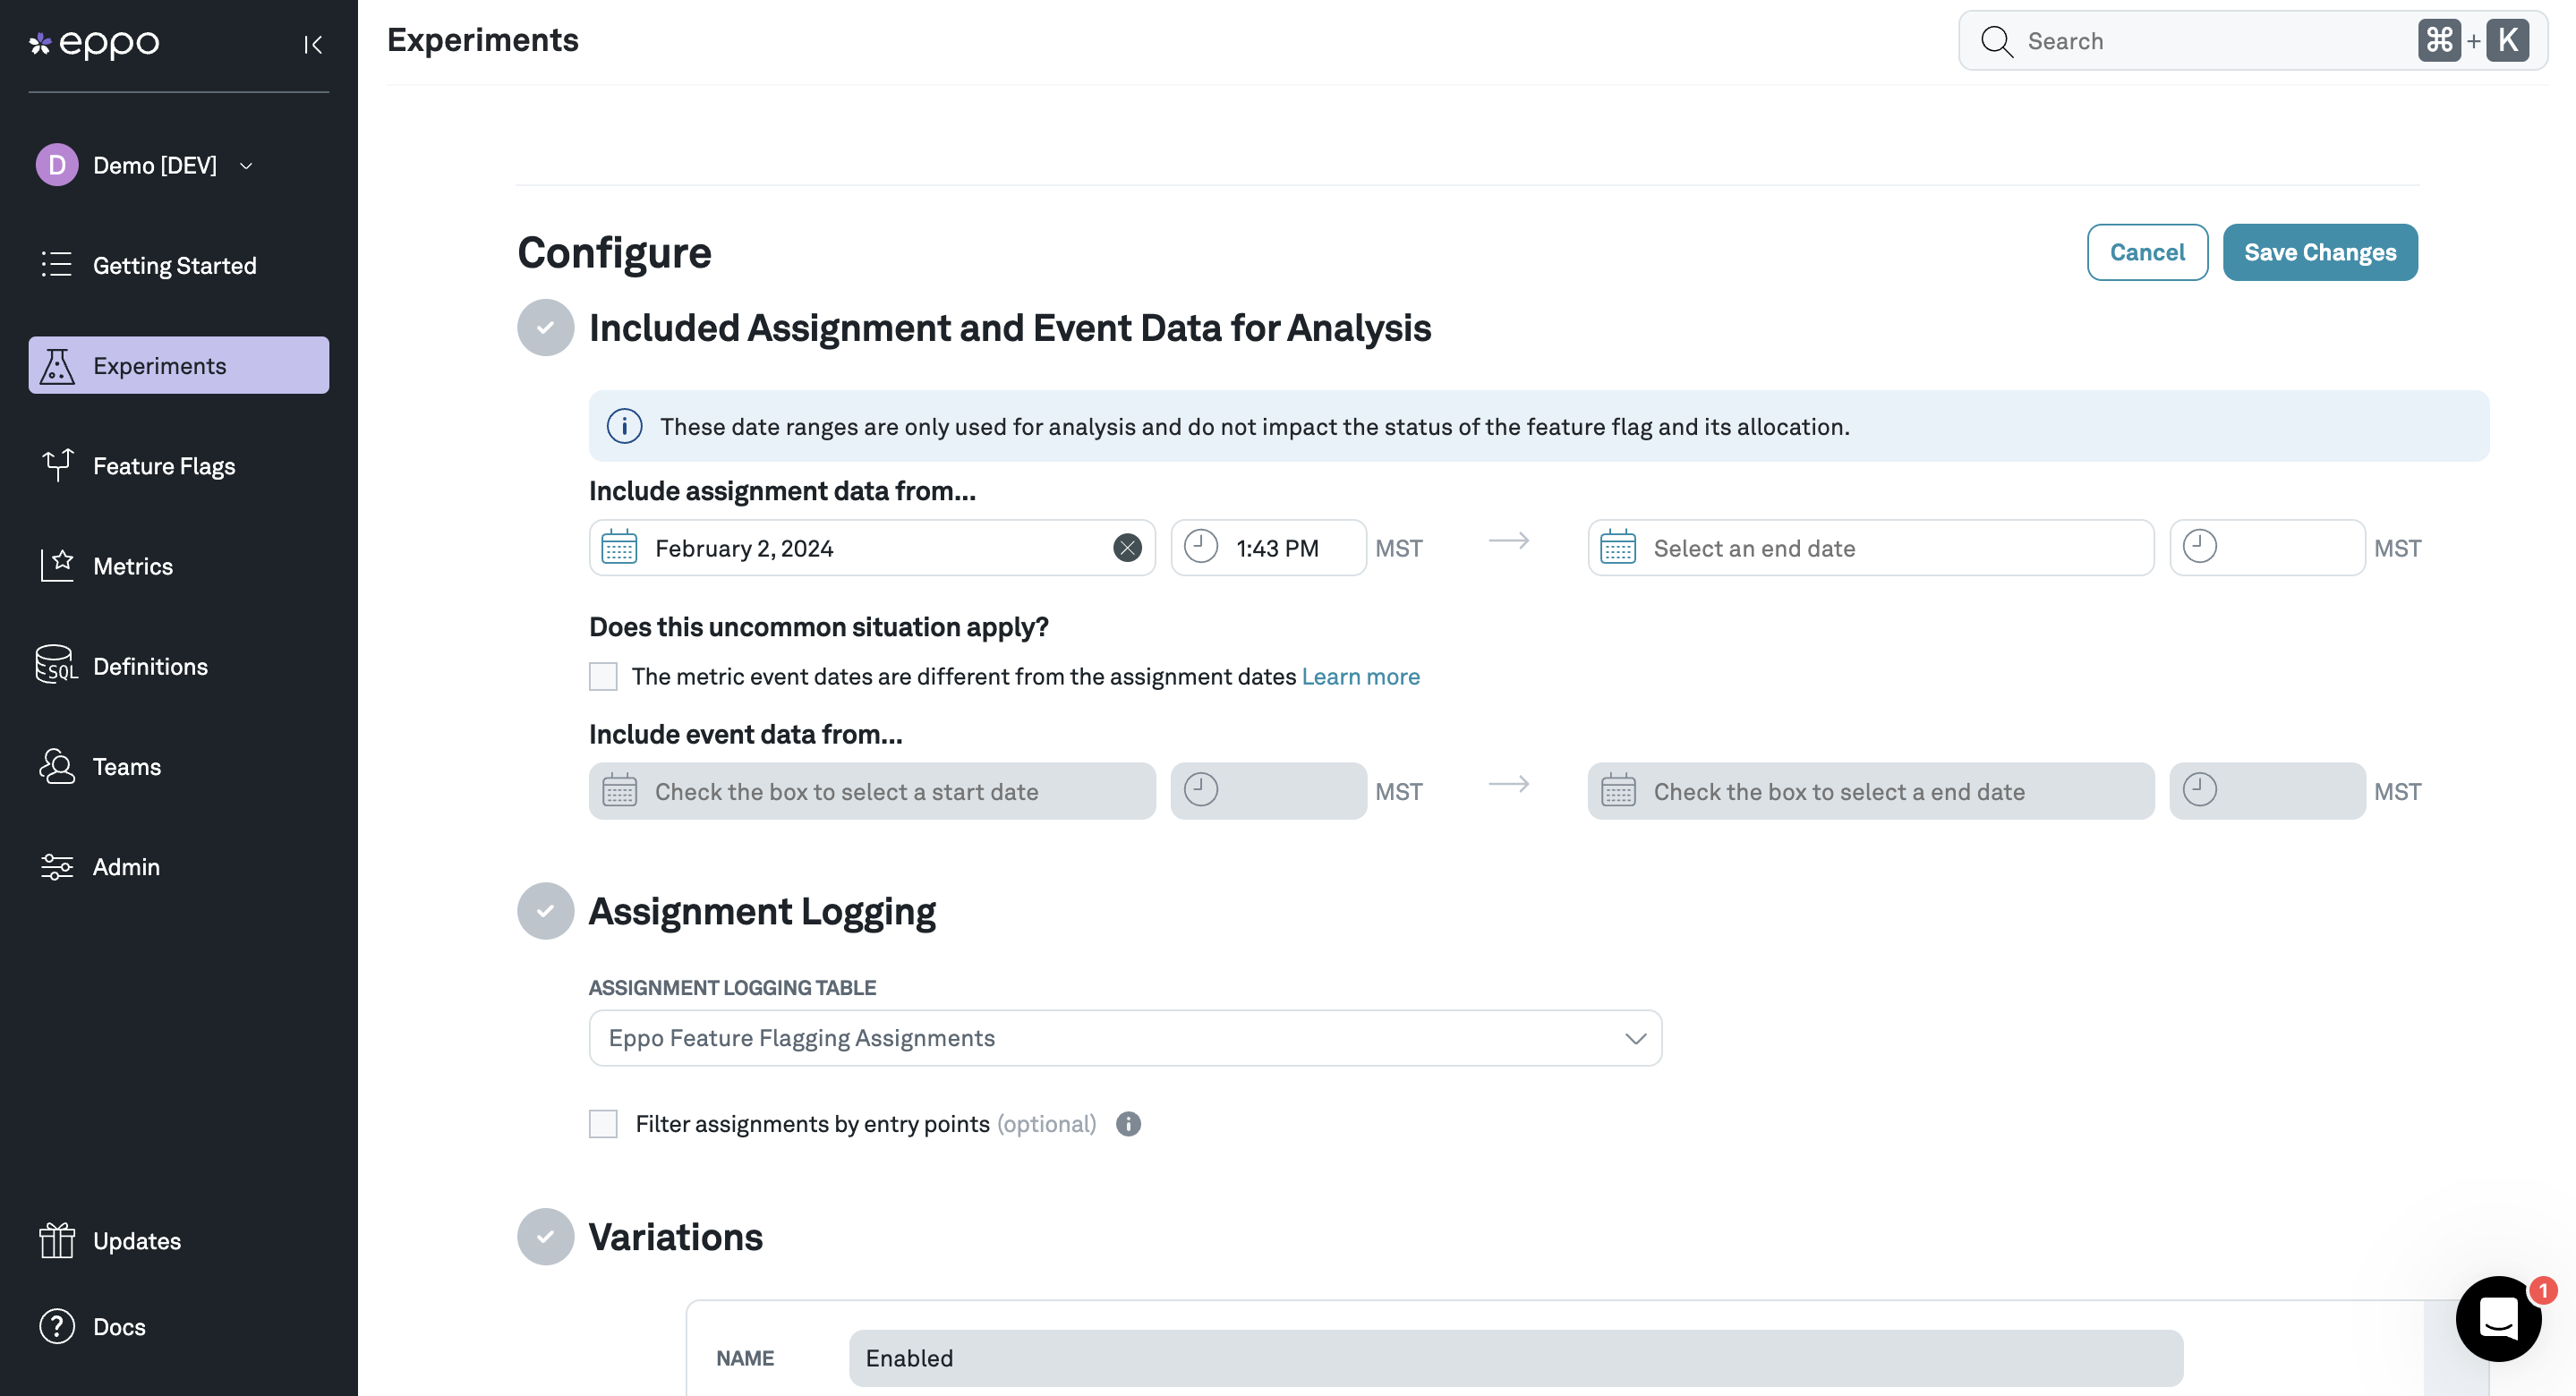
Once you have created an experiment analysis, you'll land on the configuration page. This setup flow will walk you through several sections:
- Assignment & Analysis Date Range Use this section to tell Eppo what date range of assignments to use. You can also set a different date range for the metric events you want to include the experiment. See below for more information.
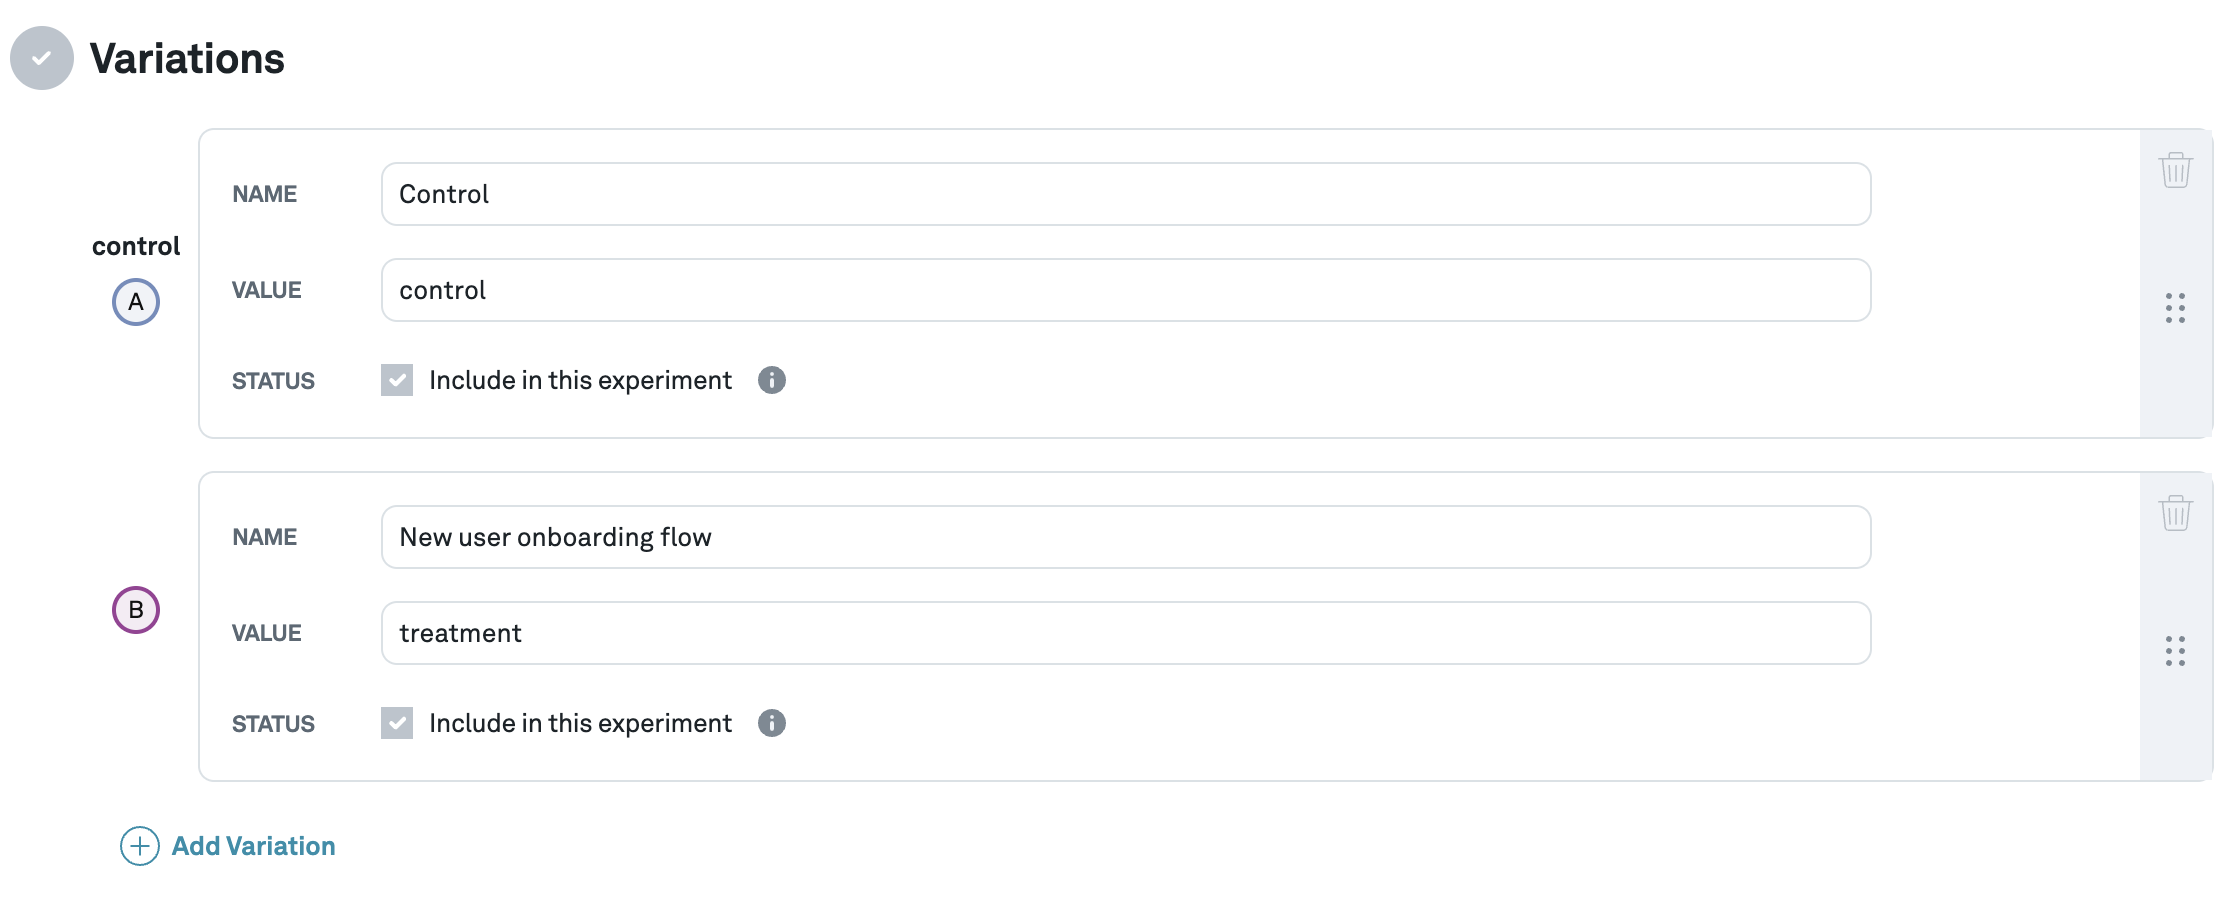
- Variations (externally randomized experiments only) Use this section to tell Eppo the different variants that were a part of the experiment and the expected traffic allocation across groups. Eppo uses these allocation ratios to perform sample ratio mismatch checks. Eppo will scan assignment logs in a scheduled batch job, but if you don't yet see your variant values you can enter them manually. The value reflects what is observed in the assignment SQL table, whereas the name specifies what will be displayed in the Eppo UI.
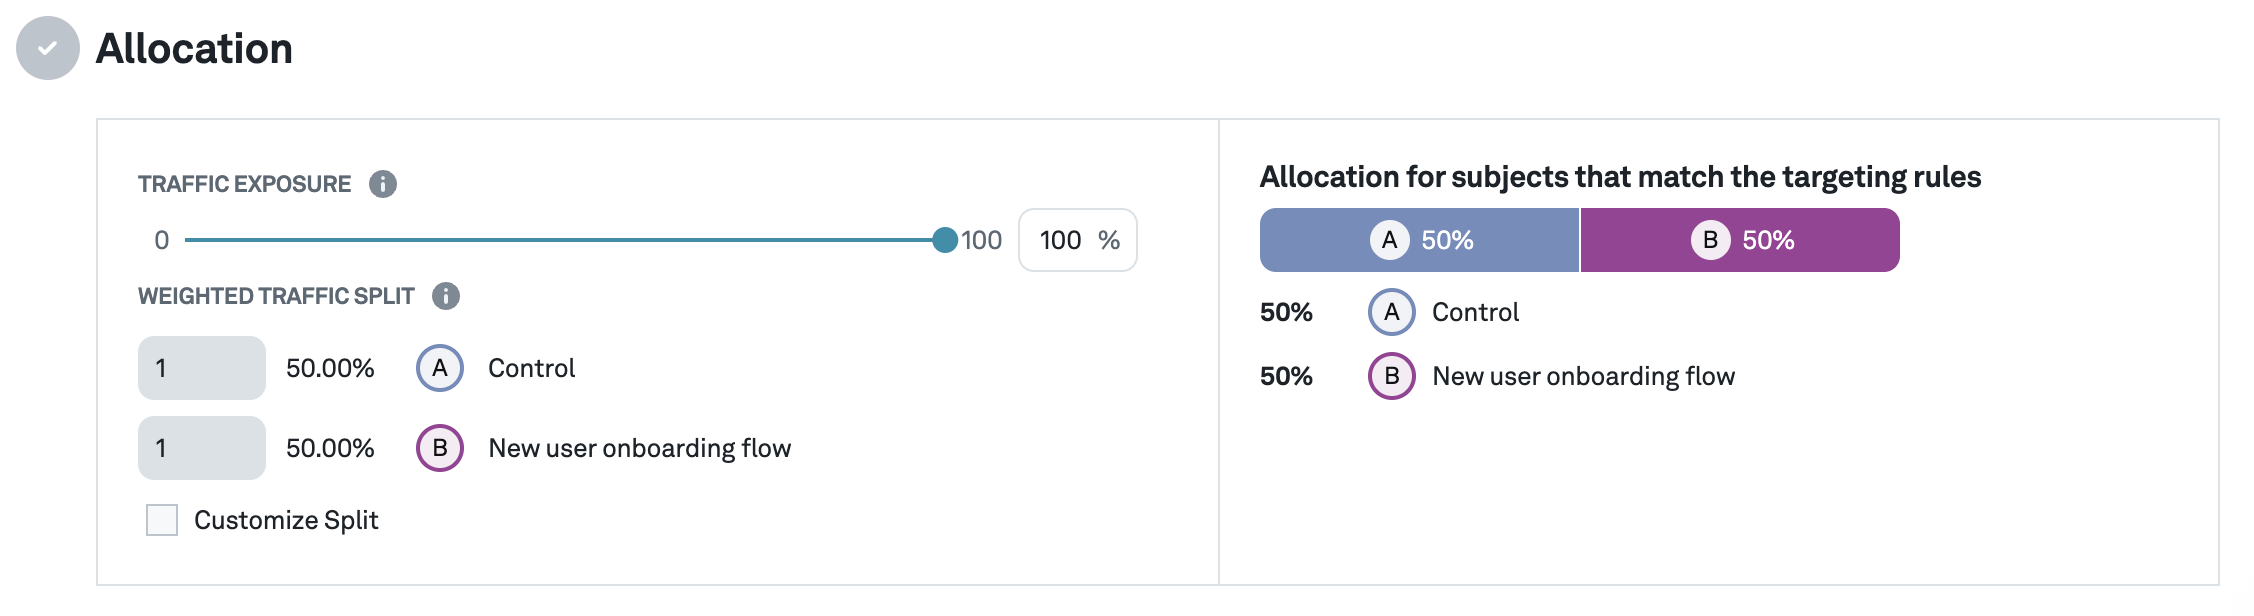
- Allocation (externally randomized experiments only) If your experiment has a custom traffic split or was only rolled out to a subset of eligible users (with the remainder not tracked in your assignment table), you can specify that in this section. The traffic exposure powers the Global Lift calculator. In most use cases it is appropriate to keep this exposure at 100% and the traffic split even.
- Experiment Analysis Plan (optional) Default analysis options are set to make it easy to start using Eppo without diving deep into the details of our statistics engine. For the majority of our customers, the default settings are appropriate. If you want to dive deeper into what these settings do, please see the Analysis Plan section of our docs.
Once you have configured your experiment, hit Save Changes and continue on to add metrics.
Adding metrics
Once the scope of the experiment is defined, you can pick metrics to lead your decision.
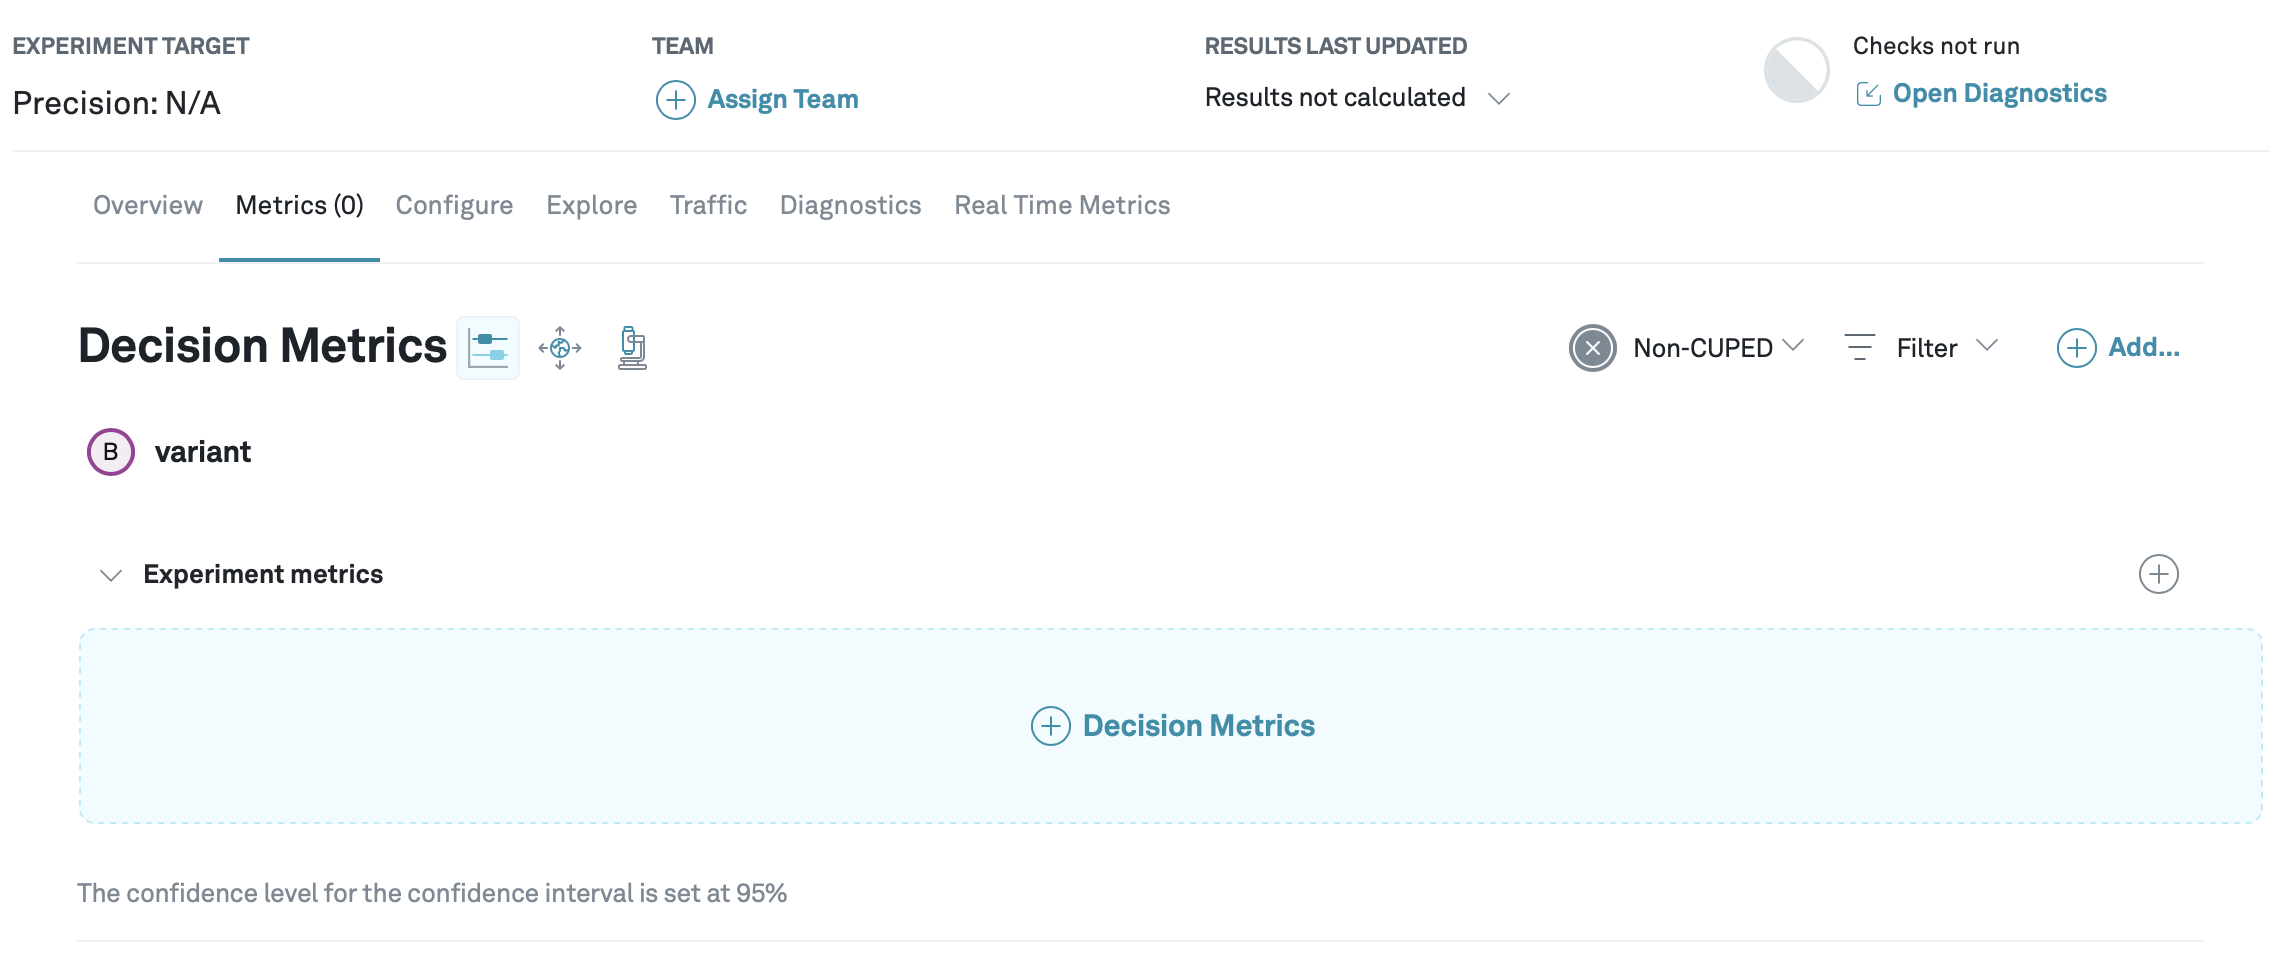
All metrics are defined by their Entity (User, Anonymous visitor, etc.), so only metrics based on the same entity as the experiment will be available here.
Note that if you can’t find the metric that you are looking for, anyone with the Data Owner role can create a new one from this screen.
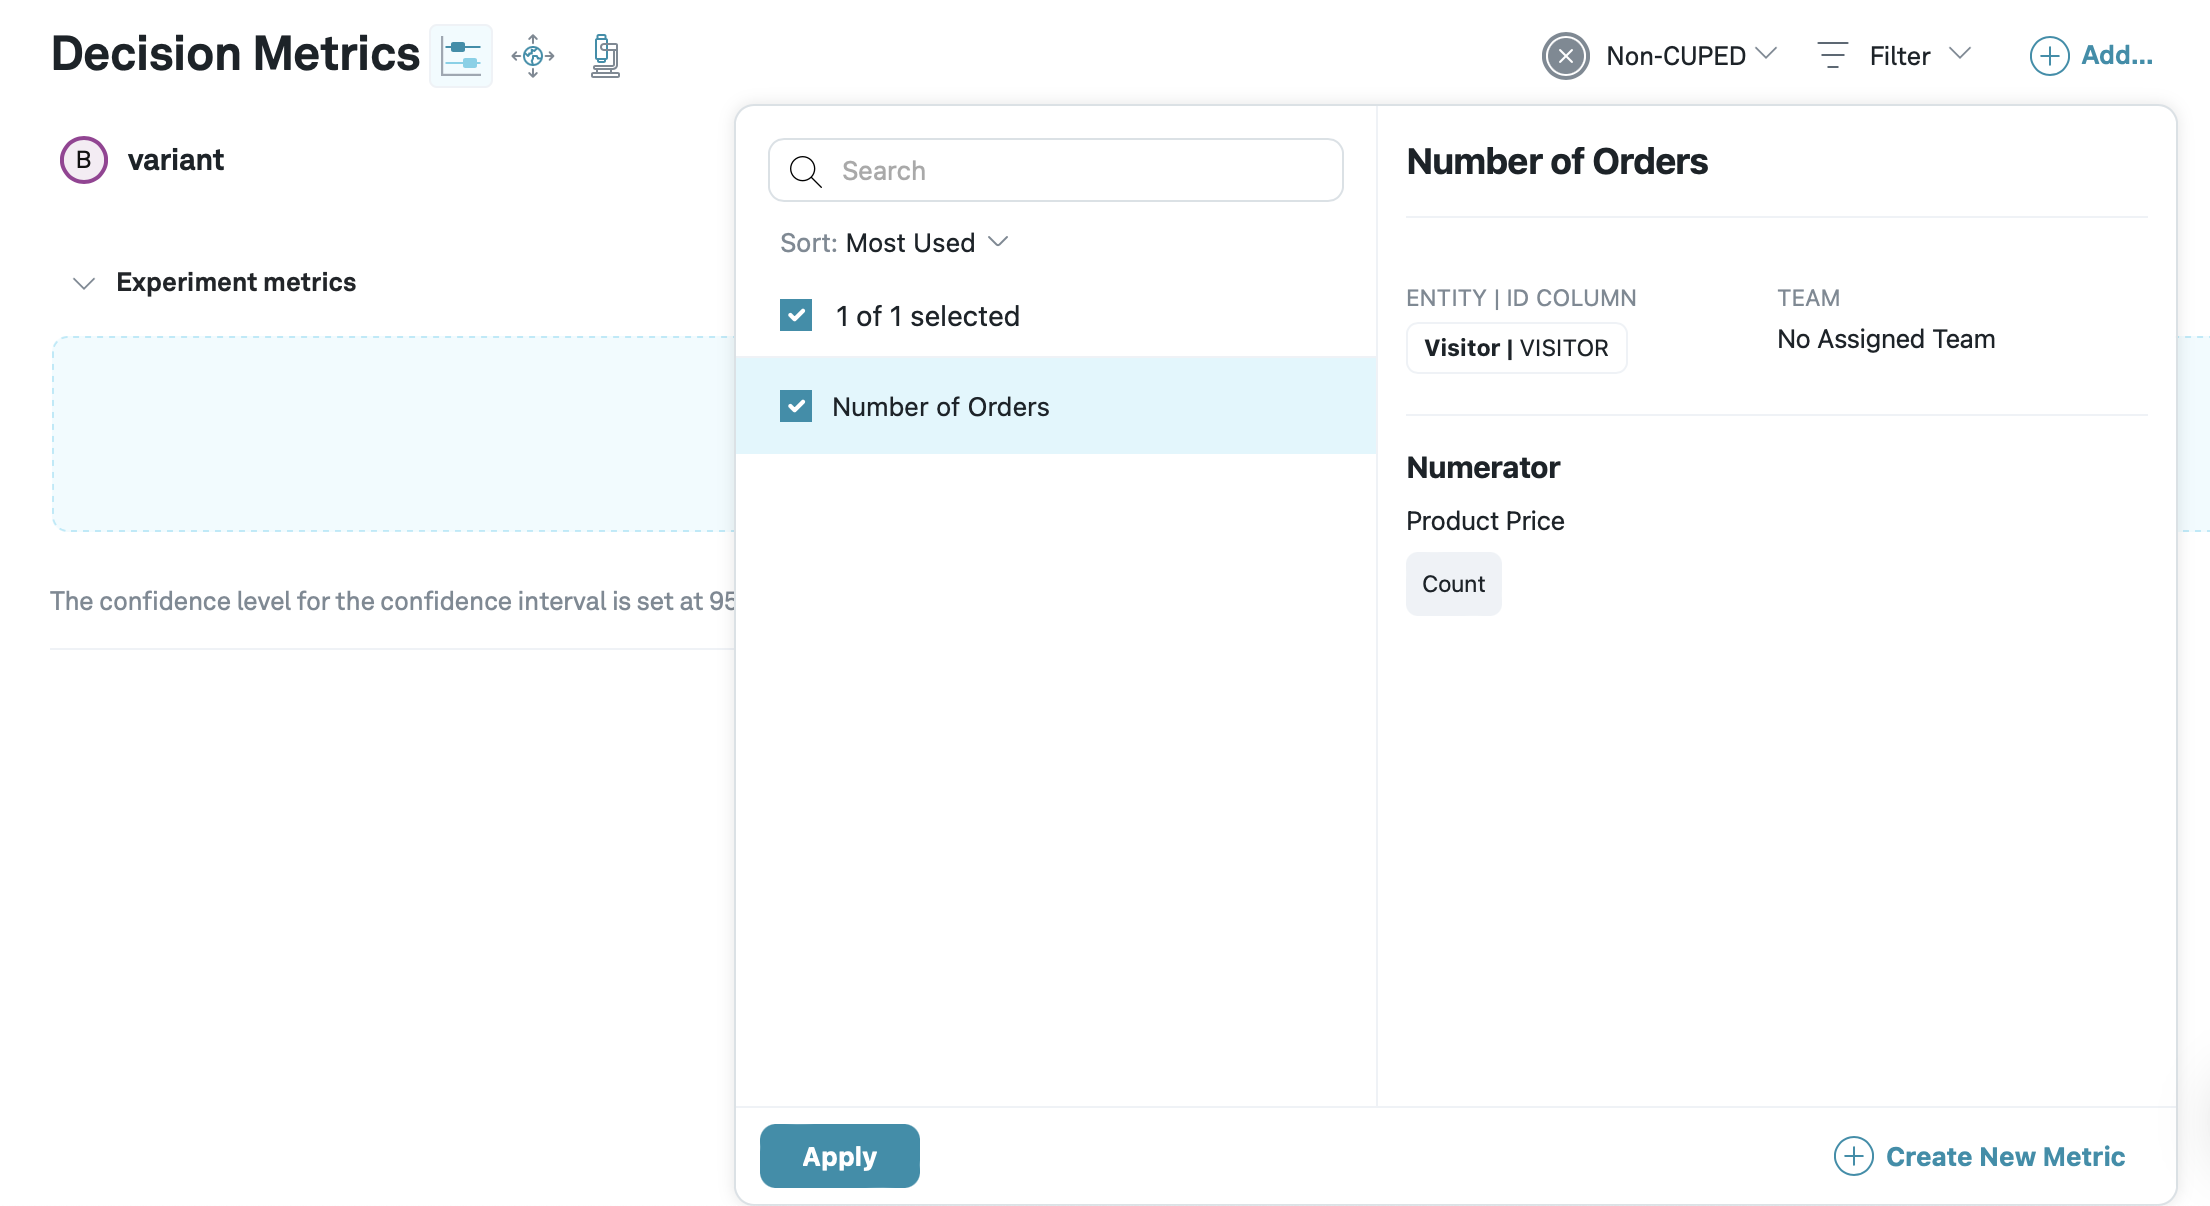
You can also add collections of metrics to add a curated set of metrics in one go.
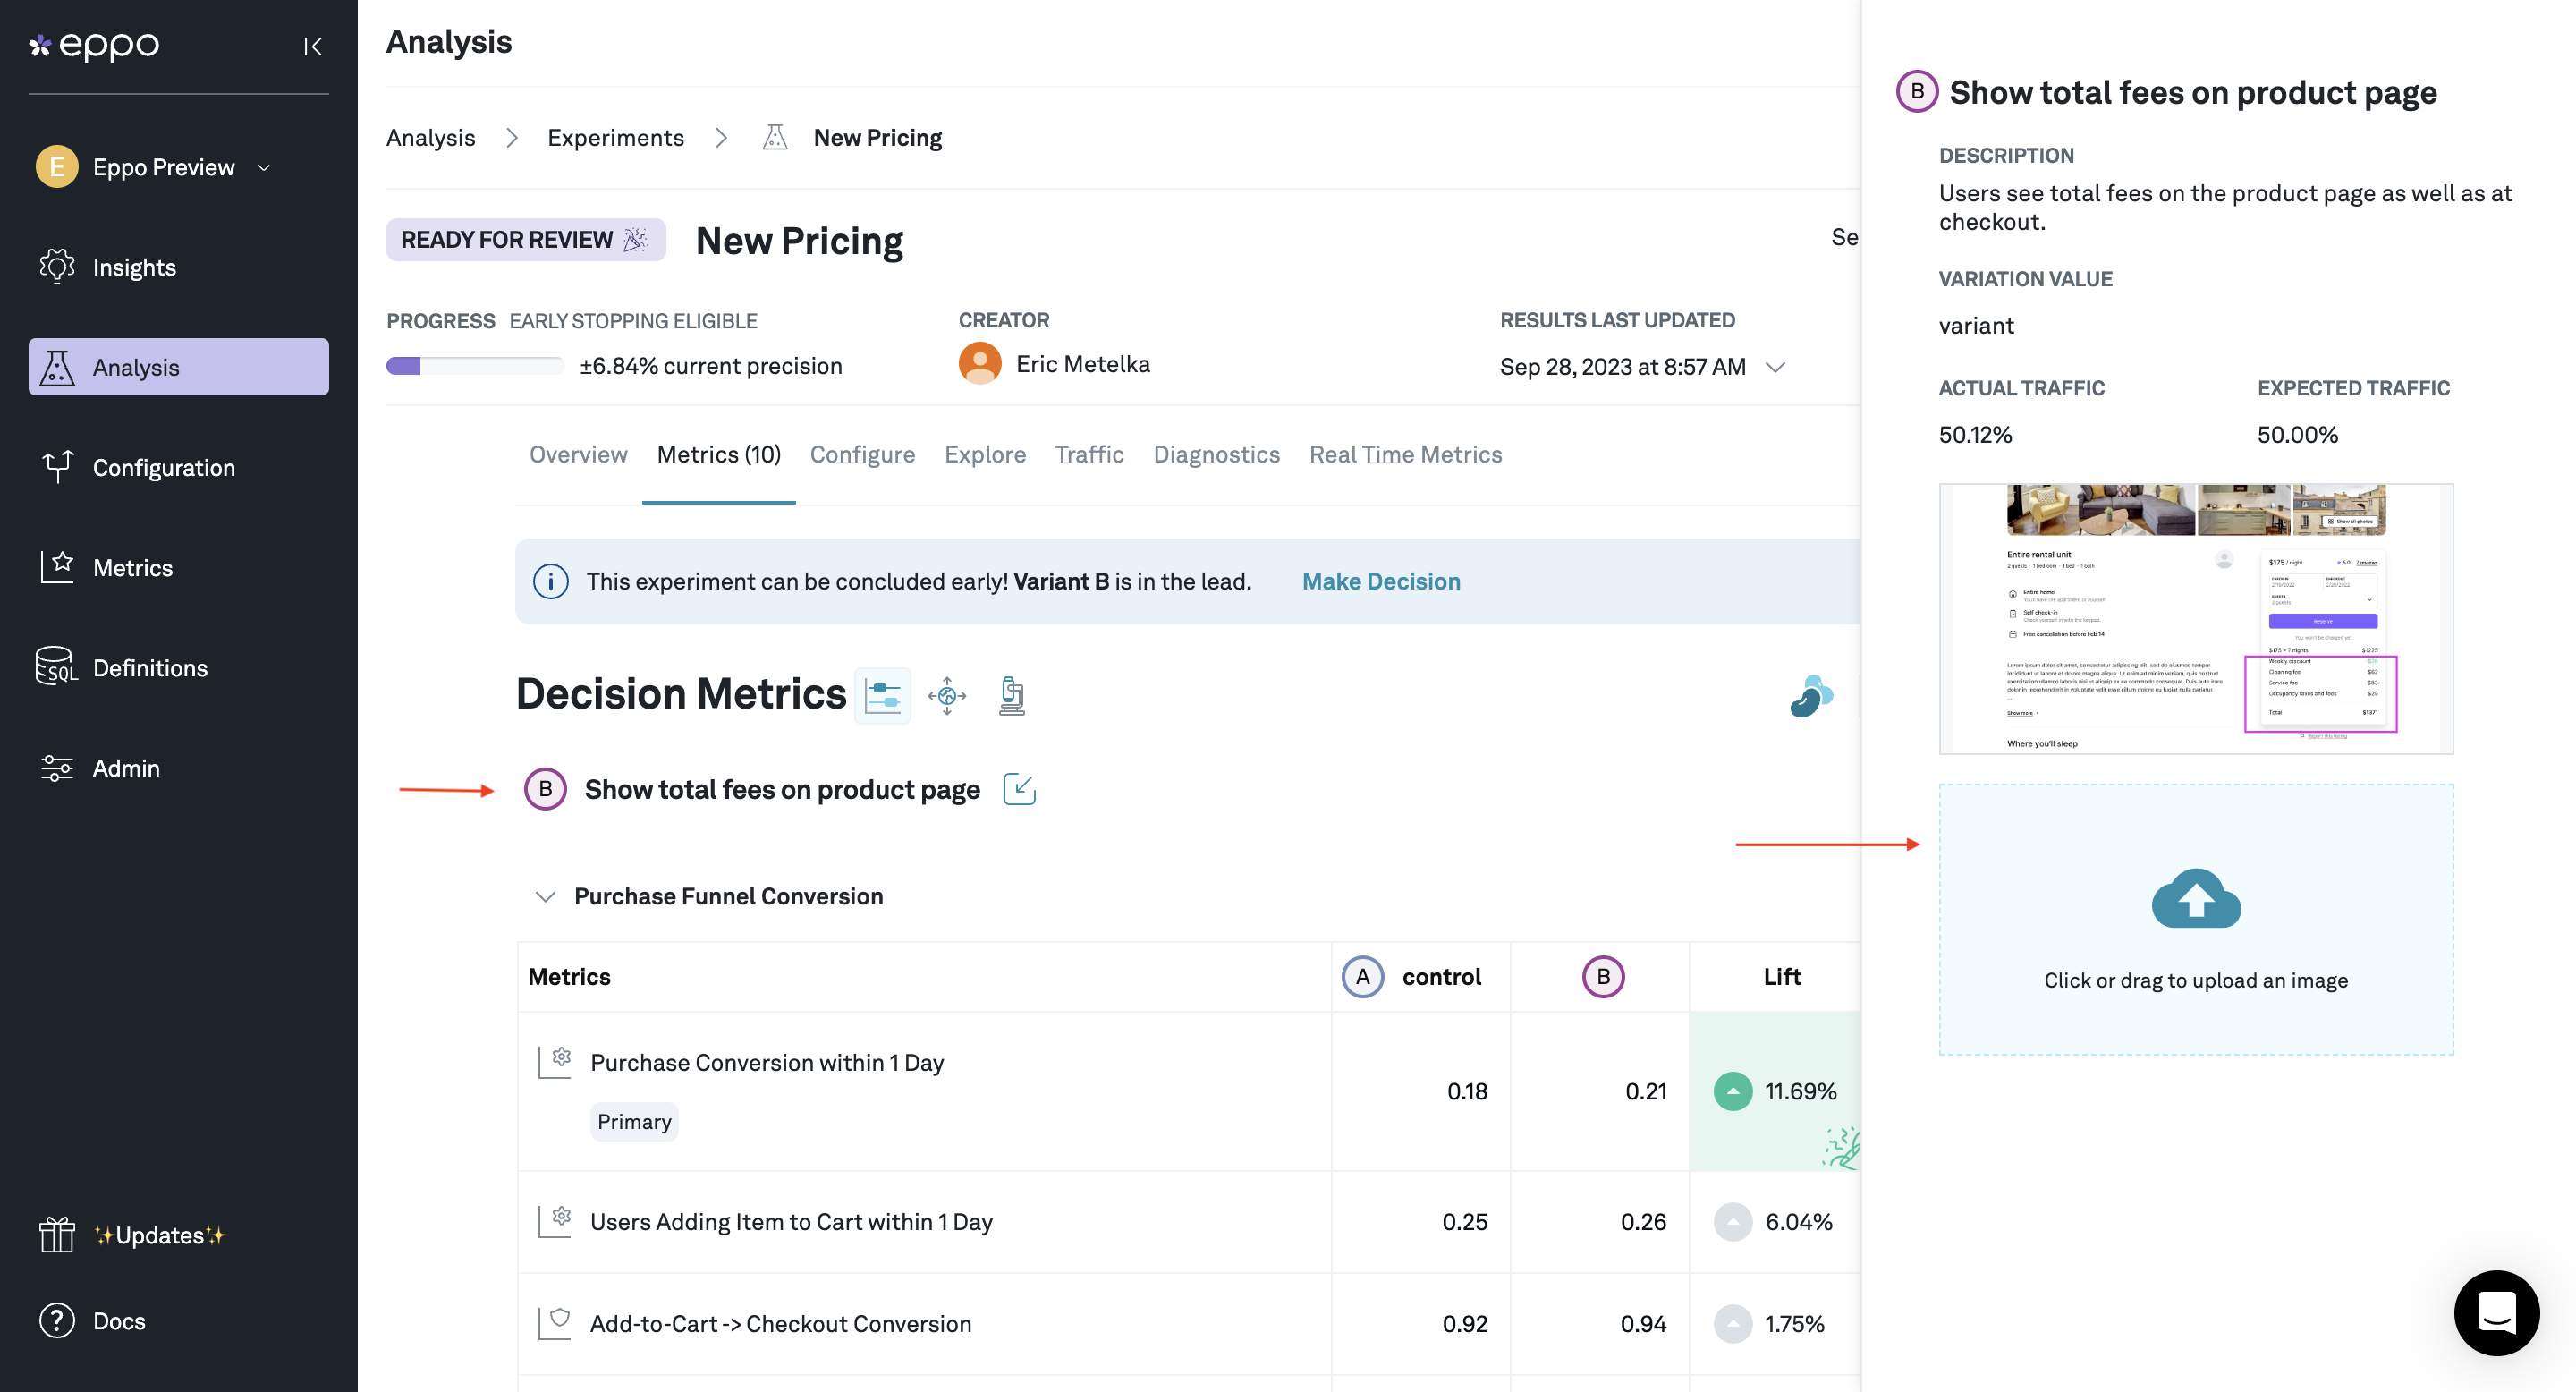
Adding screenshots
To add screenshots that highlight the changes made in the experiment, go to the metrics page and click the name of the variant. In the sidebar that opens, add one or more screenshots that show the changes made in the variation.
Experiments with custom event dates
When configuring an experiment you can opt to analyze events during or after randomization.
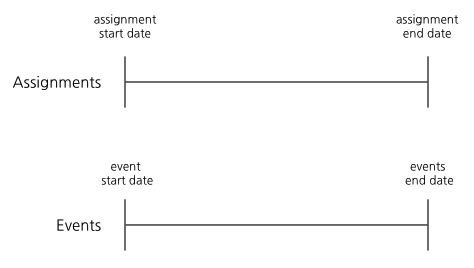
By default in Eppo, users are assigned (randomized) into an experiment and all events are tracked on the same timeline as assignment:
However, in certain cases, you may want events to be tracked well after randomization ends:
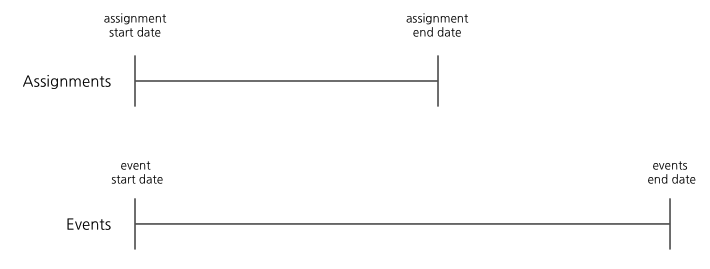
While uncommon, event dates should be extended past the assignment period if you wish to detect an effect that will appear long after treatment exposure.
Let's test the following: if we run a marketing campaign on our landing page for one day, do our customers generate higher revenue for us over the next month?
Using distinct assignment and event periods, we should:
- Assign users for one day
- Track events for one month
If the assignment period matched the event period, then we'd be continually exposing the marketing campaign to users, which is not what we intended.
A service is interested in testing whether a new onboarding flow will increase 90-day retention. One possible design could be the following:
- Assign users for two weeks (14 days)
- Track events for 104 days (14 days + 90 days)
This will allow Eppo to calculate out the retention metric for the entire population. If the assignment period matched the event period (as is the default in Eppo), this could expose more users than necessary to a new onboarding flow without first understanding the long-term impact.